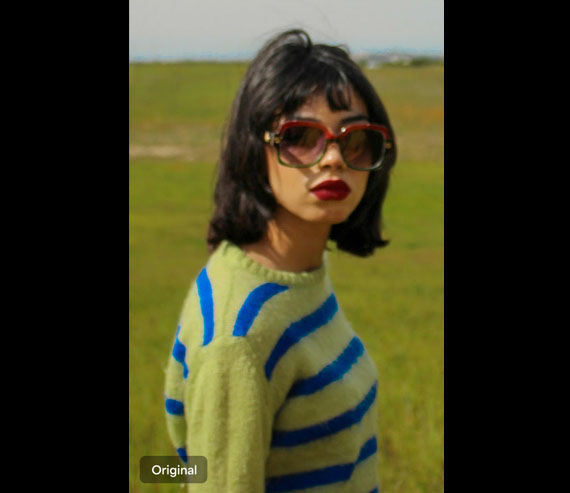
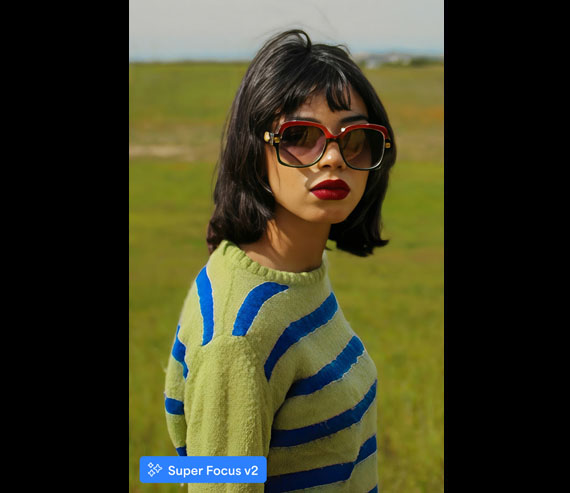
Even the best photographers occasionally miss focus. Whether it’s a quick candid, a long exposure with motion blur, or a slightly soft portrait, blurry photos can be frustrating—especially when they capture important or once-in-a-lifetime moments. That’s where Super Focus v2 in Topaz Photo AI comes in. It is currently $30 off if you try it on any of your photos.
This advanced AI model doesn’t just sharpen a soft image—it recovers real details, deblurs complex scenes, and intelligently refines focus across your image. In this tutorial, we’ll walk you through how to use Super Focus and its companion tools to turn throwaway shots into keepers.
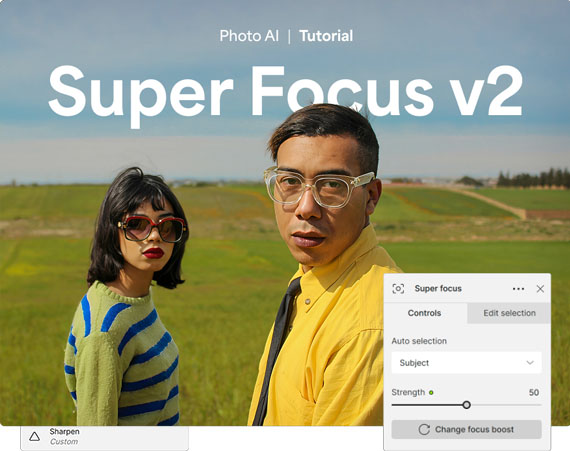
🔍 What Is Super Focus v2?
Super Focus v2 is a major leap forward in AI-powered photo correction. Compared to the previous version, it’s up to 500% faster and significantly more accurate at restoring sharpness. It works by analyzing the image structure, estimating how the blur occurred, and then reversing that damage while pulling out natural-looking details.
For especially blurry photos, there’s an additional tool called Focus Boost, which first downscales the image to reduce severe blur and then upscales it again—preserving the look of detail while minimizing artifacts.
🛠 When to Use It
Super Focus v2 is best suited for:
- Portraits with soft eyes or camera shake
- Landscapes taken without a tripod
- Low-light shots where focus missed slightly
- Action shots with motion blur
- Any image that looks “almost good” but not quite sharp
🖼 Step-by-Step: Refocus Your Image
1. Launch Topaz Photo AI
Open Topaz Photo AI on your computer. Make sure you’re using the latest version to access Super Focus v2 and Focus Boost.
2. Import Your Blurry or Soft Image
Drag and drop your image into the app. You’ll see a preview immediately. Select the area you want to improve, especially if the blur affects only certain parts.
3. Enable Super Focus v2
In the enhancement panel, turn on Super Focus. The tool will begin analyzing your image and apply focus recovery. You’ll notice an instant improvement in sharpness, especially around edges and fine textures.
4. Use Focus Boost for Strong Blur
If your image is extremely blurry or large, toggle Focus Boost. This is a two-step enhancement process that can resolve otherwise unrecoverable details. Just note: on smaller inputs, Focus Boost can sometimes be too strong—so use it selectively.
5. Adjust Enhancement Strength
If the results feel overly sharpened or slightly artificial, don’t worry. You can dial down the Strength slider to find a natural balance. The flexibility here is ideal for portraits where you want clarity without harshness.
6. Selective Editing with the Brush Tool
Use the edit selection brush to apply Super Focus only where needed. This is helpful if you want to avoid sharpening a bokeh background or want to remove minor artifacts from smooth areas like skies or skin.
7. Finish with Face Recovery or Text Preservation (Optional)
If your image contains faces, run Face Recovery after using Super Focus to refine facial features naturally. For documents or images with writing, use Preserve Text to ensure labels and fonts stay legible and clean.
💡 Pro Tips
- Super Focus works best when blur is from missed focus or slight motion—not from extreme motion streaks or heavy noise.
- You can combine Super Focus with Remove Noise or Enhance Resolution in Photo AI for even better results.
- Always zoom to 100% or more to inspect how the enhancements affect skin, hair, and fine textures.
Try it Yourself:
The latest release of Photo AI (version 4) with Super Focus introduces several powerful tools and improvements designed to enhance image editing capabilities. They are also offering it at $30 off today to celebrate the release if you want to check it out.
Deal ending soon: Photo AI Version 4 Launch Sale
Like This Article?
Don't Miss The Next One!
Join over 100,000 photographers of all experience levels who receive our free photography tips and articles to stay current:


Leave a Reply