We’ve compiled thousands of photography tips for photographers of all sorts, from beginners to pros. Follow us for new tips every day, all from the world’s leading photography experts.
This tutorial is to help you learn how to replace the sky of one photo with the more interesting sky of another photo. I have had many photos where the landscape is very interesting but the sky is somewhat boring. With this technique you can fix that problem by simply changing the sky.
Photoshop offers a solution to this problem, and while it can’t make things look exactly the way they should have been, it can make the people (or pets) in your pictures look less “possessed”.
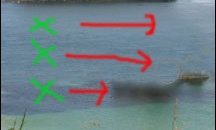
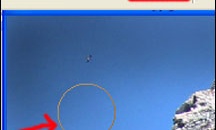
This tutorial is to help you learn how to remove unwanted items from a photo using the Clone Stamp Tool. For this photo (in order to simplify it and draw more attention to the main island) I removed the chain of little islands.
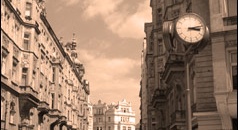
If you are one of those who wonder how people come up with the cool looking sepia tone prints that you admire so much. If you are doubling up with jealousy over a sepia tone, here, we will give you tips on how you could achieve this sepia tone, too.
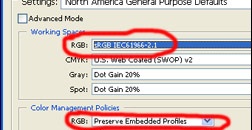
All digital systems use “color profiles” as a type of standard to generate and display color. Digital image files are usually embedded with a standardized profile to help keep the color consistent during display and printing. This is where color management comes in to play.
In the hands of a skilled user Photoshop can produce awe inspiring work; in the hands of a novice it can produce images of extremely poor quality. Unfortunately, as the popularity of the program grows and people become more and more exposed to these poor images, this lack of quality is becoming accepted as the norm.
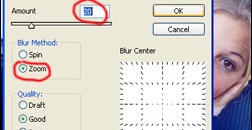
This tutorial is to help you learn how to blur the background of a photo. The blur we are going to use is a radial blur applied only to the background.
This tutorial is to help you learn how to darken the edges of a photo like a professional. I’m sure many of you have seen the photos for sale that have darkened corners to accent the subject of the image. This technique can make most amateur photos look very professional.
To produce the larger print sizes now available on the affordable medium format digital photo printers, requires photo enlargement techniques. Most people simply open the original photo file in their version of Photoshop, and resize the file by entering the width and height dimensions, resolution dpi they want, leave the resample option checked and click the OK thinking all is just great.
One of the reasons this is so important is because so many photographers get bogged down and stuck in time wasting systems, systems that are over complicated and too “perfect’. In the real world, where real clients pay the bills, and making them happy on a consistent daily basis is critical, getting the job done as fast as possible is essential.
We are always looking for more interesting and insightful photography tips and techniques to share with our readers. We would love to publish an article by you if you are interested in writing for us. See what we are looking for and get in touch.