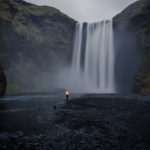
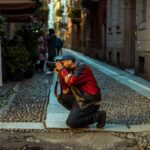
Manual mode has a reputation for being complicated, intimidating, and slow. In reality, it’s only confusing when photographers try to learn everything at once. This short, timed exercise strips manual mode down to its essentials and shows how quickly you can take control of your camera using nothing more than a simple indoor setup.
You don’t need special lighting, fancy gear, or a perfect subject. The goal isn’t to create a masterpiece — it’s to understand how exposure decisions actually work.
Relevant note: only a little while left for the Photography Exercises 🔥 February Flash Sale
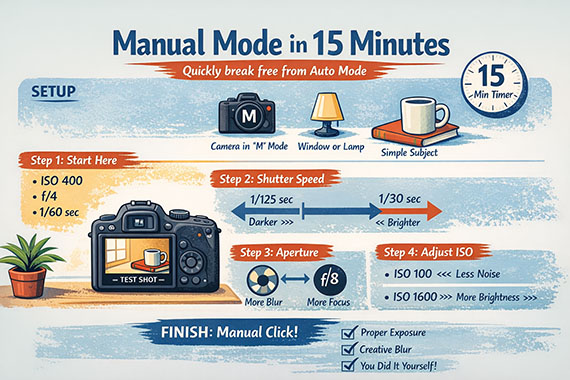
What You’ll Need
- Any camera with Manual (M) mode
- A window or lamp for steady indoor light
- One simple subject (a mug, plant, book, or small object)
- 15 uninterrupted minutes
Minute 0–3: Lock In Your Starting Point
Set your camera to Manual (M).
Choose:
- ISO 400
- Aperture f/4
- Shutter speed 1/60 sec
Take a test shot. Don’t worry if it looks imperfect — this is your baseline.
Look at the image and the exposure meter. Notice whether the photo looks too bright, too dark, or close to correct. This moment is important: manual mode starts making sense when you see what the camera is telling you.
Minute 3–7: Control Brightness with Shutter Speed
Without touching ISO or aperture, adjust only the shutter speed.
- Take one shot faster (1/125 sec)
- Take one shot slower (1/30 sec)
Watch how brightness changes. Faster shutter = darker image. Slower shutter = brighter image. This alone removes much of the mystery around exposure.
Ignore motion blur for now — this is about cause and effect.
Minute 7–11: Control Depth with Aperture
Reset shutter speed to your best exposure so far.
Now change only the aperture:
- One shot at f/2.8 (if available)
- One shot at f/8
Pay attention to two things:
- Brightness changes
- Background blur and sharpness
This is where manual mode starts to feel creative instead of technical.
Minute 11–14: Fine-Tune with ISO
Keep your preferred aperture and shutter speed. Now adjust ISO until the exposure feels balanced.
Notice how ISO affects brightness without changing motion or depth of field. This is why ISO is often the final adjustment — it fine-tunes exposure without altering the look of the scene.
Minute 14–15: The “Manual Click”
Take one final shot where:
- Exposure looks right
- Background blur is intentional
- You know why each setting is what it is
That’s the moment manual mode clicks.
Conclusion
Manual mode doesn’t require hours of study or perfect conditions — it just needs a few intentional minutes behind the camera. By slowing down, changing one setting at a time, and paying attention to the result, you’ve already done the hardest part: replacing guesswork with understanding.
The more often you repeat short exercises like this, the faster manual mode becomes second nature. Over time, you’ll stop thinking in terms of “Which setting do I touch?” and start thinking, “What do I want this photo to look like?”
That shift is what separates hoping for a good shot from creating one on purpose.
If you want more exercises like this—clearly structured, easy to follow, and designed to build real shooting instincts—the February Flash Sale on the Photography Exercises is wrapping up soon. It’s a practical way to keep improving, even when winter limits your time and motivation to shoot.
A practical way to build confidence for challenging shooting situations that often trip photographers up. Each exercise focuses on real-world scenarios—difficult light, motion, exposure decisions, and creative problem-solving—so you learn how to take control instead of relying on auto settings.
Deal ending soon: Photography Exercises 🔥 February Flash Sale
Like This Article?
Don't Miss The Next One!
Join over 100,000 photographers of all experience levels who receive our free photography tips and articles to stay current:


Leave a Reply