Landscape photography captures the breathtaking beauty of nature, but even the most stunning scenes can benefit from a bit of post-processing magic. Today, we dive into a common workflow that many landscape photographers use to turn their raw captures into awe-inspiring artworks.
Related reminder: only 1 day left for Lightroom Editing Mastery at 80% Off
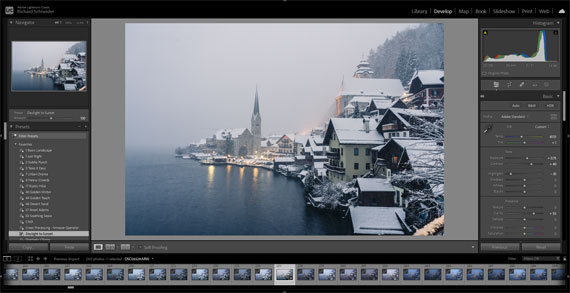
Step 1: Import and Organize
Start by importing your images into your preferred editing software. Adobe Lightroom is a popular choice for its powerful cataloging features. Organize your shots by location, date, or theme for easy access.
Step 2: Basic Adjustments
- Exposure and Contrast: Begin by adjusting the exposure. Aim for a balanced histogram, avoiding clipping in highlights and shadows. Then, tweak the contrast to add depth.
- White Balance: Adjust the white balance to ensure the colors are true to the scene, or to create a specific mood.
Step 3: Enhance Colors
- Saturation/Vibrance: Increase saturation for more intense colors, or vibrance for a subtler effect.
- HSL Panel: Use the Hue, Saturation, and Luminance (HSL) panel to fine-tune specific colors. Enhance the greens of foliage or the blues of the sky, for instance.
Step 4: Detail Enhancement
- Clarity and Texture: Add clarity to bring out details in landscapes, and use texture to enhance finer details without adding noise.
- Sharpening: Apply sharpening judiciously. Oversharpening can introduce unwanted artifacts.
Step 5: Local Adjustments
- Graduated and Radial Filters: Use these for localized edits, like darkening the sky or highlighting a focal point.
- Adjustment Brush: Perfect for detailed edits, like enhancing a waterfall or a tree.
Step 6: Creative Adjustments
- Split Toning: Add different colors to the highlights and shadows for a unique look.
- Effects: Experiment with vignetting or grain to add character.
Step 7: Final Touches
- Crop and Straighten: Ensure your composition is perfect. Sometimes, a slight crop can make a big difference.
- Spot Removal: Clean up any unwanted spots or distractions.
Step 8: Export
Choose your export settings based on where your image will be displayed – web, print, etc. Always keep an original, unedited copy for archival purposes.
Remember, every photo is unique and might not need every step. Experiment and find what works best for your style!
For Further Training:
In the digital age, capturing a photo is only half the battle; the true magic happens in post-processing. This is where Lightroom Editing Mastery, an online course meticulously designed for both budding and seasoned photographers, steps in to transform the way we enhance our photographs.

Lightroom Editing Mastery (see what’s included)
For a limited time, “Lightroom Editing Mastery” is available at a significantly discounted rate, making professional-grade photo editing skills more accessible than ever.
Only 1 day left: Lightroom Editing Mastery at 80% Off
Like This Article?
Don't Miss The Next One!
Join over 100,000 photographers of all experience levels who receive our free photography tips and articles to stay current:


Leave a Reply