When you as a photographer—amateur or professional, analog or digital–practice your craft or hobby, you will at one time or another become acquainted with the three letters ISO. If the camera does not get enough light onto the sensor or film, the images will be too dark.
To correct this you can set a higher value on the ISO. All photographers are dependent on light and lighting conditions can be very variable at different locations or times of day. The ISO value is for that reason an important tool that allows the photographer to be able to work effectively in many different lighting conditions.
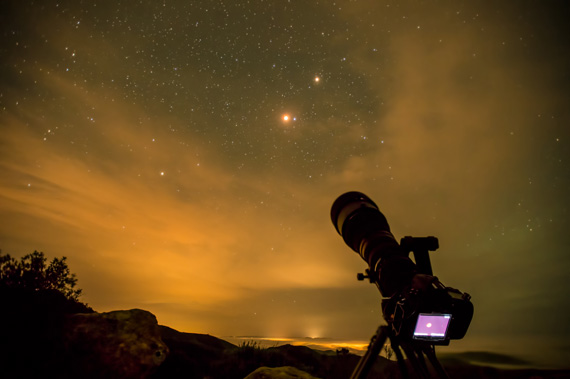
photo by Howard Ignatius, ISO 6400
ISO value has influence on the shutter speed and aperture for any photo shoot. Deep in the rain forest, to a concert or a moonlight walk, where there is little light available, it will by using this tool will be possible to get excellent pictures without using a tripod. This is one of the reasons why the digital cameras has made it much easier to be a photographer.
ISO Indicates the Sensitivity of the Image Sensor
With ISO (International Standards Organization, previously known as ASA), we mean how quickly a film or digital sensor is capable of recording light. An image sensor set to ISO 100 requires twice as much light to achieve a normal exposure, as when the sensor is set to ISO 200.
In order to get twice the light the shutter speed must either be doubled (e.g., from 1/60 to 1/30 seconds) or the aperture must be opened up a whole f-stop (e.g., from f/5.6 to f/4).
That may not sound like a good idea to have to double the shutter speed so that we risk blurring the picture? Why doesn’t we always set the ISO speed as high as possible (e.g., ISO 1600) to obtain the fastest possible shutter speeds?
Higher ISO Values Produces More Noise
The downside of raising the ISO number is more noisy images – in the film world, this is a bit more romantically known as grain.
High ISO Entails Several Drawbacks
It is not just noise that increases with increased ISO settings. There are actually three “problems” that occur: increased noise, reduced sharpness and reduced contrast ratio.

High ISO = High Noise (Slightly exaggerated to show effect in this example)
The last two problems are usually marginal. The decrease in the sharpness of the increased noise that hides the details. Reduced contrast ratio refers to the ability to see details/nuances in the shadow areas as well as highlights.
Is Noise Always Negative?
People often tend to have a hard time telling the difference between images with low and high ISO speeds and very large prints. Therefore, it is difficult to choose which you prefer – a little “noise” doesn’t always disturb the picture. It may even bring a little feeling into the photo.
Different Cameras Provide Different Levels of Noise
Now you may think that you do not recognize this at all – when you test high ISO settings on your camera, the pictures may seem to be very noisy, much more noisy?
Yes, the noise is very different between different cameras and it has been an enormous development in recent years. If you have a compact camera, the risk that your images even at ISO 400 looks like ISO 3200 in other cameras. But if you use a modern digital SLR, you should be able to get great pictures even on ISO 800 and maybe even at higher ISO speeds if your camera allows it.
The problems we have these days when we assess the digital images is that we would look at them maximum zoomed in on the screen. However do not forget to relate to the possible noise you see to what size you actually use the image. Honestly, how many images to print larger than A5/A4?
How High ISO Should I Tolerate in My Camera?
Test your camera! Take a picture of the same motif with different ISO settings and print or send images to the photo lab. The most challenging is to shoot indoors in a low light setting. To try different ISO settings in daylight gives surprisingly comparable results, it is in low light conditions the major problems occur.

Photo by Flickr user barnyz; ISO 200, f/5.6, 5-second exposure.
This is What You Gain by Increasing the ISO Settings
Now I have spent the whole article to explain the potential problems of raising the ISO. Let us finally turn to the issue and look at the opportunities provided by changing the ISO value.
By Raising the ISO Setting, You Can:
– Speed Up the Shutter Speed.
It is common to have problems getting fast shutter speeds when taking pictures indoors at night (= reduced risk of image blur). Although you may have opened the aperture to the max, you may even have to raise the ISO as high you think the quality will allow.
– Reduce the Aperture Setting.
Instead of changing the shutter speed, you can choose to reduce the aperture (for example, from f/4 to f/5.6) if you need a greater depth of field.
– Try a Combination of Both.
For example, if you raise the ISO setting from 100 to 400, you have doubled the ISO value in two steps. This allows for faster shutter speeds combined with reduced aperture, like going from 1/30 to 1/60 sec. (= 1 step) and f/4 to f/5.6 (= 1 step).
Is it Possible to Lower the ISO Setting From Time to Time?
The most common is that you want to increase the ISO value, but if there is a lot of light in the scene it can be justified to go the other way. Here are three examples:
Example 1:
You want to shoot a stream and use a slow shutter speed around half a second to get good-looking motion blur in the water.
Answer:
Here you must set the camera at lowest ISO. If the minimum aperture is still not enough, you must use a gray filter that reduces the light inlet.
Example 2:
You want to shoot with wide aperture to get the short depth of field on a sunny day. You have chosen the A/Aperture Value setting (Auto Aperture Priority) to get to choose f/2.8 aperture while the camera determines the shutter speed for you. The problem is that your images are overexposed at all times.
Answer:
A large aperture (comparable with a large pupil) on a sunny day means fast shutter speeds. Most cameras cannot capture images faster than 1/4000 or 1/8000 seconds, which may be too slow for the ISO number you selected. If you can, try to reduce the ISO to 100 or 50. If it is not enough, the only choice left is to buy a gray filter for the lens, which removes some of the sunlight.
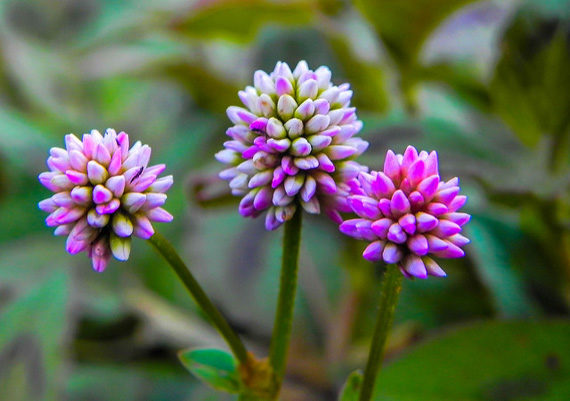
Photo by Paul Saad; ISO 160, f/3.5, 1/35-second exposure.
Example 3:
You try to shoot indoors in a low light setting and has set the ISO at max, you have selected a large aperture and still think that the shutter speed is a bit too slow. You now turn on the flash and take the shot, however you notice that the picture becomes too bright. Despite the fact that you reduce the flash power all the images appear to be heavily overexposed.
Answer:
In extreme situations, the lowest effect of the flash can be too strong for the scene along with your choice of a high ISO number. The only opportunity to use flash in such a situation is to lower the ISO until you notice that the image becomes darker and then start to increase flash power again. From there, you will try to aim for a good balance between the ISO and the flash effect.
About the Author:
Morris Scjomin (dslrlensauctions) has been a professional photographer for over 10 years, practicing exclusively in the field of portraiture, still life, and documentary images.
Like This Article?
Don't Miss The Next One!
Join over 100,000 photographers of all experience levels who receive our free photography tips and articles to stay current:


Thank you for sharing this article.. One of the best tips
Very Useful…Thanks a lot
great article, well explained. higher ISO also works with wildlife first thing in the morning. will pass on to fellow photographers.
Very interesting post. Normally, in digital photography you set first aperture and shutter speed, and ISO is like a magical tool we can use at the end ;-)
Very Very well explained, useful and direct
I shared to all of my friends,
Thanks! really usefull for my next project!
Great article, im somewhat of a begginner, and i have found your blog to be very enlightening! Thank you so much!
Thanks
Thank you for sharing. This was a great reminder about ISO. Great article. Keep them coming.
useful tips! thanks
Sometimes the ability of shooting high ISO is the difference in being able to capture an image or not.
Last summer at a festival we had performers on the ground in front of the stage that were not very well lit. On top of that, they were moving rather quickly which meant I had to get my shutter speed up to the 1/200 range to keep blurring at a minimum and even shooting at f/2.8, I sometimes needed to boost my ISO to 4000 (which seems a bit crazy) but it worked.
You can see these images here – http://carltonward.zenfolio.com/p261802386
Check this one – http://carltonward.zenfolio.com/p261802386/h233a9304#h233a9304
Canon EOS 5D Mark II, f/3.5 @ 195 mm, 1/200, ISO 4000, No Flash .
Love in Light,
Carlton
ISO has never stood for the ‘International Standards Organization’. The organization arose in 1947 and derived its name from the Greek word isos, meaning equal. This was used because of concerns by the organization that using acronyms would be confusing because the International Organization for Standardization’ would have different acronyms in different languages (IOS in English, OIN in French for Organisation internationale de normalisation, etc).
My theory is the human eye (or my eye) has an average daylight ISO of about 400 and that’s where I set my D3s as the default. I’ve been photographing for over thirty years and migrated from ISO 400 film to ISO 400 digital with comparable results. In the triad of shutter, aperture, and ISO, I try to keep ISO as the constant. I do adjust the ISO based on the overall light of the scene but i don’t use it as a variable in the same way as aperture & shutter. I was taught aperture controls the light on the subject, shutter controls light on the background and ISO controls the noise or granularity of the scene.
During the days of film, if I remember correctly, ASA stood for American Standards Assn. Then ISO came along and it stood for International Standards Organization which has since morphed into international organization of standards.
I Will add this:
To be sure to not over evaluate the ISO value that you really needs, set-up your ISO value to automatic Then, if the light condition do not need to increase the ISO value it won’t.
If you presume that you need 1200 as value but the reality is 800 you will lost quality for nothing.
good post but it ISO represents the trading name for the International Organization for Standards ( the acronym of which would be IOS)
I shoot mostly in Aperture mode with Nikon D7000. I struggle with if I should use Auto ISO where I can set a minimum shutter speed and maximum ISO I am willing to use. Suggestions would be much appreciated. Most of my photography is of people or landscape. Thanks for the great article. I am going to try printing photos using several ISO settings indoors.
Cheers!