Don’t you just hate it when you find yourself trapped inside because of the weather? A good day for photography wasted. But you can still use your creative ideas indoors and get some interesting shots. In this video, Gavin Hoey from Adorama shares his tips for creating simple, beautiful sparkler shots using a light bulb in front of the sparkler:
Here’s what you’ll need for the setup:
- a small sparkler
- a light bulb
- Blu-tack adhesive
- glossy, black floor tile (optional)
- black background
Hoey uses the Blu-tack to hold the sparkler and the light bulb upright on a glossy floor tile. The floor tile provides some protection from the sparks and also creates a fantastic reflection. He also uses a black background at some distance from the setup so that all the attention is directed to the sparkler.
Camera Setup for Sparkler Shoot
- Shutter speed: Since this is going to be a long exposure shot of 1 second, be sure to have a tripod handy.
- Aperture: The sparks will cover a good distance, so aim for a greater depth of field. Hoey has his aperture set at f/11.
- ISO: With practice, Hoey has determined that you can use an ISO of 400 to balance the exposure.
To set all these parameters, use manual mode. Also, set your focus on the middle of the light bulb by focusing manually. As the shoot will take place will all the lights turned off, auto focus will not be of help. When composing your shot, be sure to align the sparkler exactly behind the light bulb. This way, it will appear as if the sparkles are coming from the bulb.
Here is what Hoey’s image looks like. Note that it was taken with all the lights turned out.
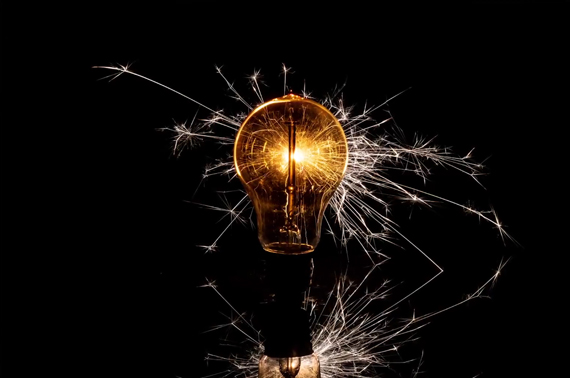
Notice the underexposed metal bulb holder.
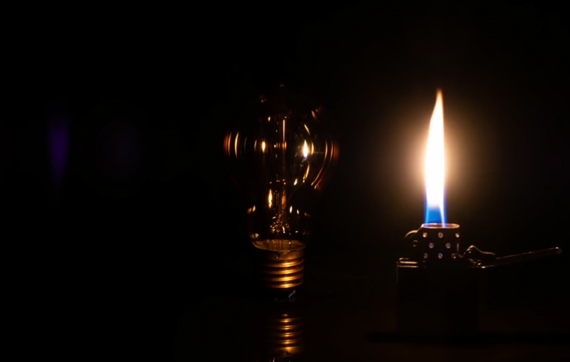
The image looks fantastic, doesn’t it? But if you look closely, you can see one small issue. While the glass portion of the light is beautifully lit, the holder at the bottom is still dark, because the sparkler cannot light it up from the back. Hoey uses a simple trick to solve the issue. He lights up his lighter and places it in front of the bulb, making sure that the metal portion is illuminated. In the process, he makes sure that the composition hasn’t changed at all. The idea is to mask in the illuminated holder during post-processing.
Editing a Sparkler Image in Photoshop
While most of the image looks great as is, only the metal holder parts needs to be retouched. This can be easily done by using the final image taken with the lighter. Here is how you can do it:
- Open both the images in the same document in Photoshop.
- Make sure that the image with the lighter is the top layer and the one without is the background layer.
- Check that the two images are in perfect alignment by changing the blending mode to Screen.
- Once you make sure that the two images are perfectly aligned, go to Layer > Layer Mask… > Hide All. This will hide the layer with the lighter.
- Next, grab a brush tool, and choose white as your foreground color. Then paint on the metal portion of the light bulb. Don’t forget to paint over the reflection.
- If the Blu-tack is visible, use the clone tool to remove it.
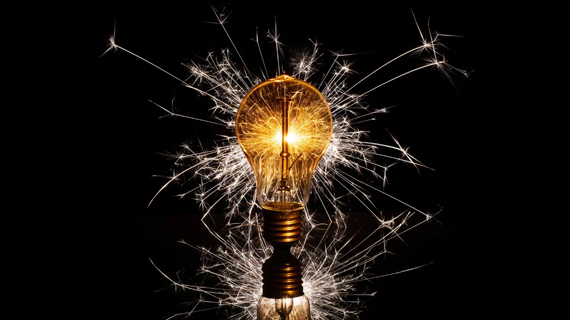
And there you have it, an amazing looking sparkler photo. So the next time you find yourself trapped indoors, give this technique a try and share your images with us.
Like This Article?
Don't Miss The Next One!
Join over 100,000 photographers of all experience levels who receive our free photography tips and articles to stay current:


Leave a Reply