There are four aspects that cover the essentials of studio lighting with a softbox: color temperature, quantity of light, quality of the light, and direction of light. When setting up your lights in a studio these are the four aspects that you have to take care of. Jeff Rojas explains:
For this tutorial, no additional modifiers have been used. This means both the quality of light and the color temperature are aspects that will not be (cannot be) tinkered with. What will, however, be tinkered with are the quality of that light (how intense that is) and the direction.
Intensity of Light
Intensity of the light in comparison to the subject can be controlled by changing the distance between the subject and the light. You need to also check the subject to background distance. These are the two main aspects that govern the intensity of the light.
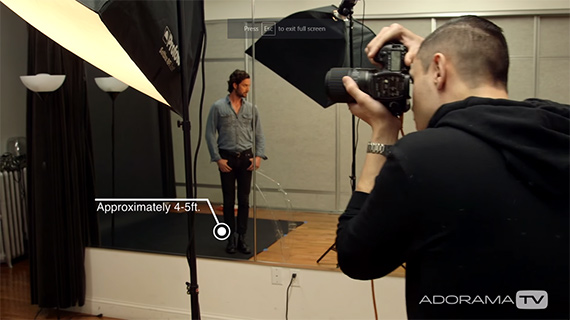
To accentuate the effect of the light on the subject and to prevent light from affecting the background, Rojas moved the subject 4-5 feet away from the background (inverse square law). The lights feathered off to accentuate this. Rojas was shooting inside a small (15 x 10 foot) studio, so there was no way that he could have maneuvered the lights too much.
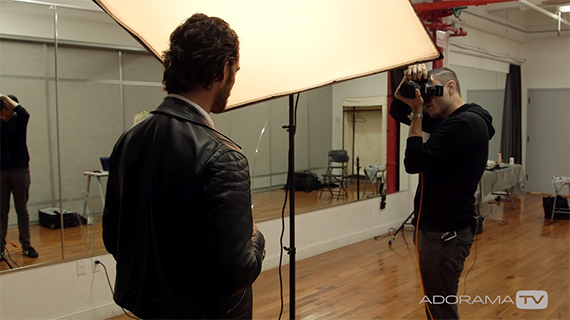
Additionally, the light was turned slightly away, aiming toward the left of the frame. This accentuated not only the left side of the subject’s face but also spilled some light on to the right side of the subject’s face. This ensured that the facial features such as jaw line and cheek bones were highlighted.
Direction of Light
The light was placed about 35 to 40 degrees toward the subject, facing down. This, again ensured that the jawline and cheekbones were highlighted. It also helped to capture the textures and patterns in the model’s clothing.
Aperture
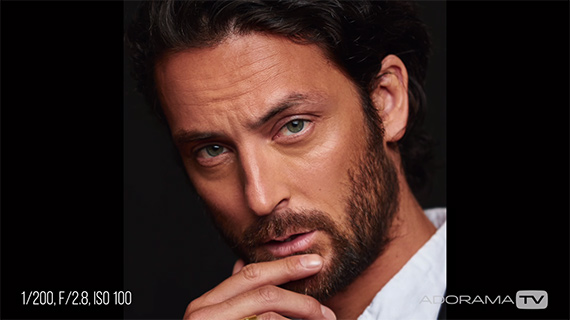
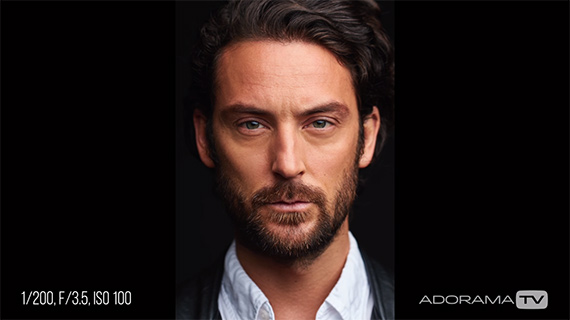
Rojas used a wide open aperture, focusing on the subject’s eye closest to the camera. Shooting with a small aperture would have meant having to push the light and therefore risk spilling some onto the background. That would have defeated the whole purpose of the shot.
Next time you work with a softbox, consider: color temperature, intensity, direction, and quantity.
Like This Article?
Don't Miss The Next One!
Join over 100,000 photographers of all experience levels who receive our free photography tips and articles to stay current:


Very interesting article,but no dialogue on video!