Many beginner photographers feel overwhelmed by the idea of retouching their images. Using software like Adobe Lightroom or Photoshop doesn’t necessarily need to be overcomplicated. And you don’t need to spend hours retouching a single image to get the desired result either. Fine art photographer Attilio Ruffo takes you through a simple process of editing your landscape photos in less than five minutes using Lightroom’s basic editing panel:
Before starting off with the five-minute editing process, Ruffo suggests that you make the following quick adjustments. These are five quick fixes that you should follow for any of your images before editing them:
- Remove chromatic aberration.
- Enable profile correction.
- Level the horizon so that the image does not look crooked.
- Adjust the photo ratio depending on where you want to publish your image.
- Remove any dust specks using the spot removal tool.
All these adjustments can be made with very few clicks of a mouse and can be done within Lightroom. Once done with these adjustments, head on to the develop module for the actual editing process.
Pick the Right Color Profile
Color profiles determine how colors appear in your images. Some color profiles make the image look flat and unflattering while others can make it look vibrant or full of contrast. Experiment with the different color profiles that are available and see what works best for your image. Ruffo prefers using the landscape or the Adobe color profile for his landscape images.
Choose the Correct White Balance
If the white balance is incorrect, the whites in your image will not be pure white. And accordingly, all other colors will appear inaccurate. Use the white balance tool to pick either a pure white, pure black, or neutral grey area to correct the white balance.
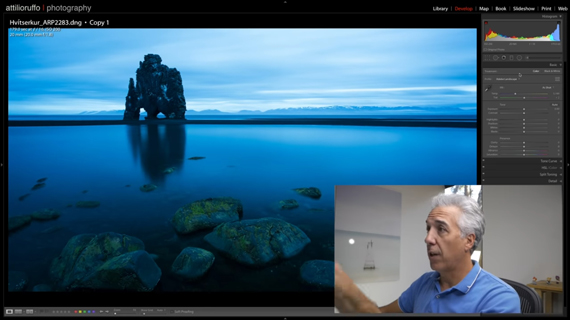
Notice the blue tint in the image due to incorrect white balance.

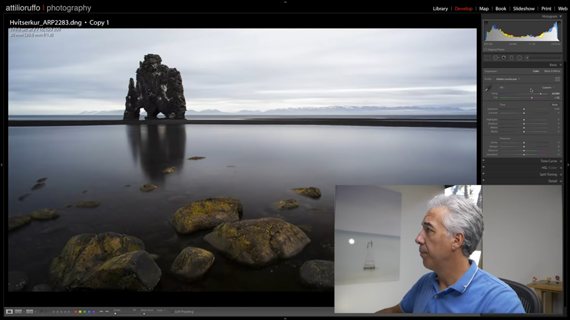
The colors look much more natural after white balance has been fixed.
Expand the Histogram to the Maximum
Whenever taking photos, it’s a good practice to expose to the right of the histogram. This ensures minimal noise in the images while lifting shadows in post.
To expand the histogram to the maximum, hold the Shift key and double click on black and on white. This will extend the blacks and the whites in the images to the extreme, without clipping.
Set the Tone and Exposure
Next, set the tone and exposure of your image by adjusting the shadows, highlights, and contrast sliders. Decreasing the highlights slider allows you to recover some more information in the brighter parts of your images. Increasing the shadows slider, on the other hand, allows you to recover some shadow details. Adding a little bit of contrast adds a punch to the image if it’s looking flat.
Working with Colors
The clarity adjustment tool helps you to adjust the contrast of the mid-tones. Increasing it a bit adds a punch to the image and also helps in defining the textures better. Be sure not to go overboard with this as it introduces unwanted artifacts in the images.
Adjusting the vibrance affects the saturation of the most muted colors. On the other hand, adjusting the saturation affects the saturation of all the colors. Adjust these two settings depending on how vibrant you want your image to appear.
Go on and see how these simple steps can transform your images. If this still feels challenging, keep on practicing and you’ll definitely get the hang of it.
Like This Article?
Don't Miss The Next One!
Join over 100,000 photographers of all experience levels who receive our free photography tips and articles to stay current:


Leave a Reply