Portraiture can be very rewarding. It’s a chance to show the best side (literally) of someone, and create a photo that communicates something unique.
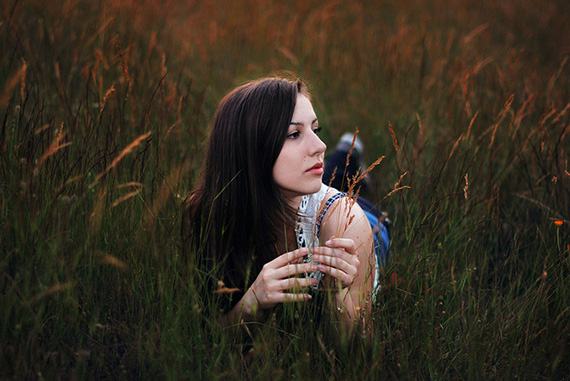
photo by Vesna Pukich
Look at your subject
This sounds obvious but take a browse through all the shots you have of your family and friends and see if they don’t have a sameness about them. Head and shoulders, passport photos, awkward poses, uncomfortable expressions, blank looks, embarrassed smiles?
Each person has some unique quality that deserves photographing. It doesn’t have to be perfect skin, a remodeled nose, pouting mouth, stunning eyes. But it should be some quality that best communicates the person’s individuality.
Sound daunting? It isn’t if you follow some basic tips.
Try not to use direct flash
Flash is light at its most boring. On rare occasions it can really lift a shot into dazzling life, but most of the time using available light is better. Flash tends to give a bland look and the fact of the flash going off takes away any intimate atmosphere you may have created.
Use a telephoto lens
In my opinion, 105–135mm is best. Wide angle is usually a big no-no.
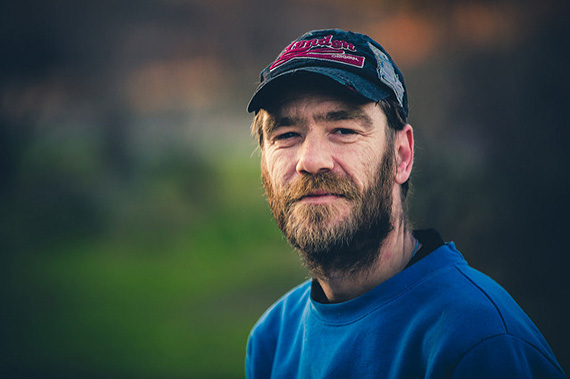
photo by Matt Wiebe
Pick the person’s “best side”
People really do have one. Get one shoulder turned towards the camera so one side is favored a little. Try the pose the other way and figure out which is best.
Dress your subject up if possible
If this is a semi-formal portrait you can have some say in the clothes. Solid, dark or light colors work best. Stripes checks, swirls, and patterns confuse the viewer’s eye. Bold colors can overwhelm the skin tones. A vee or scoop neck is better than a round neck. For a man or older woman, cover the shoulders, for a young woman leave them bare.
Try to use the available light to good effect
Position the person where the light is soft and coming mainly from one direction. This can give a moody feel and usually gets the eyes more attention.
You can use a reflector on the shadowed side to bounce the light if the contrast between highlight and shadow is too strong. You can make a simple reflector using aluminum foil on a sheet of cardboard.
Let the person sit down
This helps them to relax and helps you to be able to direct them more easily.
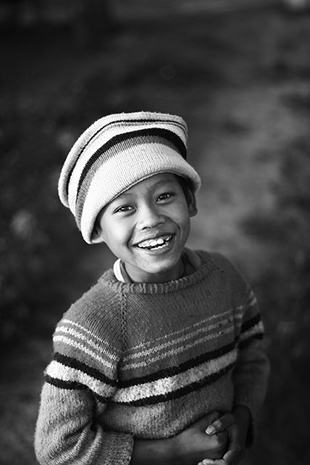
photo by Chris Hobcroft
Direct the person
In portraiture, you’re dealing with minor movements and shifts of position and angle. Try to shoot slightly above the person to make the eyes open more. Lower the shoulder closest to the camera, get the head straight or at an engaging angle. Lower the chin a little.
Some people look best when they smile and some don’t. You can get more interesting expressions and nuances without a smile. Tell the person to think of something they like doing. This will bring up subtle lights in the eyes and shifts in the mouth lines.
Compose vertically
Turn the camera on its side. A portrait usually includes the head and upper torso and sometimes the hands. These work best in a vertical format. Horizontal framing leaves you with wide open spaces either side of the subject that can detract from the feel of the shot.
If hands are in the shot, take a good look at them
Hands can look ugly or awkward. A lightly closed fist is usually neutral. Let the hands rest on a knee or in the lap and see what you have. Crop them out later if they don’t work.
If you’re shooting candid portraits the same tips apply but in these shots you have to move around to get the best angle.
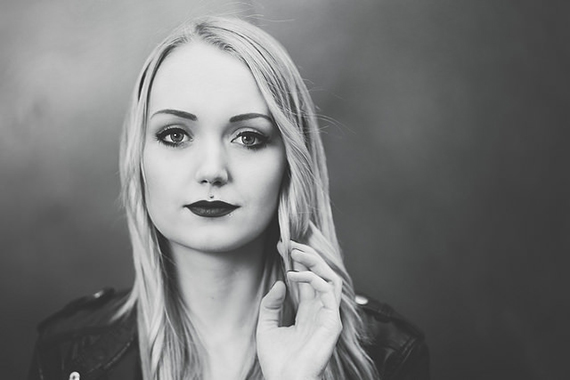
photo by fiction of reality
About the Author
Lance is not very good at writing about himself in the third person. He is an ex-patriot Australian living in Taiwan running a business consulting company. He writes for My-Photography-Tips. His grasp of the Chinese language ranges from poor to laughable and in most circumstances his actual use of the Chinese language results in laughter.
Like This Article?
Don't Miss The Next One!
Join over 100,000 photographers of all experience levels who receive our free photography tips and articles to stay current:


Thanks for these good tips for portrait photography. I’m glad that you mentioned that the the hands can look weird, and that it’s best to let them rest on a knee or a lap and to maybe crop them out later. It sounds like it could be beneficial to maybe take some practice shots and see how the hands look, especially if practicing this can help you identify what looks weird and how to fix it.
Article says ” use a telephoto lens “, yet one of the photos was taken with a 50mm. REALLY?
helloo0ooooo
shoot wide push in tigh (really close) on the longer end of the lens making sure you shoot on a plain level , meaning no perspective or tilt of the camera so the image doesn’t distort and it should be ok for headshot or 3/4 lenght, it wont work for full lenght do !
Great tips, although I disagree about a couple of things. Firstly, flash doesn’t create dazzling results on RARE occasions, in the right hands it creates dazzling results on the majority of occasions.
Also, whilst I agree about the focal range you have mentioned as being the most ideal, you can still get some fantastically quirky results shooting wide.
Rules are great, but breaking them can sometimes be even greater.
I agree with you jochystaz, ¨in the right hands flash creates dazzling results on the majority of occasions.¨
And I disagree about ¨Flash tends to give a bland look and the fact of the flash going off takes away any intimate atmosphere you may have created.
Flashes if you know how to use them wolud make that your photos are stunning¨
As Joe McNally from Sport Ilustrator, NatGeo, and Time Life. most of his famous portraits were shot using flashes.