After spending the last four years getting more and more into photography, it has only been recently that I’ve felt I have really become confident in my abilities to make use of perspective to get shots that I’m truly proud of. That may seem like a long time. But I guess you could say I’m somewhat of a perfectionist when it comes to critiquing my own work. I have recently been able to capture some images that really emphasize the sense of depth in the scene. This led me to write this article to share some of those techniques with you.
If you look at a photograph, whether it be in print or on a screen, it goes without saying that what you are looking at is a two-dimensional representation of a three-dimensional scene. The two-dimensional image is an illusion, and your mind deciphers the information to determine the ‘depth’. As photographers, we can use the concept of perspective to create a sense of depth and scale in photos.
As a photographer, you must be aware of perspective, as it can be a little tricky at times. We must avoid taking pictures that include unintended distortions or that are flat and uninteresting.
We can define perspective as the sense of distance between things and their dimensions in relation to the position of the viewer, producing a sense of depth. Here are my most useful tips on how to use perspective:
Blocking Parts of Subjects
It’s an obvious statement, but when you see one object partially obstructing your view of another object, your brain tells you that the obstructed object is further away than the object obstructing it. By relating their sizes we can get a sense of the depth. We call this overlap perspective.
Relative Size
As an object gets smaller, our brains process the information to let us know that the object is farther away from the spot where the photo was taken. We already know rough sizes of natural objects, like cars, trees, humans, and houses, so upon seeing a person who is five times taller than a house, our brain lets us know that the person is much closer to us than the other object. Our brain works this out based on familiar objects in relation to other objects in the picture to get an idea of the distance and depth of relative objects. This is what we refer to as scaling.
We can use some effective photography techniques by placing several objects at different distances from the viewpoint and create an illusion that they are the same distance from the camera as each other. This can produce some peculiar pictures.
Having a single familiar object in a photo allows us to work out the sizes of everything else in the scene in relation to that one familiar object. Think back to all the pictures you’ve seen of fishermen holding their catch smiling at the camera. You’re able to see how large the fish is compared to the sizes of the fisherman’s body. Think about an image of a person standing among huge leaves in the jungle, which are taller than him. Seeing this stimulates our minds because we’re used to seeing leaves that are smaller than our hands.

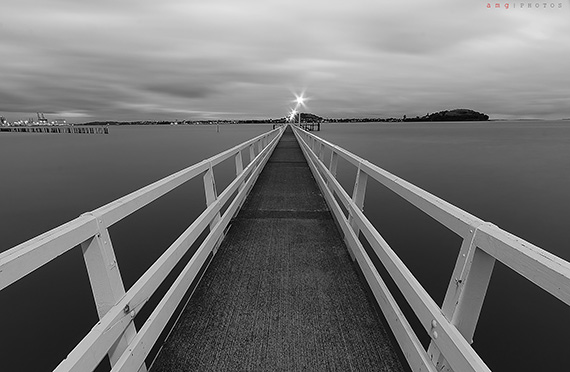
“Mission Bay, Auckland” captured by PictureSocial member Al Michael Genabe
Vanishing Point
The human eye judges distance by looking at how lines and planes converge at a point inside or outside of the picture. This is what we call linear perspective.
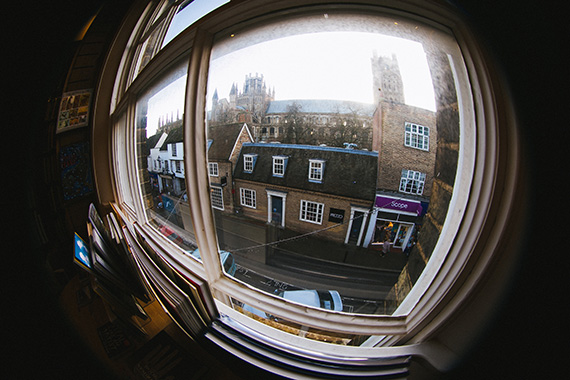
Fisheye lenses produce photographs of objects which appear smaller along the edges of the shot than they would look in reality. Conversely, things in the middle of these shots appear a lot bigger than they would in reality.
Parallel lines which move away from the viewpoint in a photo appear to be converging or meeting with each other at a certain point, which is what we call vanishing point. This is very common in photography. A typical example is a photo of railway tracks converging in the distance.
The Lens Axis Level
Horizontal lines moving across the lens axis level appear to be straight, while all other horizontal lines above and below this level appear as curved lines. With rectilinear perspective, the straight lines in the frame are reproduced as straight lines in the picture in the same way that we perceive objects in reality. Regular lenses are rectilinear lenses.
Perspective Projection Distortion
All pictures could be subject to perspective projection distortion. The fisheye and panoramic lenses produce perspectives that are false. They’re used to produce interesting effects deliberately.

Photo by Phil Hearing
Reduced Color Quality, Definition, and Sharpness
Due to reduced contrast, scattering of light, and other factors, our eyes cannot define objects in the distance as easily. Objects farther away are harder to define because of light scattering and reduced contrast, as well as other factors. Knowing this allows our brains to make more sense of distance. In photography, we can take this knowledge and use it to our advantage to create pictures where objects far away have less definition and contrast. We do this by controlling the depth of field. An easy way to do this is by focusing the camera lens slightly shorter than infinity so that the objects furthest away look blurred. This is what gives the viewer a sense of depth and distances of various objects in the picture.
Objects with reduced brightness and contrast make our brains perceive that we are looking at something further away than the brighter, more vivid objects closer to the foreground.
Before you take a photo, you should decide whether you want to emphasize the depth of the scene or not.
Depth of Field And Focus
The aperture, focus distance, and focal length can be used to control depth of field. Depth of field (DoF) is used to define an area where objects are sharp in the picture. Objects outside of this zone appear blurred. Many beginners try to make everything in the picture look sharp. They often try to maximize the DoF with smaller apertures. Sometimes this can work well, but it is generally not seen as something more seasoned photographers like to do.
Isolating an Object
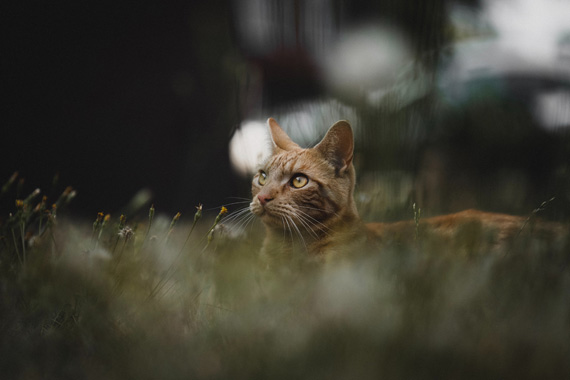
One way to get nice effects in photography is to isolate an object from its environment. An example is to use a wide lens, enabling you to divide the scene into different layers. Sometimes you will find that the background is unappealing. You can often resolve this by using a tiny DoF so that everything behind the main subject is out of focus. Background elements are now less significant in the picture.
Layers
If you’re interested in landscape photography and enjoy shooting scenes of mountains, a great approach is to use the notion of layers. Mountains are usually the dominating feature of a photo. By including more layers in the foreground and the middle area of depth you can bring your photos to life.
A lack of familiar objects (trees, people, etc.) in a shot makes it hard for the viewer to get a sense of scale. In this instance, you might wait until someone comes walking past to get a shot or ask your buddy to stand in the frame.
Now that we’ve reviewed these tips on working with perspective, let’s look at how we can use it to create some interesting effects. That brings us to the second half of this article.
Forced Perspective Photography Tips
Forced perspective photography is a style that uses optical illusions to make a subject seem to be different sizes and distances from the viewer than it actually is. It can be used to create some rather unusual (and often funny) effects.
Let’s examine a few simple techniques for doing forced perspective photography.
As mentioned, it’s possible to deceive the viewer by manipulating perspective. Think about a diamond. Usually, with diamonds, size is the most important factor to determine how much they are worth. The cut and clarity are less important to some extent. When we see a photo of a diamond, we need a reference point to get an idea of its size. We can manipulate photos so that the viewer sees the diamond and the other object as being entirely different sizes or virtually the same size.
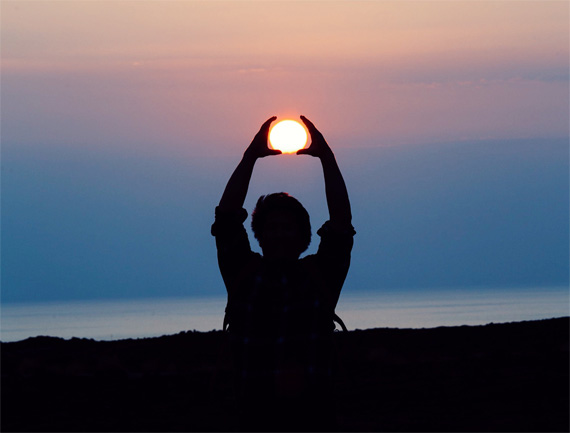
You will no doubt have seen the usual ‘holding a building’, ‘leaning on a skyscraper’, ‘holding the sun’ types of pictures, but how can we get some more interesting photos using this technique?
Below I have outlined three ways for getting forced perspective shots. Everything else is completely your choice. Use your creativity and ride that sucker like a wave for as long as you can until you have no more ideas left!
Size Altering Forced Perspective Photography
A size altering forced perspective picture is manipulating three things: distance, the line of sight, and the depth of field. First, choose the subject that you want to appear smaller. Position this object further away from the camera than the subject you want to make seem larger. How close or how far away the two subjects are will determine their difference in size. More space is needed for larger size differences between the two objects. It’s, therefore, a good idea to do this kind of photography outdoors.
Try using a wide angle lens, around 35mm or 24mm. Set your aperture to a large F-stop value. The F-stop will vary depending on the distance between the two objects. It is necessary to find a setting that allows you to get both of your subjects in focus.
After finding the most suitable focus, the next step is to spend some time lining up the two subjects and working out your camera position–the overall alignment of the photo. Let’s pretend you’re taking a shot where the first subject is a person and he or she has a hand on the other subject. For such a photo you would need to take some time to get the alignment as perfect as you can. You may need to take many shots to get the perfect picture. I would recommend you use a tripod to minimize movement and stabilize the camera position. Consider gaps and overlaps between the two subjects. You need to spend time getting everything aligned perfectly. Think about all of the failed attempts you’ve seen by people trying this technique–more than you care to remember, no doubt.
Zero Gravity Forced Perspective Photos
This technique can be achieved fairly easily by placing the camera on its side or upside down. Ask your model to lie on the ground and put his or her feet against a wall to look as though the ground is actually a wall that the model is leaning against. The model could also lean out from doorways and windows to make it seem like he or she is hanging out from them. One thing to be aware of is the direction in which clothes and hair hang. You could have the subject wear a hat or tuck in his or her T-shirt. It also helps if models wear clothing that fits a little tighter than normal.
Another point to remember with this approach is that when you turn the camera on one side, you need to make sure it is perfectly aligned at 90 degrees or 180 degrees with the horizon or the edges of the building and ground to make the illusion works properly.
Merged Subject Forced Perspective Photos
There has been a growing trend recently to show old photos of a scene in front of a recent photo of that same place. This is an example of merged subjects. What you have to do is get the old picture to line up with the size of the current scene. You’ll be holding the old picture relatively close to the camera, so you’ll need a large F-stop with a wide angle lens so that you can put the two pictures in focus.
I hope that reading this has given you a wide range of actionable approaches and provided you with the basics to step outside and start getting some excellent shots by using perspective. Step outside when you can and enjoy yourself! Thanks for reading and please remember some of the tips I made next time you’re taking photos.
About the Author:
Luke Walkers is a photography enthusiast originally from the UK and lives with his wife in Canada.
Like This Article?
Don't Miss The Next One!
Join over 100,000 photographers of all experience levels who receive our free photography tips and articles to stay current:


Great article! I agree whole heartedly and practice several of these tips including: the tip on layering for landscape. How often do we focus on landscape photography without using some layer in front to give scale?
I also think it is powerful to use your aperture to your advantage, not every landscape photo needs to be f/8 or higher. Try the same shot moving 1-2 feet and dropping your aperture to f/3.2 or f/4.