Often when taking landscape photographs, you’ll find that the sky is much brighter than the landscape. This can make it difficult to keep detail in the sky without the landscape being too dark, and to keep detail in the landscape without the sky being too bright.
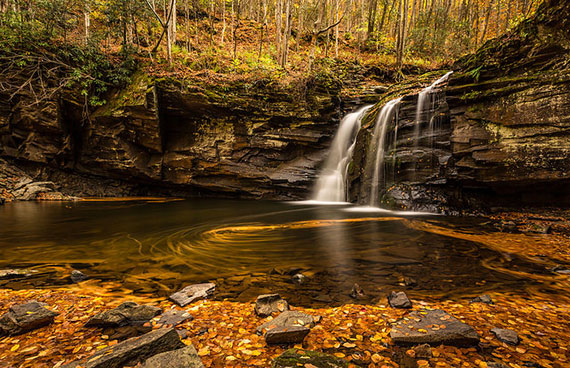
Photo by WVTROUT; ISO 50, f/6.3, 1/30-second exposure.
One solution to this problem is the split neutral density filter. This is a filter that can be placed in front of the lens. One half of the filter is clear, while the other half is dark.
Typically, you will place the dark section of the filter over the sky to darken the sky, while the clear section is placed over the landscape. You can then expose correctly for the landscape and don’t have to worry about the sky being too bright.
Split neutral density filters come in two varieties: graduated edge and hard edge.
- Graduated edge means that there is a soft transition between the dark and soft sections of the filter. Soft edge or graduated split neutral density filters are normally preferred for landscape photography because the transition looks more natural than a hard edge.
- Hard edge split neutral density filters are more useful when taking a photo with a well defined horizon that forms a solid line. The split line of the filter can then be placed along this line. They are especially useful when the sun is on or just above the horizon.
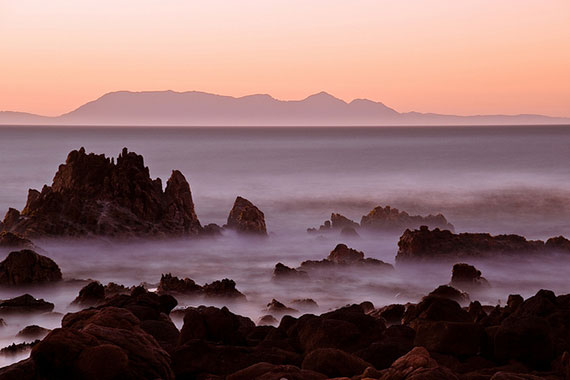
Photo by Steve Crane; ISO 100, f/8.0, 1/120-second exposure.
Both hard edge and graduated split neutral density filters are available in a range of strengths:
- ND0.3 = 1 stop
- ND0.6 = 2 stops
- ND0.9 = 3 stops
The larger in difference between the brightness of the sky and the landscape, the stronger the filter you will want to use.
Although split neutral density filters are available as glass screw-in filters, most photographers prefer a Cokin P or similar ‘slot-in’ based filter system. This allows you to easily rotate the filter and move the filter up and down, placing the dark section of the filter exactly where you need it.
The main benefit of split neutral density filters over software methods of equalizing exposure in a photo is that you can see the result as soon as you take the photo. It also saves on the work involved with software-based solutions.
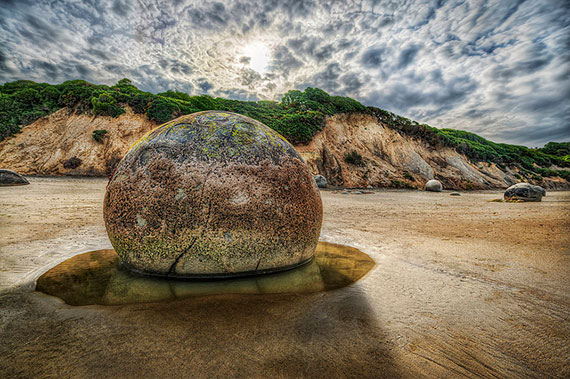
Photo by Jacob Surland; ISO 100, f/8.0, 1/25-second exposure.
The disadvantage, though, is that split neutral density filters work best where the horizon is clearly defined. If you have objects, such as trees in your image, that are both below and above the horizon, you’ll find that the top of the object will be darkened while the bottom will not. This is the main problem with split neutral density filters, and in cases like these, a software solution to managing the exposure may be preferable.
About the Author
Discover Digital Photography offers tips and advice on digital photography, helping you to improve your photography skills. The website is updated on a regular basis with new photography tips, and covers all aspects of photography, including landscape photography.
Like This Article?
Don't Miss The Next One!
Join over 100,000 photographers of all experience levels who receive our free photography tips and articles to stay current:


Love that shot of Petersfield Lake. I drive past it every now and then. I’ll take my graduation filter next time Im there. Thanks for the tips.
Great tip. Beautiful images that inspire me to seek out a ND split filter
Well done. The article was clear and informative. Thank you..