The gradient filter tool in Lightroom is pretty powerful. It works and behaves like the neutral density filters that we use in everyday photography. Using the Lightroom filters, however, requires a slightly different approach to what you might be used to. Joshua Cripps explains:
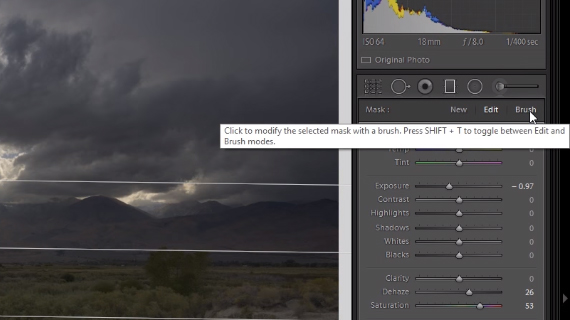
First things first, the graduated filter can be easily accessed from the top right Develop panel. There are six icons under the histogram.
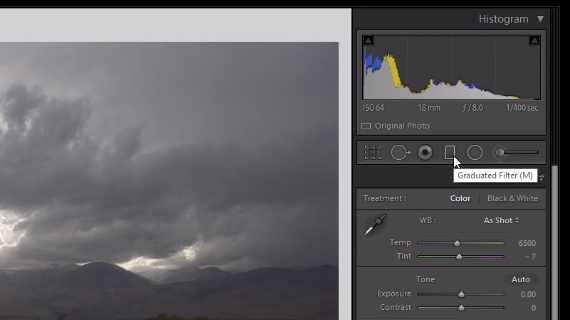
Select the one that looks like a graduated ND filter or use the keyboard shortcut ‘M’.
Once this panel comes up you can tweak things around, slide the sliders, and make a bunch of adjustments using them. These are all familiar adjustment options such as white balance, exposure, contrast, highlights, shadows, and so on.
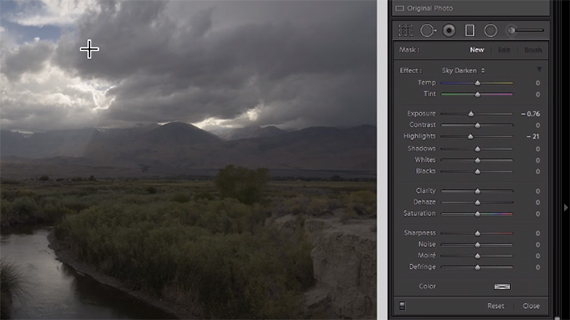
The gradient filter tool allows you to select areas of the frame that you can apply these adjustments to. Thus, it is a selective and localized application of changes.
How to Use Lightroom’s Gradient Filter Tool
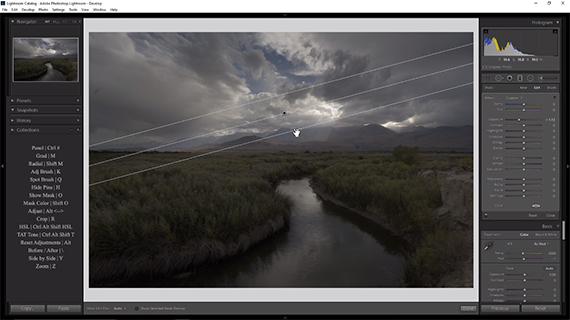
In the image used in the video tutorial, the foreground is visibly darker than the background/sky. To use the gradient filter, simply click and drag (after having selected the gradient filter from the right panel). The point where you click and then start dragging is where the tool will be used.
When you finish dragging across the image, you will see that there are three parallel lines. The effects of the adjustments start from the point where you clicked and then gradually fade out at the fringes of the first and third line as demonstrated here:
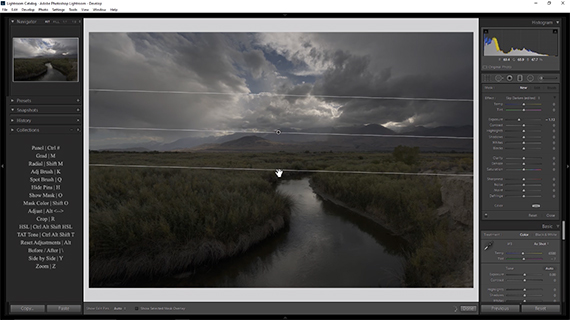
If the lines are closer to each other you get a more drastic effect.
And if the lines are further apart the effect is more gradual.
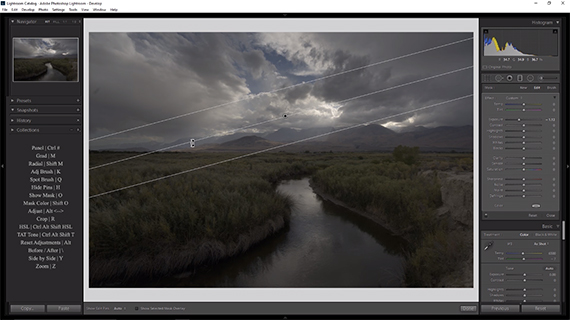
Just in case you are trying to repeat the effects as you read this, you may have seen how wobbly the lines are. This is what you can do, to create a straight line. Simply hold down the Shift key as your drag down / up. This will create a perfectly straight line.
Just in case you are wondering, you can go top to bottom, bottom to top, left to right and right to left as you do this. So the effect can be given in any direction.
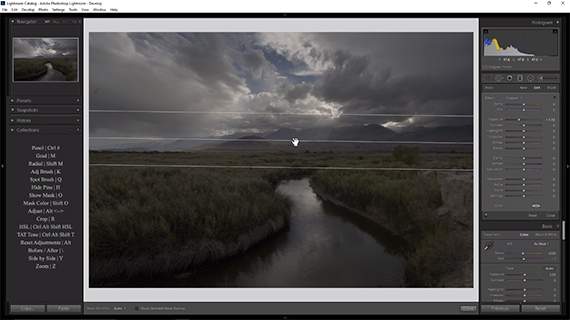
When you let go of the gradient filter, it’s set. But what if you want to change things around after you let go of the filter? Just grab hold of the filter when your hand tool shows up and then drag it up or down to re-position it.
You can also grab hold of the center line and flip it right or left.
You can also grab hold of the dot at the center and move the whole filter around.
Show Edit Pins
You may have noticed that when you move your cursor away from the image the filter disappears. You can prevent this from happening by going to Show Edit Pins and selecting Always.
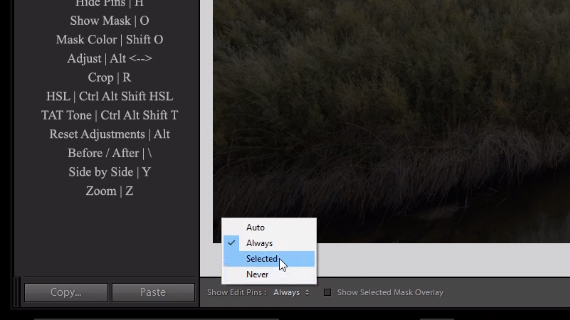
The filter will show up no matter what. If you select Never, then the filter will never appear (which is kind of a problematic). Otherwise, you can choose Selected, which will activate and show the selected filter among a number of filters that you have.
Show Selected Mask Overlay
When you check this option, it shows up as a kind of hazy green or red to mark the areas where the effects of the gradient is applied.
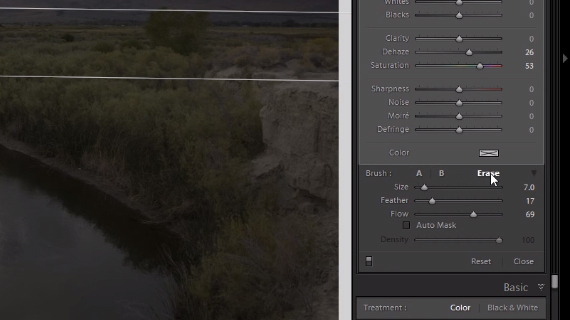
Selectively Erase the Filter Effects
To selectively erase the effects of the gradient filter from a selection, all you need to do is click on the Brush tool.
This will bring up the Brush tool. Now click on Erase and gently paint over the areas where you don’t want the effects of the gradient filter.
Lightroom’s gradient filter opens up a completely new dimension for you once you know its power.
Like This Article?
Don't Miss The Next One!
Join over 100,000 photographers of all experience levels who receive our free photography tips and articles to stay current:


I am confused. You started the grad filter part way down the image but the overlay shows the mage being filtered from the very top of the image down. What am I missing?