Because photography is a stationary medium, one of the most difficult challenges any photographer faces is that of conveying movement. Through years of experimentation, people have come up with a variety of techniques attempting to tackle this issue. Chances are, you’ve seen prolonged exposures used to show time’s progression. But photographer Tony Northrup‘s approach offers something a little bit different. Watch as he demonstrates his strategy of choice —taking a complete sequence of frozen actions and compositing them into a single image:
The first thing you’ll want to do is load all of your images into Lightroom. There, you should make any global exposure and tonal adjustments that you’d like to apply. One you’re satisfied with your edits, sync all of the changes you’ve made by selecting all of the images in your sequence. Export all of the images that you’d like to use as JPEG files.
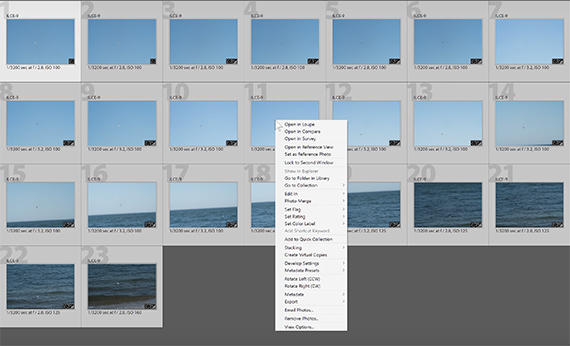
After you’ve exported the images, create a panorama composite. In this tutorial, Northrup uses Microsoft ICE to make a composite; however, there are a slew of Mac programs capable of creating similar panoramas. Lightroom is perfecting a panorama tool as well.
Next, crop your photograph in to get rid of any distortion or jagged edges. Straighten the horizon (if applicable). Once you’ve done so, bring the panorama into Photoshop.
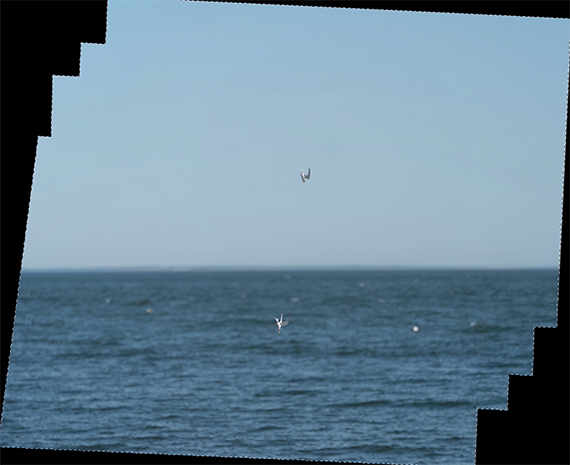
Import each of the individual JPEGs as layers in Photoshop, overlaid over the panorama composite. Afterwards, auto-align the JPEG files. The files will likely scatter across the composite in a way that doesn’t quite make sense. Begin making manual adjustments, moving photographs to the approximate area where they belong, starting with the last image first.
Optional: If you’d like to expand your canvas, go to Select > Modify > Expand. Here, you can slightly stretch out your image. Experiment with a 10 pixel expansion to begin with. Adding a Content Aware filter will do a good job of filling in any remaining gaps and making your final piece look as natural as possible.
While working on an individual layer, lower its overall opacity. As accurately as possible, try to line the image up with your composite.
Once you’re satisfied with your JPEG’s placement, apply a layer mask and fill it with black. Use the white brush to restore the desired detail within the masked image.
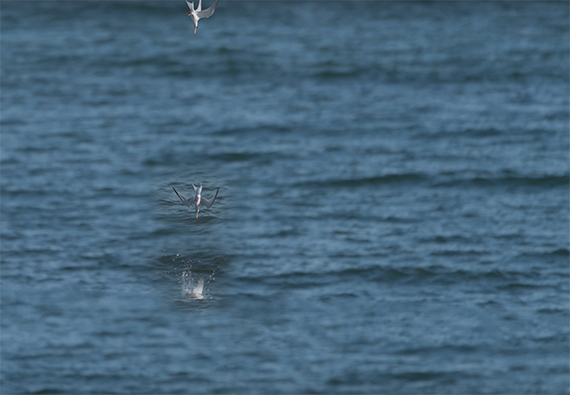
Repeat the positioning and masking process with every image in the series. If desired, readjust your frames to create a more dynamic action sequence; the less complicated the background, the easier it becomes to manipulate reality.
After everything is set in place, begin to perfect your individual masks. Use the Quick Selection tool hone in on the details you’d like to keep in your image. Make tweaks with the smart radius, being careful to erase any accidental selections you may have made. From there, alternate between the black and white paint brush tools to further refine detail edges.
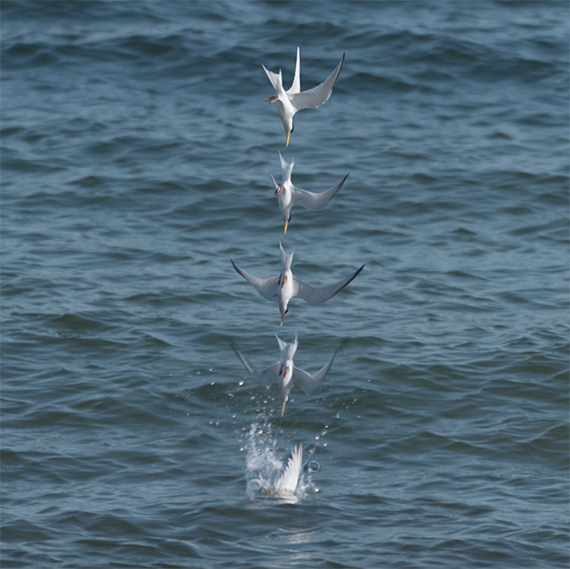
And that’s all there is to it! If you’re able to complete all of those steps, you should eventually be left with a clean, convincing full-range action sequence packed into a single image.
Of course, the process is tedious and takes patience to properly accomplish. Nevertheless, the next time you utilize a high speed continuous shutter to freeze every moment of an action, consider utilizing this technique. The awesome end result makes it an effort worth pursuing!
Like This Article?
Don't Miss The Next One!
Join over 100,000 photographers of all experience levels who receive our free photography tips and articles to stay current:


Leave a Reply