It can get pretty pricey having your prints mounted and framed. Commercial photographer Tony Roslund shows us how we can skip going to the photo lab by mounting and framing prints ourselves:
If you have a photo printer at home and want to know how to mount your prints on foamcore, Roslund takes you through a process you can do yourself that is very similar to what they do in a lab.
The larger the print, the harder it is to mount, so you might want to start with an 8×10 or 11×14.
Supplies
- Varnish—something like Moab Desert Varnish
- Foamcore—Roslund uses Gatorboard, Sintra Board, or any kind of substrate
- Pressure-sensitive adhesive—has release paper on one side and is tacky on the inside. This is your mounting material.
- Brayer—to roll over and press the print down
- X-Acto knife—make sure it’s sharp because a dull knife will created jagged edges
- Varnish—something like Moab Desert Varnish
- Point gun and framer’s points—like a staple gun; to hold the substrate to the frame
- Mounting hardware—framing wire and eye hooks work well
Instructions
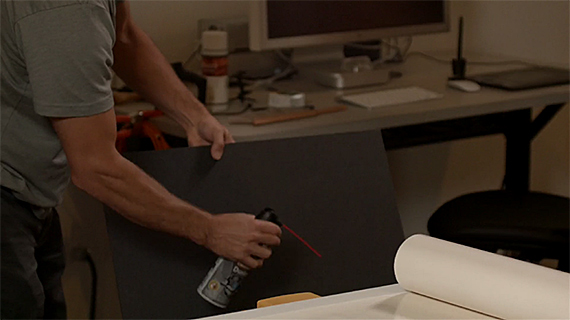
1. Apply the varnish to your print to add a protective layer. Don’t worry, it won’t change texture or color. Spray the print in a well-ventilated area.
2. Roll out the pressure-sensitive paper, tacky side up. You can use a straight-edge to hold down the one side so it doesn’t curl up.
3. Make sure your substrate is clean before you apply it to the material. You can use canned air or an air compressor. If you skip this step, you could end up with dust and dirt between the substrate and adhesion material, which can show through on the print.
4. Line-up the edge of the substrate with the paper. Do this slowly and carefully so it’s lined up perfectly, then press it down on the adhesive paper firmly. Trim the excess paper around the substrate.
5. Use the brayer to roll out the paper. It doesn’t really matter if there are air bubbles, but you want to make sure the adhesion is pressed firmly onto the substrate.
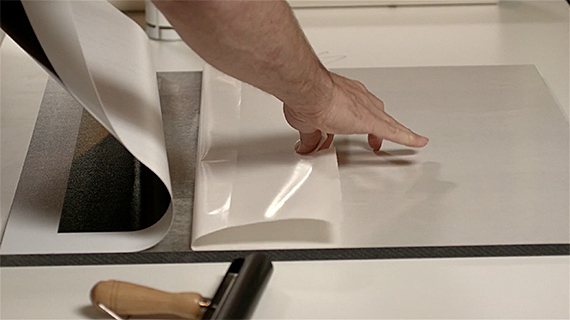
6. Tear off or fold one edge of the adhesive material. This will give you a sticky edge so you can begin to mount the print. You don’t want to take off the whole paper because, again, dust can stick to the adhesive material.
7. Line-up and apply the edge of your print to the sticky edge of your substrate. Take your time; this needs to be flawless. If the leading edge goes on crooked, the rest of the print won’t line up.
8. Peel back the release paper in sections and slowly mount your print. As you expose the adhesive material a little bit at a time, use your brayer to roll down your print. Be sure not to crease the print as you hold it up. Keep peeling and rolling in sections.
9. Once the print is fully mounted, roll out any air bubbles and trim the edges.

10. Frame it! Hopefully it fits into your frame perfectly. Use your point gun to staple the frame to hold the substrate in place, then apply the mounting hardware.
Like This Article?
Don't Miss The Next One!
Join over 100,000 photographers of all experience levels who receive our free photography tips and articles to stay current:


Thanks for the video. Got some chuckles at those “experts” sharing their knowledge.
Looking for the bestest and cheapest mounting methods..
Thank you. I needed something that serves the purpose. Sure you can go as professional (and expensive) with other methods but I am thankful for getting the best of this technique. Hope to see some of it in my walls soon.
Im not a professional, paid, photographer. However, this is exactly the info that works for me. Thank you. Quetion: Will this adhesive work when using canvas, for a canvas look?
Great tutorial! i’m wondering how the gudy can allow you to remove that giant bubbles without a problem!
No need for glass. The print is mounted and coated. Glass is used to keep the print flat and/or protected.
Sorry about the shaky video, we were testing some new rigs which clearly weren’t the best option.
I noticed you didn’t put glass in the frame. Is that just personal preference?
Not all prints are destined to be “fine art prints” that are going in a pyramid burial chamber for 4,000 years. In fact, most prints, if not mounted with a similar process as described here, will end up buckling and/or bubbled. Further, if your wonderful acid free fine art print shows damage after x number of years? Print another one… or ten of them, using the latest printing technology.
I do appreciate the video and found it informative but as a photographer you should know better than to have a hand held camera to do your filming. Because the camera was so unsteady, the video was hard to watch. Please, next time mount your camera on a stand. Thank you for the video anyway. It was worthwhile to watch it.
This method isn’t intended for fine art mounting. It’s supposed to demonstrate a lab mounting alternative. But for anyone concerned, Neschen Gudy 831 is acid free.
Why did you remove my comment?!?!?! NEVER EVER MOUNT A PHOTOGRAPH if you want it to last the test of time.
If you print on museum quality paper and you mount it with chemical based adhesives you are defeating the purpose of museum grade fine art acid free materials. Over time those chemicals will leech their way into the print and cause acid damage. If you go to any museum that shows famous photographers work it is NEVER ever mounted. A fine art print should be able to be removed from it’s framing the exact way it went in right after printing. I know acid damage and foxing as I owned a frame shop for over a decade. We were the official framer for the Miss America Museum in NYC. “Foxing” is damage from acid and moisture.
Bad advise to mount a photo…If you print on museum quality paper and you mount it with chemical based adhesives you are defeating the purpose of museum grade fine art acid free materials. Over time those chemicals will leech their way into the print and cause acid damage. If you go to any museum that shows famous photographers work it is NEVER ever mounted. A fine art print should be able to be removed from it’s framing the exact way it went in right after printing. I know acid damage and foxing as I owned a frame shop for over a decade. We were the official framer for the Miss America Museum in NYC. “Foxing” is damage from acid and moisture.