Nothing makes a sky pop in a photograph the way that a sunset can. Beautiful purples and yellows in a sky are often the result of the setting sun, but in order to capture the richness of those colors in a photograph, there are a few tricks you should know about. In today’s landscape photography photo tip, we will continue our discussion on shooting better sunset photos.
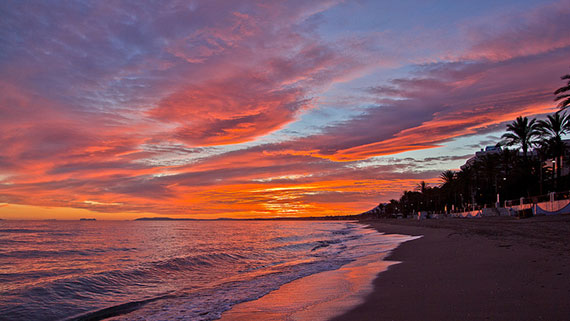
Photo by Hernán Piñera
Metering
In a past photo tips article we discussed how to meter the sunset so that we don’t get a dark, muddy (or even completely black) sky.
The meter in our camera will see all the light from the sun and expose for that value while letting everything else in the scene go dark. To fix it, we meter for the sky with the sun out of the frame, then recompose to include it. In effect, this increases the exposure value and more properly exposes the sky.
For today’s first sunset photo tip, we are going to take a step backward. Now that we have increased the exposure to get a “correct” reading in the sky, we have to step back and change our settings to slightly underexpose the sky. That’s when we are going to get all of those colors to “pop.” Slight underexposure will deepen and intensify the colors.
The problem is that if we overexpose the sky–or even if we have a “correct” exposure (I put “correct” in quote marks because artistically there really is no such thing) —we wash out all the stunning colors that drew us to the scene in the first place. On the other hand, if we underexpose by too much, everything starts to go black.
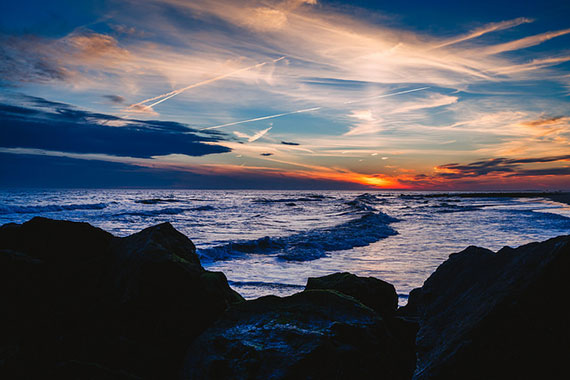
Photo by Christopher Ramirez; ISO 800, f/6.3, 1/200-second exposure.
This is another area where shooting digital images is sometimes better than film. We can see what we’re getting and make adjustments on the fly. When shooting film, we had to guess at the best exposure–and frequently we were wrong. Even worse, we didn’t find out until the film was processed, which could take several days. And we had to pay $15 or $20 for the privilege of seeing bad or inadequate sunset photos.
With digital cameras, we can immediately see the results and tweak our settings until we get exactly what we want. With this ability, there is absolutely no reason why we can’t get sunset photos that will absolutely take our breath away.
The flip side to underexposing the sky in sunset photography is that the ground area is going to go dark. At sunset it is probably dark to begin with, and underexposing the image is going to further darken it, possibly making the foreground go completely black with no detail. Unless we are going for a silhouette, we rarely, if ever, want areas of our photographs to be without detail.
Add Filters
If we want to lighten the foreground without lightening the sky, we use a split neutral density filter. This way we underexpose the sky with the filter, not the exposure setting.
Actually, the filter can be neutral or colored. When using a colored filter, you can add color to a sunset.
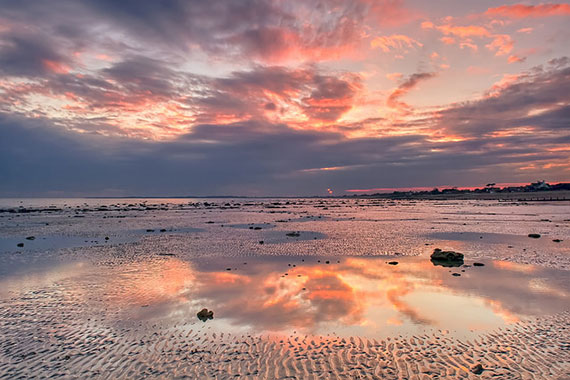
Photo by sagesolar; ISO 400, f/8.0, 1/100-second exposure.
Here’s a pro secret: many of the beautiful colors we see in professional quality sunset photographs have been added with a filter. Particularly in movies and on television. (Photo techniques don’t change just because it’s a movie set.)
We can stack filters and use a colored filter to add colors to the sky and then darken it with a split neutral density filter to rescue the foreground.
For sunsets, tobacco colored filters tend to be very popular. For sunrises, filters trend more toward pink.
So, to create that jaw-dropping, contest-winning sunset you’ve been dreaming about, meter with the sun out of the frame to increase the exposure value. Then slightly underexpose the sky to intensify the colors. Finally, bring back the details in the ground and add color to the sky, if necessary, with filters. Today’s landscape photography photo tip is going to quickly separate you from the crowd. Try it!
About the Author:
Dan Eitreim writes for OnTargetPhotoTraining. He has been a professional photographer in Southern California for over 20 years. His philosophy is that learning photography is easy if you know a few tried and true strategies.
Like This Article?
Don't Miss The Next One!
Join over 100,000 photographers of all experience levels who receive our free photography tips and articles to stay current:


There is sooo much that I need to learn from all of you. I just point at what I see and shoot and hope.
How about spot metering plus one on the sky
The tip of setting the WB to ‘Cloudy’ is right on the money; I have had much better results since trying this out a few months ago.
Thank you for the tutorial.
I was trying to take some shots of sunset behind some trees today but that beautiful orange glow just did not appear on my photos and I did not understand what I was doing wrong. I guess that the problem was that I was metering while pointing the focus at the middle of the sunset and I might have overexposed it.
Wow look stunning
One other tip: Set a manual white balance, most likely either Daylight or Cloudy. If you leave it on Auto White Balance, your camera may decide there is too much red/orange in the scene and throw in some blue to offset that and your beautiful sunset will fade away to blah. Add Filters? Why? Changing white balance to Cloudy gives a warmer view than daylight. We don’t need no stinking filters! Just change a setting.
Metering for the sky: Aim your camera at a part of the sky that looks as bright as the main sunset sky without the sun in it and push the shutter release halfway down. Holding the shutter release halfway, recompose for the actual image you’ve chosen and, without releasing the halfway hold on the shutter release, push it the rest of the way down to take the image. Pushing the shutter button halfway locks in focus and exposure.
Ken-Why bother with photography at all when you can download images from the internet? Doing so takes all the fun out of photography. Are you sure that someone has taken the exact same image you are witnessing? I doubt it.
Have fun!
I disagree with the comment about film, as if you know how to shoot film, you can come up with more effective shots with one take than five takes with digital. Also using filters requires more knowledge, and often works better on film than digital.
Ken, if you are doing artistic photography, especially off the lens work, as I do, you use filters to make an image the way you see it, not the way it is. Someone that snapshoots, does not worry about filters, because they do not understand the importance in creatively modifying an image, they just shoot what is there without worrying about metering, filters, or framing. One of the worst things is to shoot a beautiful image, and have it come out that the person looking at it, is not sure what they are looking at.
Why would you go through the hassle of putting filters on to give you an image that doesn’t exist. Why not just download it off the Internet.
Maybe if you could lay out the steps as to what Metering for the sky means to folks that are Newbies in the area of DSLR Photography when issuing posts like these so that we can read step by step how to do that? That way we will have a much better opportunity to experiment ourselves in capturing those great photos of Sunsets and Sunrises.