We’re all familiar with the cropping tool in our image editing programs. Unfortunately, it is one of the most widely used editing tools, mainly because it’s easy to forget to frame pictures before snapping the shutter. Yes, it is easy to crop images to get rid of ugly background extras, like empty water bottles, and focus only on the part we want. Or sometimes we do some heavy-duty cropping to zero-in on a subject’s face. But if you are planning on printing your images or enlarging them, you’ll get a sharper end result if you do a little planning before you take your shot.
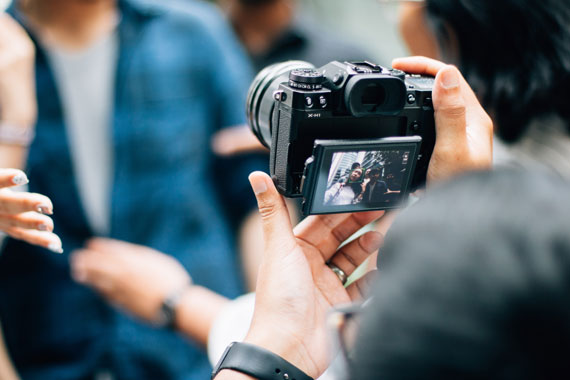
Photo captured by Luke Lung
Whenever you crop your photo, you limit the size you can print your image without it looking fuzzy or jagged. If you shoot in high resolution or you only plan to show your photos online, it is not as big of an issue. However, by properly framing your shots in the first place, you will have greater flexibility in what you can do with your photos, and you won’t have to spend so much time cropping.
Here are some tips for properly framing your pictures:
- Take a minute to compose your shot and see what’s in the background before you have people get into position. Then you won’t have to rush to get your shot when your subjects get restless.

Photo by cheriejoyful
- After you’ve added people to the shot, check out what’s in the background on the left and right sides of your subject. Is there a trash can or telephone pole in the way? Better to adjust your shot now than to have to crop it out later.
- Are there objects in the background that could provide an attractive backdrop to your image? Is there something in the background that can provide a natural frame for your picture, such as an attractive doorway or staircase?
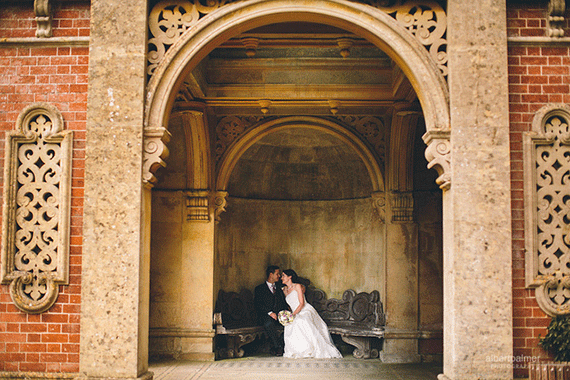
Photo by Albert Palmer; ISO 500, f/2.0, 1/1250-second exposure.
- When photographing people with scenery or buildings/monuments in the background, the foreground should be minimized. Try to focus fairly close up on your subjects so they don’t look like tiny ants in front of a giant building — unless, of course, you are attempting to show how big something is in comparison to the people.
- Landscape photos benefit from showing more of the foreground in order to provide a better perspective.
- Keep the horizon above the center line of the photo to enhance the composition.
- When photographing a landscape, placing an object in the foreground can greatly enhance the image. It can be interesting to focus on an object in the foreground and let the background blur, or try the reverse: focus on the background and let a foreground object blur.

Photo by Thomas D Mørkeberg; ISO 100, f/16.0, 30-second exposure.
By keeping these tips in mind, you’ll find you’ll use your cropping tool much less, you’ll keep your printed image sharp, and you’ll increase your creative options—from making enlarged prints and posters to calendars, and even blankets and pillows with your favorite pictures.
About the Author:
Valerie Goettsch is from Digital Photos 101. She is a researcher, reviewer, copywriter, web designer, and graphic artist for the site.
Like This Article?
Don't Miss The Next One!
Join over 100,000 photographers of all experience levels who receive our free photography tips and articles to stay current:


I’m glad you posted an article reminding folks that good framing (among other things) is an important time saver, and should be done in-camera, if time permits, at the time of the shot.
This is something I had to practice years ago, and then again in my switch to digital.
I grew up with film and was an early convert (late teens) to slide film because the image I received from the lab was the one I “took.” No cropping after the fact with slide film unless a print is being made, and showing slides on a screen reveals all framing faults. Tilted horizons stayed tilted.
Slide film quickly forced me to get the framing as best as possible with every single shot, and this has continued to be an important part of me in these digital photography times.
On my first digital slr, a Nikon D70s, I used a label maker to put a label below my viewfinder that said, “leave room around the edges,” to remind me not to crop quite as close, because I lost critical image parts when, say, straightening the horizon.
Now it’s second nature to me even with my digital cameras, but have always been grateful for that lesson in framing learned from shooting slides.
I’m one of those people that needs to be reminded of little things, and reread old photography how-to books collected over the years, just to keep stuff fresh in my mind.
I appreciate seeing just such a lesson as your’s here on framing, on the internet, the most amazing place to learn about photography, particularly if you don’t like to read how-to books.
It seems like the more megapixels we purchase the more we take composition for granted. In some ways the artform suffers more from technology advances than it gains. When digital surpassed film the recording method shot-counts went through the roof as ther was no real cost of shooting more. Now with bigger sensors and more megapixels we can crop away our problems. There’s a lot to be learnt from slowing down and learning discipline in photography.
couldn’t agree more.
I think every photographer should al least work a month analog to learn how to design a photograph instead of shooting and chimping.