A well executed black and white is hard to criticize. Filled with rich tonality and void of the distractions color can bring, it forces viewers to focus on basic elements, such as form and light. However, with the dawn of digital post processing, the simple process has become a bit more complicated than it once was. Sure, there are plenty of filters available that will quickly convert your image to black and white. But custom adjustments to contrast, tonal values, and coloring require going into a bit more in depth.
What you may not realize is that making all of the adjustments necessary to take your photographs to the next level is possible with the aid of Adobe Lightroom. Nathaniel Dodson put together this excellent guide on how to create several distinct black and white looks:
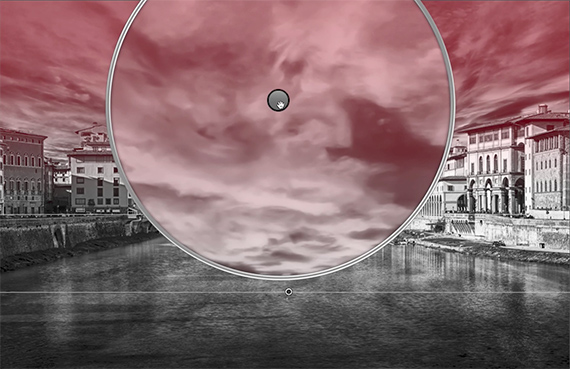
Faux Wide Angle Landscape
Before diving straight into black and white work, Dodson suggests making any initial adjustments to the photograph in color. When push comes to shove, not every image lends itself to black and white conversions. With some basic exposure compensation and color correction, you may very well find that an image is much more striking in color than it ever could be in monochrome.

Should you decide to go black and white, there are a few different ways to go about implementing the effect. In this first example, Dodson utilizes the HSL/B&W sliders located on the right side of the Develop module. By simply pressing the “B&W” text, the image will automatically be converted to black and white. At the bottom of the slider panel, you’ll notice an “auto” button. As you might expect, pressing it will adjust the color to what the program deems optimal. Whether that aligns with the look that you’re after is another matter entirely. Using the sliders provided, it’s possible to adjust the tones within your image by the colors that correlate within a specific area of the composition. For example, switching the value of the blue slider might strongly impact a landscape’s sky, despite the fact that the image has already been converted to black and white.
After you’re satisfied with an image’s black and white settings, it’s possible to intensify the contrast through the tonal curve. As a finishing touch, Dodson utilizes the lens correction panel within the Develop module to manipulate the perspective and mimic an ultra wide angle appearance. The end result? A sprawling, dynamic landscape that’s guaranteed to impress.
Throwback B&W
Black and white filters often lend themselves to portraits just as well as they do landscapes. In this second walkthrough, Dodson demonstrates how he’s able to utterly transform an image that many might deem unusable. Despite being about two stops underexposed and having an odd color cast, a few tweaks and a B&W conversion via Lightroom’s Basic panel is enough to completely alter the feeling of the photo.
Though you can certainly make color adjustments through the B&W sliders in the Develop module, changing a photograph’s tint and temperature can have a dramatic impact as well. Likewise, adjustments to the tone curve can play a major role in crafting your final product. By pulling up the blacks within the curve, Dodson creates a faded, “inky” looking appearance reminiscent of what a film camera might have to offer.
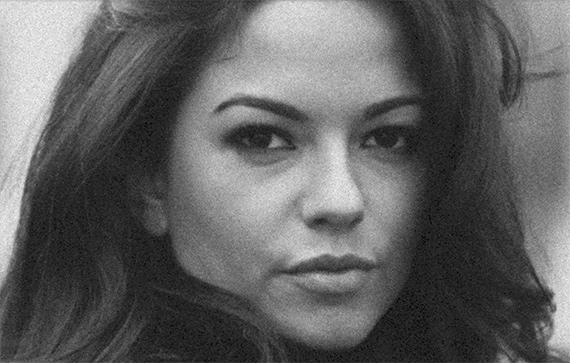
As a finishing touch, he adds digital noise and roughness to replicate the look of film grain. Though this sort of noise is generally undesirable in color digital photography due to chromatic abnormalities that occur, the noise can actually be quite beautiful when converted to black and white, evoking a sense of nostagia.
HDR Conversion
Often times, it doesn’t even occur to HDR photographers to work in black and white. Because the process itself pulls out details in highlights and shadows, HDR images often contain unusually alluring color. However, HDR images often prove to be incredibly striking when color is removed from the equation.
The key to bringing out the best in these photographs is to avoid going overboard. It’s important to keep in mind that HDR images inherently have a fantastic tonal range unlike what is normally found in a single exposure. Adding a bit too much clarity or contrast to a photograph can very easily take a shot from fascinating to tacky and unrealistic.
Once you’ve applied basic adjustments, consider using the brush tool or graduated filter to apply changes to specific portions of an image. That way, if you need to make a tonal or exposure change in a small portion of your photograph, you can make the necessary adjustments without affecting the entire composition. Dodson also points out that split toning and vignetting can also play a major role in improving the look of an image.
“There’s something that’s just so amazing about just that perfect, simple black and white, whether it’s a portrait, a landscape, or anything in between. You just have got to love a well-executed black and white photo.”
Like This Article?
Don't Miss The Next One!
Join over 100,000 photographers of all experience levels who receive our free photography tips and articles to stay current:


I need some more practice on this! I always loved the black and white photos!