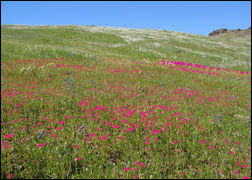
Introduction: This tutorial is to help you learn how to change the color of many flowers all at one time. This technique could also be used for many other things. Ok, once you have your photo open in photoshop:
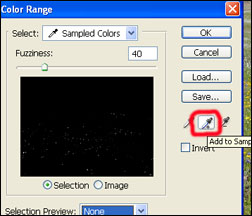
1. Go to the Select Menu and choose Color Range, (Select>Color Range).
2. Click on the Add to Sample Eyedropper.
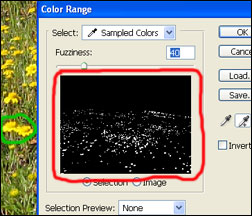
3. (With the Add to Sample Eyedropper) click on one of the yellow flowers. Make sure you click on all the different shades of yellow on the flower.
4. In the preview box, when it looks like you have all the yellow flowers selected press OK.
5. (With the flowers selected) Adjust the Hue/Saturation. (Image>Adjustments>Hue/Saturation).
6. For this photo I chose to change the color to red by adjusting to Hue to about -45.
For Further Training on Photo Effects:
Check out this best-selling eBook on how to do more photoshop effects and photography tricks. It can be found here: Trick Photography and Special Effects
Like This Article?
Don't Miss The Next One!
Join over 100,000 photographers of all experience levels who receive our free photography tips and articles to stay current:


Thank you, I actually understood your step by step instructions and was able to change colors. Too many other Photoshop ‘how to’ guides assume a level of knowledge that beginners don’t have.
You can use selection tool to limit the color range selection (it selects inside the selction).
thanks Richard
this works perfectly with flowers
the only problem I find is that if your changing color of a certain object and other objects have same or similar color it will change all objects of similar color
or I’m doing something wrong
other then that
its great
thanks