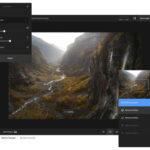
Neon lights add a retro look to an image but they aren’t something that you can find in a small studio. Adding them in post is always an option, but it’s easier said than done. Neon being a light source in itself, it’s important that you get the lighting correct in-camera before opening up the image in Photoshop. Photographer Gavin Hoey from Adorama demonstrates how you can take an image and add a neon light to it later in post:
The idea is to photograph the model against a dark background so that the neon can be added easily later. Be sure to light the back of the model with a light as if the neon light is actually there. This way, you do not have to spend too much of your time fiddling around in post. Also, use a gel that’s the same color as the neon light that you want to add later in post.
By lighting the model on the back and the sides, it gives the illusion that she’s really standing in front of a neon light. Pop a flash at the front, and you can expose for the face. To make it more dramatic, Hoey chooses to use a blue gel for the flash in the front. Use some interesting props and that’ll take the shoot to the next level.
Adding the neon is only about importing the neon image, and masking it to place it behind the subject. With a little bit of Photoshop knowledge it shouldn’t take too much of your time. And to make it appear even more realistic, you can even blur it out. This gives the perception of a shallow depth of field, making it more believable.
Like This Article?
Don't Miss The Next One!
Join over 100,000 photographers of all experience levels who receive our free photography tips and articles to stay current:


Leave a Reply