Photomatix Light is designed for photographers who want a clean, straightforward introduction to HDR, but is powerful enough to produce superior-looking results. Photomatix Pro is the software preferred by the majority of professional HDR photos, but this light version was recently made available for photographers looking for a quicker and easier solution to producing professional grade HDR photos.
HDR or high dynamic range photography is a technique that allows a greater range of light exposure between the lightest and darkest areas of an image. This wider dynamic range allows HDR images to more accurately represent the wide range of intensity levels found in real scenes, ranging from direct sunlight to faint starlight.

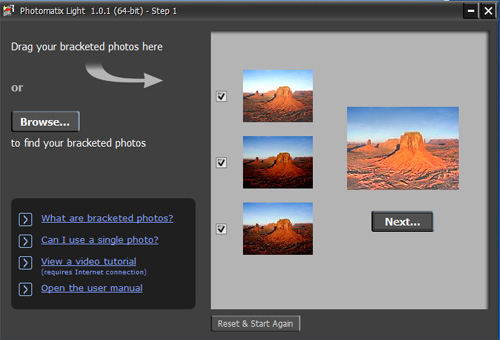
Photomatix Light User Interface
How to take an HDR Photo:
- Select the scene you want to photograph
- Mount your camera to a tripod (to make sure your three exposures are of the exact same scene)
- Set the exposure mode to manual. Meter for a normal exposure.
- Take three pictures (or more if you want to get a wider range of exposures). One picture at normal exposure, one picture underexposed by two stops, one picture overexposed by two stops. Many cameras have settings available where the camera can take these three exposures automatically.
Photomatix Light has a simple interface onto which you can drag up to five bracketed images, which are converted in seconds into an HDR image. If you don’t have bracketed photos, you can use the Tone Mapping mode to create a pseudo-HDR image from a single JPEG or RAW file. It’s a very easy piece of software to use, with preview results always on display in real time.

Splicing Metered Photos in Photomatix Light
Additional Photomatix Light Features:
- HDR processing from JPEG, TIFF, PSD and RAW files.
- Automatic alignment of bracketed photos.
- Reading of exposure information from Exif data.
- Two HDR processing methods: Exposure Fusion (for “natural” look) and Details Enhancer Tone Mapping (for more “surreal” look)
- Dialog with preview for adjusting the following settings:
- Exposure Fusion: Accentuation, Blending Point, Shadows, Color Saturation, Midtones contrast.
- Details Enhancer: Strength, Color Saturation, Smoothing, Luminosity, Microcontrast.
- HDR processed image can be saved as JPEG or 16-bit TIFF.
- Color managed display.
Learn more here: Photomatix HDR Photography Software
Like This Article?
Don't Miss The Next One!
Join over 100,000 photographers of all experience levels who receive our free photography tips and articles to stay current:


I really like the natural look of HDR photography. The St Paul’s church pix looks great. I like the Neptune Marina picture but it looks “photoshopped” and not natural. But it is a great picture. I am glad you put up the review as I am considering getting into doing HDR for interiors. I have been doing budget beach weddings for years and now want to do landscapes and real estate. I hear that Photomatix is the industry standard or at least most popular…
Photomatix Light was the first product that I bought. I was pretty happy with it and decided to upgrade to Photomatix Pro Plus. Wow! So much better. There is a big difference in the amount of control over images between Light and Pro. I would recommend either however…it just depends on what you need.