In today’s DSLR photo tip, we will discuss HDR photography, how to do it, and why.
For some reason, this has become a real hot button issue with photographers. Some swear by it, others hate it!
First, what is HDR photography?
Defining HDR photography is one of those areas where it can get very detailed and packed with mathematical formulas and whether or not a certain image qualifies and on and on!
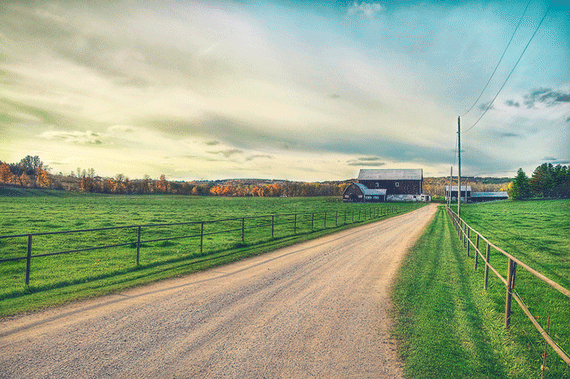
Photo by Bardia Photography
For this article, we are just going to keep it light and explain the basics. Please, all you technical types, don’t bother sending me all the calculus formulas.
HDR stands for High Dynamic Range.
In our past discussions on getting great sunset photos, I alluded to several problems. If you expose for the sky, the ground will generally be underexposed and will go black. If you expose for the ground, the sky will be overexposed and get washed out.
This is because of the dynamic range of the film or digital sensor. It can only record just so much detail. This is generally known as the standard dynamic range (SDR). When the details in the scene exceed the standard dynamic range, they get lost.
Think of a sunset shot with a silhouette of a person. In SDR you lose all the detail in the person and that is what creates the flat black shape.
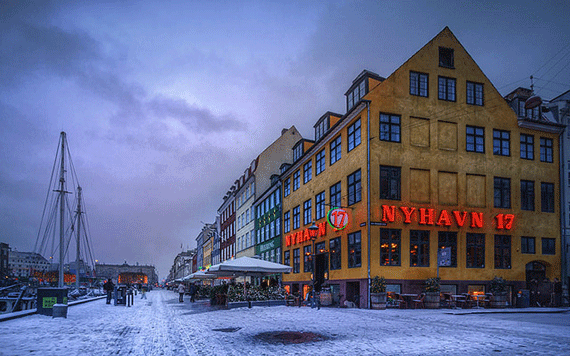
Photo by Jacob Surland; ISO 100, f/13.0, .3-second exposure.
As I’ve mentioned before, some of the detail can be recovered by using split or graduated neutral density filters. They would hold back some of the light in the sky, allowing the exposure to be more friendly to the ground. But, there is a better way.
What if we took multiple shots? We could take a shot of the sky at its perfect exposure, and another of the ground at its perfect settings, then later in Photoshop or some other program, we could combine them.
Then we would have a perfectly exposed sky AND a perfectly exposed ground!
This is a very simple shot with two exposures. Typically, there would be at least three. One of the sky’s settings, one “normal” exposure, and one with the ground’s ideal exposure.
I’ve seen some HDR photos that go as high as 7 bracketed exposures! Bracketing means that you are shooting at exposures both above and below the “correct” exposure. You are bracketing it.
Now, let’s say you’ve done a series of 7 exposures, from way over exposed all the way down to way underexposed. When you combine them, you are going to get a dynamic range that is higher than your computer monitor is capable of showing.
That is HDR.
It has to do with bits and luminosity and so on… but let’s just say there are several programs that are designed to deal with this issue and work their magic with “tone mapping”
That’s a whole ‘nother article.
I think the debate over HDR is that it isn’t a “pure” image created in the camera. To work in HDR you MUST have some sort of computer program to combine the images. The HDR haters are the same ones that used to object to retouching negatives or adding filters, etc.
To my way of thinking, it’s the image that counts. If you like it, it doesn’t matter what techniques were employed to get there.
The whole point to HDR photography, how to do it, and why, is that—if well done—the final result can more accurately display what you saw with your eyes and give you some pretty stunning results.
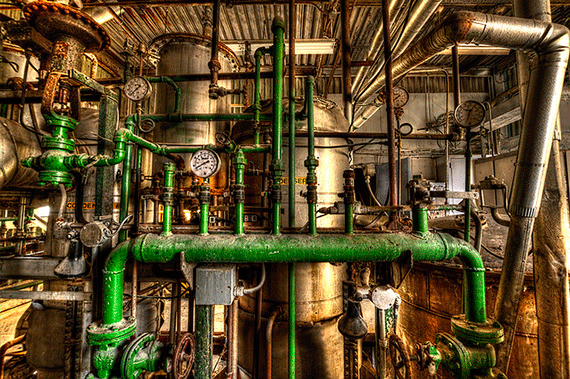
Photo by Freaktography; ISO 100, f/8.0, .6-second exposure.
Like everything else, a lot of photographers have gone overboard with the technique and produced some really bad results. I think this is what fuels the anti-HDR crowd.
Your assignment is to look up some HDR photographs and see if you like the technique or not. If so, give it a shot and create some simple ones of your own. Then you can look into some of the HDR programs and become an expert!
About the Author:
Dan Eitreim writes for OnTargetPhotoTraining. He has been a professional photographer in Southern California for over 20 years. His philosophy is that learning photography is easy if you know a few tried and true strategies.
Like This Article?
Don't Miss The Next One!
Join over 100,000 photographers of all experience levels who receive our free photography tips and articles to stay current:


Photography for me is as subjective as creative writing can be. To prove my point, we all know that very few people can enjoy historical novels the same way or as much as they might enjoy dystopian fantasy novels. This is because serious readers tend to dive deep into a specific niche rather than dabble lightly in several genres.
The same goes for photography.
There’s nothing wrong with this approach, and so I am of the opinion that artists should focus on honing and improving their craft and pick a niche or a technique that works for them. If fame and fortune are what they desire, then they will focus on finding out what the masses enjoy and cater to their ever-changing whims and trends.
As for me and my art, I will continue to capture the beauty that I see and hope that that finds its own audience who enjoys my work as much as I do.
By default, I’m the kind of photographer that considers a photo to be a success when the viewer sees what I saw when I decided to take it. A lot of times SDR just doesn’t cut the mustard. I have very poor success in making selections in PhotoShop (no matter how I set the sensitivity of the magic lasso, it either selects parts I don’t want or ignores parts I do want, and manually defining the selection area is maddeningly piddly), and adding to/removing from the mask is its own kettle of fish. And then I still have to smooth out the hard edge–somehow. A dedicated HDR package saves me a lot of time and torn hair. A lot of HDR isn’t recognized as HDR simply because it corrects for the limitations of the digital sensor to create an image that seems like a “normal” SDR that film would produce.
That said, HDR offers a new dimension in photography that the painter in me loves to play with (Photomatix has presets named “painterly,” “surreal,” and “grunge”). People that expect a photo to look like a slice of the world (albeit in perfect lighting and sharpness) seem to want to dis anything that doesn’t “look” like what a photo’s been for the last century. Right now I’m fuming because I’ve been looking over my county fair entries, and in the “computer enhanced” enlargement (I tonemapped it to improve detail in the foreground horses and break up the distracting high-contrast patches in the background that were drawing the eye away from the subject, then increased the overall contrast to bring out the foreground even more), the judge (who apparently loved one of my HDR entries and trashed the other twelve) wrote “when enhancing is should Improve the Picture.” What can I say–except this judge also gave a second to a fireworks burst with obvious camera shake, putting it above several other technically correct entries. (And that’s not the first time I’ve seen a judge do that.)
If the only issue is to hold detail with a subject that has a dynamic range exceeding the capability of the camera’s sensor, then I would suggest photographers exhaust all of the vast resources Photoshop has to offer, before considering HDR. If the goal is to achieve a specific HDR look, then that would be another matter.
For the sole purpose of contrast reduction, I feel that HDR tends to be a highly flawed process for achieving high quality results. Part of the problem lies not only with the software, but with digital sensors themselves. When a digital sensor’s pixels are overloaded with light, they cause an effect that looks somewhat like flare or halation. This effect will often be evident to a great extent in the lighter exposures of a series of bracketed exposures intended for use in an HDR image, and this effect will often be retained in the final HDR image. If combining the various exposures as layers in Photoshop, one has a better chance of being able to edit out this effect than by trying to do that later on an HDR image. Also, depending upon the subject matter, one might have the ability to add some supplementary lighting to help make the retouching process easier.
I would like to mention that Michael Freeman, the author of one of the most widely read books on the subject of the HDR technique, abandoned his use of the technique out of frustration with the limits of the process. My photographic specialty, architectural and interior photography, often involves photographing high contrast subjects, for which the HDR process would seem to be tailor made. However, I, and it seems most other architectural/interiors photographers, avoid HDR and prefer to use Photoshop layer/masking or supplementary lighting, or a combination of both, to deal with the high contrast subject matter.