Whenever I return from a shoot, I go through this process every time with each camera so that they are ready for the next time.
1. Camera bodies off. This is to remind me that I use a variety of lenses and if I remove them, I have to select an appropriate one for my next shoot.
2. Camera batteries recharged after each and every shoot—no exceptions. I have lost count of the number of times when I am in the middle of a shoot that I get a battery warning. To this extent, I even take along a spare battery for each camera.
3. Flash off. Get in the habit of doing this, as you don’t want to scare wildlife or pets by accidentally firing off the flash.
4. Flash batteries recharged after each and every shoot—no exceptions. I’m paranoid about this aspect; in fact, all batteries get charged straight away. Having rechargeable batteries is a must, in my opinion.

Photo by Natilyn Hicks; ISO 250, f/2.8, 1/1000s, 50mm.
5. Check to make sure the memory card slot is empty and working correctly. This reminds me that I should routinely transfer my images to another storage medium like my portable hard drive. I also take spares along for each shoot.
6. Check spare memory card. I get in the habit of checking all my memory cards for damage and wear and to make sure they can be read without problems.
7. Set quality settings to RAW/JPG. I use this setting as opposed to just RAW or just JPEG. If I want to process the images more I can, or if I am happy with the images, I don’t have to do much processing in JPEG.
8. Set ISO to 200. This is a good idea regardless of the weather or lighting conditions, i.e. sunny or cloudy. I don’t like highlights to be blown, and this setting allows me some leeway in processing the images.
9. Set aperture to wide open on all lenses. This is the setting I most use for portraits, as it blurs the background nicely while keeping the subject in sharp focus.
10. Set shutter speed to 1/125 of a second. This is a decent shutter speed for most of the lenses I use in portraits. As I usually choose a focal length of about 90mm, it helps prevent camera shake issues.
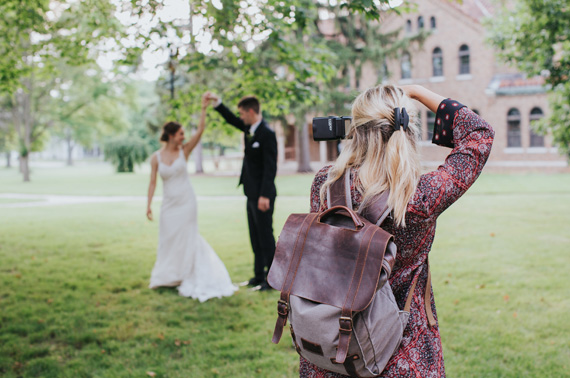
Photo by Mariah Krafft; ISO 250, f/4.0, 1/50s, 50mm.
11. Set mode dial to Aperture Priority. I prefer to shoot in aperture priority as most of my portrait subjects are fairly stationary.
12. Set metering mode to spot or matrix. I find this gives me the best metering for the stable exposure conditions that I work in.
13. Set white balance to auto. I work with this setting the most; however, if I’m in my studio, I will normally do a preset with a grey card.
14. Set exposure compensation to 0. This prevents me from over exposing or under exposing since I was out last in daylight and had to adjust the exposure compensation.
15. Reset the focus point to the center, single point. This is my preference for most shoots.
16. Set shutter mode to single. Most of the time I don’t use continuous shot mode unless I am taking fast action sports or wildlife shots.
17. Set all lenses with focus stops to focus maximum area of focus. A good habit to get into. You can always adjust accordingly.
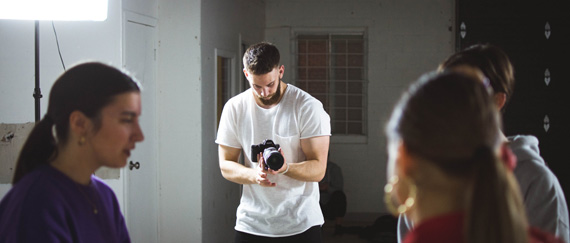
Photo by William Bayreuther; ISO 500, f/1.8, 1/250s, 35mm.
18. Remove any and all filters. This prevents you from leaving the polarizing filter or the neutral density filter attached. It’s amazing how often this happens and it takes a while to see what the problem is.
19. Check that the camera body and any/all lenses are set to auto-focus (unless you just always use manual focus, in which case disregard.) This is a great tip as you can grab the camera for a quick shot in most situations.
20. Do a quick visual examination of the camera to look for damage defects. I usually check lens surfaces, the screen, and everywhere else if I’ve been out in the rain or wind when sand is blowing about.
21. Reset additional gear like tripods, light stands, etc. They all go back in their individual bags and covers. It also means that I don’t leave bits lying around—my greatest concern after a shoot.
About the Author:
Geordie Parkin keeps a website about wildlife photography, pet photography or general questions about digital photography (photopress brianparkin). Parkin is a photographer based in Forest Lake, Qld in Australia.
Like This Article?
Don't Miss The Next One!
Join over 100,000 photographers of all experience levels who receive our free photography tips and articles to stay current:


ermmm its nice to have a picture associated with an article but apart from the error/s that has been pointed out I have just been and looked at the web site of the Authors and is wondering does he take his own advise theres a lot to be desired lots of out of focus and what i would call Point N Shoot stuff and as for the Pets side ermmm…well ill leave you all to make your mind up
Again no disrespect article is helpful for those that forget to do these things just a slight conflict in some points
Great article with lots of practical information – many thanks. I’d suggest that unless the photographer has a dedicated camera used exclusively for work shots, it would be better to separate the list – one for after-shoot items, another the pre-shoot “to do” list. Certainly charging batteries, cleaning, transferring media/reformatting, etc are all top items, and I’d add others like cleaning lens smudges, ensure you didn’t leave anything at shooting location, etc. Regarding pre-shoot camera settings, here’s my checkout list:
1. Mode shooting
2. Metering
3. Time value
4. Aperture/Iris
5. Compensation
6. Focus points
7. Stabilization
8. ISO
9. White balance
10. Lighting
11. Resolution
12. Ratio (4×3, 16×9)
I am a bit new at this, but items 9, 10, and 11 are a bit confusing to me. In item 11 you say you select Aperture Priority and in item 10 you select a shutter speed of 1/125. If you select AP mode doesn’t the camera select the shutter speed which may or may not be 1/125? In order to independently select AP mode and a specifically desired shutter speed wouldn’t Manual or perhaps Program mode be required?
#9. How do you set the aperture on all the lenses if they aren’t on the camera, if there are like Nikon G type lenses? Of all the lenses that I have, I have only one where I can set the aperture on the lens itself. But, when I do, I can’t shoot in Aperture mode.
#4. I never have a problem leaving batteries in my camera. But, the AA rechargeables seem to lose charge faster if they are left in the Flash unit. I always remove them after a shoot.
@John T. My thoughts exactly. If you are in Aperture mode, you control shutter speed by adjusting the ISO & aperture. You can’t set all three. Well, of course, you could do it in Manual. But then, I have no experience with a 60 D.
Doesn’t step 11 over ride step 10 ? Why set the shutter speed to 1/125 in step 10 if going into Aperture priority mode in 11 ?
@David – Aperture Priority gives you direct control of the camera’s lens opening setting. The larger the aperture you select manually, the faster the shutter speed that the camera selects for you. Conversely, the smaller the aperture you choose, the slower the shutter speed selected by the camera.
Great tips and reminders…..thanks:)
Could you tell me how you set the shutter speed in Aperture priority.I have a Canon 60 D.