Candles are a unique light source that can result in breathtaking photos. Candlelight temperature is different than flash, daylight, or regular bulb light. Using candlelight is hard and requires experience. This article will provide you some basic ideas with which you can start experimenting.
“Candle” captured by Leland Francisco
Candles can be used in a few ways:
- They can be a light source that lights an object in the photo but not appear in the photo themselves.
- They can be used as a light source and also participate as an object in the final photo.
- They can participate as the main subject of the photo.
Remember to eliminate other light sources. The goal of candlelight photos is to achieve an effect that is based on the unique characteristics that candlelight provides, such as its warmth. In order to maximize this effect you should make sure that there are no other light sources that contaminate the scene. A simple test for that is to blow out all the candles and make sure that the scene is completely dark. It goes without saying that you should make sure that your camera’s flash is turned off. In some cases, a small amount of additional light source can be used. After experimenting and gaining experience with candlelight photography you will get a sense of when allowing some other light to penetrate the scene makes sense and at which angles and intensities.
Candlelight is not as strong as other light sources. It is much weaker than your camera’s flash. For that reason, candlelight photography will almost always result in low light, slow shutter speed photography. Although it is recommended that you use a setup in which you maximize the aperture width and minimize the shutter speed it is likely that you will end up having to use slow shutter speeds.

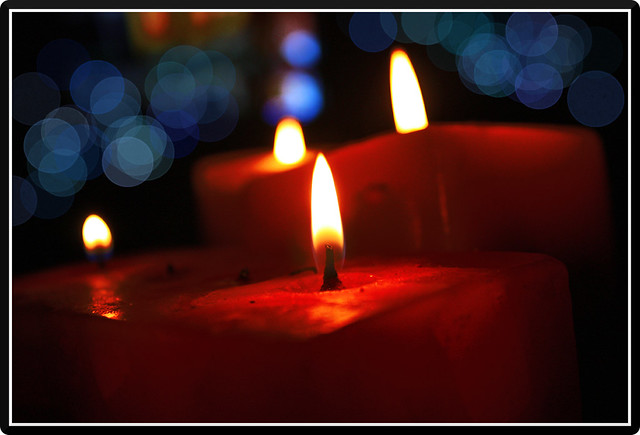
“Red” captured by Alberto Roseo (Click Image to See More From Alberto Roseo)
There are a few things you need to consider:
- Camera shake. This can be eliminated by using a tripod or by placing the camera on a stable surface and using the built-in timer.
- Subject movements. If objects move during the period in which the shutter is open, the photo will appear smudged. Make sure that the objects you are photographing do not move and that people do not blink. Another movement source is the movement of the light source itself.
- Flickering. Although it is hard to completely eliminate this phenomenon—and some flicker is actually welcome in order to get a good candlelight effect—it is recommended that you prevent extreme flicker. This can be done by making sure that there is no wind blowing in the scene, that the candles are on stable surfaces, and that they were lit for a while and burn consistently.
Determining the right shutter speed is also hard. Since the candle’s light is bright on the one hand but also concentrated in a small area and weak once farther from the candle, most cameras’ ambient light measurements and automatic shutter speed settings will be wrong. Try to take a few photos with slower and faster shutter speeds and explore the results.
The amount of light in the scene depends on the number of candles that are used. Since candles are not a strong light source, you would usually need to use a few candles. Sometimes you might want to have a small number of candles appear in the photo itself but you might still need to have more candlelight in the scene. In such cases you can use extra candles to light up the scene but keep those candles out of the composed photo. When you do that, make sure that the additional candles are placed in a way that make sense. For example, make sure they do not create shadows that do not appear normal in relation to the candles in the photo.
Lighting is an art. Using candlelight as a light source is an art by itself and requires experience. There are some basic rules for candle positioning. For example it is clear that the candles should be closer to the camera than the objects. Otherwise the result will be a silhouette of the objects. Different lighting angles create different shades and different effects. For example, if you are photographing a person and the candles are placed in a low position relative to the person’s face, you will get a more scary effect. On the other hand, if the candles are placed at the same height as the person’s face you will get a warmer and softer effect. It is hard to provide candle positioning rules and such positioning greatly depends on the effect that you are looking for. More than one candle can be used with each at a different position to create more complicated effects and to eliminate unwanted shades. The best advice is to take many photos and experiment with different candle positions and angles.
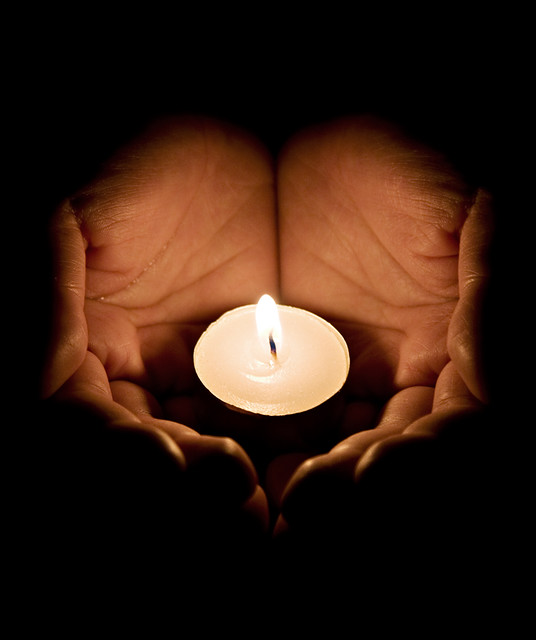
“Keeper of the Light” captured by Roy Chan
Last, but not least, is white balancing. Digital cameras can be set to compensate for the specific light source that is used. Although most cameras can automatically detect and set their white balance, it is better to manually set the white balance. Some cameras include a candlelight source as an white balance option. It is also worth experimenting with setting the white balance to the wrong source on purpose. Set the white balance to different temperatures to achieve different effects—more reddish photos, for example.
To conclude, candlelight photography is tricky. It requires a lot of experience and understanding of lighting, shutter speeds, and other photography issues. Such experience pays off with breathtaking photos and effects that sometimes appear more like paintings than photographs.
About the Author
Ziv Haparnas is a technology veteran and writes about practical technology and science issues. This article can be reprinted and used as long as the resource box including the backlink is included. You can find more information about photo album printing and photography in general on http://www.printrates.com – a site dedicated to photo printing.
Like This Article?
Don't Miss The Next One!
Join over 100,000 photographers of all experience levels who receive our free photography tips and articles to stay current:


Had just been thinking about this today, terrific tips and very timely. Thank you! :)
nice I have just tested it with great results