Since I like to travel light, I rarely buy souvenirs. The most important things I bring home from a trip are my photos. I love taking and sharing photos, but I’m very much an amateur photographer.
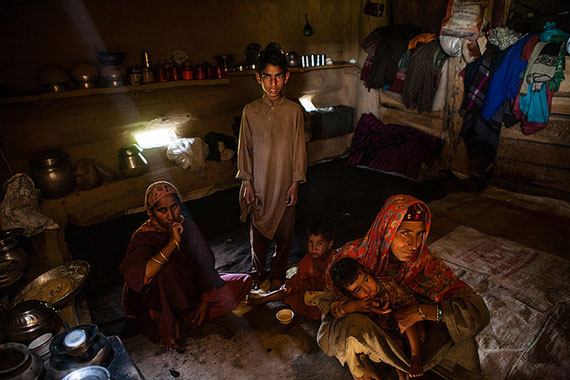
Photo by sandeepachetan; ISO 1600, f/2.8, 1/30-second exposure.
I don’t know the lingo and I have a DSLR (digital single lens reflex, whatever that means) camera that ups my street cred, but in all honesty, I’m still figuring out what most of the buttons and settings do.
It’s intimidating to wade through all of the information, equipment, and technology available, but there are a number of things that you can do immediately to ensure that you come home from a trip with a great set of photos that are presentable and fun to look at regardless of the type of camera you own.
These are some of the things that I quickly think through whenever I’m setting up shots:
1. Prioritize your subject
Don’t try to highlight everything in one shot. If there is more than one potential subject in the frame, decide what takes precedence and then focus on it.
Do you care more about the person or the landscape? The two should not be competing. If it’s the landscape, make sure the person is not obscuring any important elements. Consider shifting them left or right. If it’s the person, bring them closer to the camera so that you can really see their face and have the landscape serve as a beautiful backdrop.
Before you click, scan what’s inside your frame to make sure you’re not cutting off any important elements (the top of a mountain? the top of a person?). Include some space around the subject to create a natural border. When in doubt, include more space than less. It’s easier to crop a photo later than to Photoshop an arm back in.
2. Don’t shoot into a light source
Unless you know what you’re doing, your subject will be back lit and the light will wash out the entire photo. If you really want to take the photo, and the light source isn’t too strong, you can try shooting with a flash so that it lights up the subject in front of the light source. Sometimes this works, sometimes it doesn’t. It can look kind of artificial.
On the other hand, light hitting a subject at an angle can create some beautiful effects and contrasts.
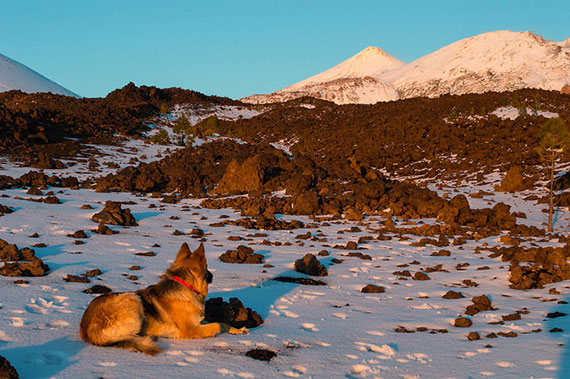
Photo by perlaroques; ISO 100, f/14.0, 1/13-second exposure.
3. Make sure your subject is actually in focus
Maybe you’re looking at the person, but the camera has decided to blur them out and focus on the leaves in the background. Check before you click. Use a tripod or surface to stabilize your camera if necessary.
4. Experiment with different camera angles
While shooting at eye level will give you some concise, straight-forward photos, try occasionally shooting at different angles to add interest. Shoot subjects from above, below, and the side. This will make for more dramatic photos and create size variation and interesting perspectives. In some cases, it will also allow you to capture more details because you’re cutting across planes. Plus, kneeling down to take a shot makes you look really cool.
5. Include variations in color, texture, and/or light
If what’s in your frame doesn’t include contrasts in at least one of these areas, your photo will probably be quite flat and blah to look at.
6. Find frames within the environment
Try to find things that can be used as frames for subjects in your photo. A window or a doorway are more obvious options, but don’t limit yourself. Think outside the box. Shooting through a bike wheel or a space between a collection of objects could create an unexpected and interesting shot.
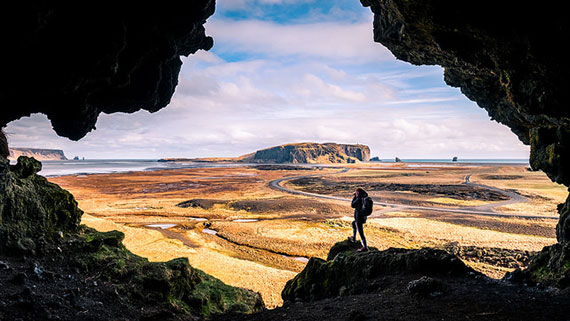
Photo by Giuseppe Milo; ISO 400, f/8.0, 1/350-second exposure.
I personally think the most important part of photography is learning to see things in different ways and being flexible with your vision. After you’ve become more adept at setting up these basic shots, a lot of “rules” can be disregarded to create more avant-garde photos, but this is a good place to begin to ensure that you take sharp photos that “pop.”
About the Author:
This article was written by Perrin Smith from nodnsmile. A backpacking and photography enthusiast.
Like This Article?
Don't Miss The Next One!
Join over 100,000 photographers of all experience levels who receive our free photography tips and articles to stay current:


Excellent article. Simple and helpful. I’m at about the same level of photography as the author and agree with all its contents. I’ve had several of my photos published in the travel section of USA TODAY so I occasionally get a winner. I remember reading a quote from Ansel Adams. He said that if you take a hundred photos in a day and one of them is really good, it’s been a successful day. And, in the digital age, those hundred attempts are free!
It’s nice to see articles that are not from pros but from people just like me. Sometimes we need that break from technicality toward practicality!
I get some of my most interesting pictures shooting directly into the light, leaving my subject out of the center of the frame ect. While this advice can be followed to create “good” photos, one needs to think outside the box to create truly excellent images. These rules are defiantly more like guidelines. I have seen many truly excellent pictures where these rules have intentionally been broken.