Sometimes your camera confirms that the AF has been locked but when you review the image later, you see that the camera has missed critical focus. This “false positive” AF lock occurs most often in low light or with a low contrast subject. Photographer Steve Perry has a solution for you. In this video, he shares a technique that he uses with static wildlife to nail focus right on the eye:
Challenges in Nailing Focus
The camera’s AF system will struggle in low light and low contrast situations, no doubt. Perry’s experience tells that the following are clues that the camera is struggling to lock focus:
- Your camera initially fails to lock focus and hunts around for a while. This is a good reason for you to be skeptic about where the camera has locked focus.
- When using the camera in AF-C / continuous servo, the frame seems to be jittery with the AF actively engaged.
- The camera seems to lose focus easily for no reason and has a hard time maintaining the focus lock.

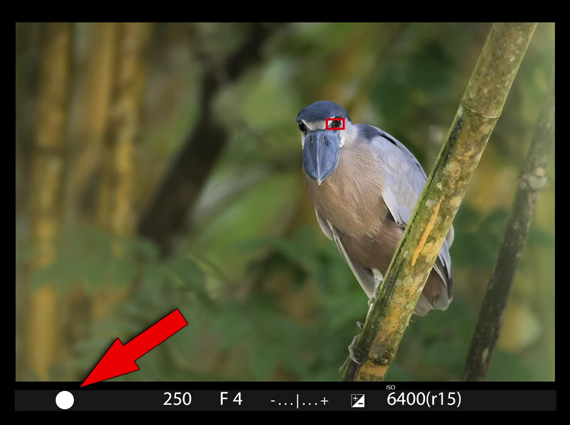
Examples of low contrast scenario around the eyes where the camera can miss focus.
How to Nail Focus Every Time
If you can’t tell if you’ve nailed focus on the eyes, you can use Perry’s technique.
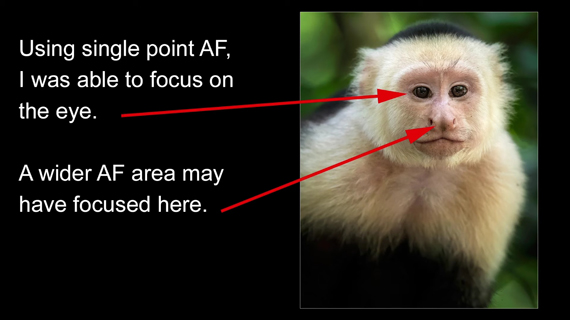
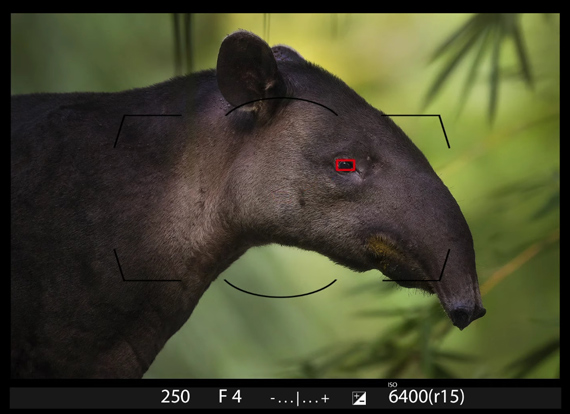
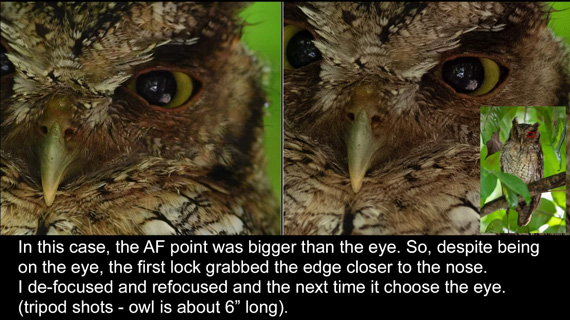
Focus Area: Define your focus area precisely in order to get accurate focus. The first thing you can is to use Single Point AF. Doing so allows you to place the AF point precisely over the area where you want the camera to focus. If you use a wider area AF, the camera may focus on the nose when you want to focus on the eyes.
AF Point Position: A good practice is to compose your shot first, and then move the single AF point to the subject’s eye. But, if a low light or low contrast situation comes in as a challenge, the camera will struggle to lock focus. Use the AF points that are closer to the center. They perform better even in low contrast and low light conditions.
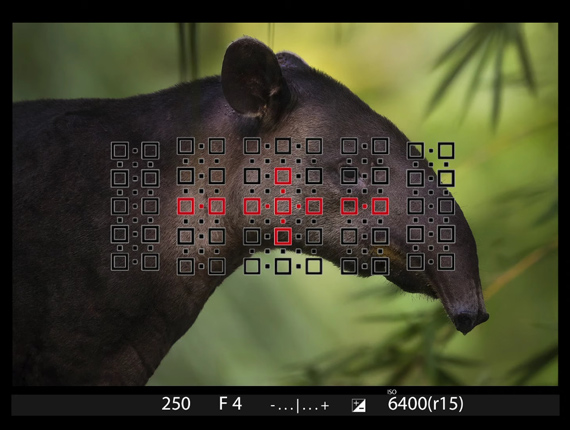
In challenging situations use central AF points as they are more sensitive.
How to Ensure Perfect Focus
Now that you’re aware of the things to consider for accurate focus, let’s move on to the technique that Perry uses to ensure perfect focus.
Focus on the subject’s eyes. Once the camera confirms that the focus is locked, take a short burst of photos.
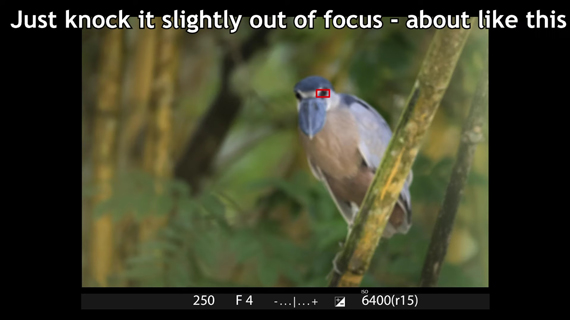
Next, de-focus the lens a little bit by rotating the focus ring slightly. For some lenses and camera brands, you may need to go into the camera menu. Be sure to go through your camera and lens manual if you’re not sure on this matter.
Again lock the focus on the subject’s eye and take a burst of photos.
Follow these steps a few times depending on how difficult the situation really is.
When you use this technique, the camera gets different windows of opportunities to pick slightly different planes to lock focus. And the chances of at least one image being in sharp focus will increase when you do this multiple times.
“This technique isn’t something that you should do for every subject every time.”
Try this technique out when facing tricky lighting or low contrast situations and let us know if it works for you!
Like This Article?
Don't Miss The Next One!
Join over 100,000 photographers of all experience levels who receive our free photography tips and articles to stay current:


Sunny,
For a while now I have been using a variant of your technique with my 100 – 400 Canon lens. I will focus with the back button and then before the shot, I will release the BBF and then refocus with the BBF. Sounds like a similar technique except that I do not go out of my way to defocus.