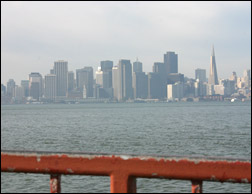
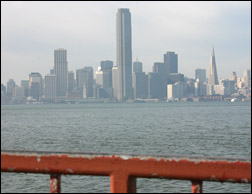
Introduction: This tutorial is to help you learn how to adjust the skylines of cities to change building height or size. With this tutorial I changed the height of one building so it would be the tallest in San Francisco. Ok, once you have your picture open in photoshop:
1. Select the Rectangular Marquee Tool (M). And zoom in on the building you would like to make taller.
2. With the Tool, try to select from just a little above the base of the building to the top. Then Copy the selection (Edit>Copy)
3. Then Paste the Selection (Edit>Paste). (What this did was it pasted the selection onto a new layer).
4. Then select the Move Tool (V) and with that new layer selected, move the copied part of the building up higher to make the building taller.
5. What I did to make the building even taller is I just repeated steps 2-4 over again.
For different photos, the process and amount of adjustment won’t be exactly the same. But you could also use this technique to copy in buildings from other photos to make a whole new skyline.
Like This Article?
Don't Miss The Next One!
Join over 100,000 photographers of all experience levels who receive our free photography tips and articles to stay current:


Leave a Reply