“Real pros shoot manual.”
If I had a penny for every time I had heard this in a photography forum, I could have given up wedding photography years ago and bought my own island. The sad fact is that photography forums are not really a great place to learn about photography. More often than not, one or two “strong characters” will voice an opinion, and then their acolytes will repeat it until all opposition is crushed. Forums are more about clashes of egos than real photography advice, with one or two notable exceptions.
Often, the best real-world choice is worked out by photographers in the field, not armchair enthusiasts with an axe to grind. I have shot in manual mode for prolonged stretches, and I do still use it if that’s the best option, but for wedding photography or anything where things can unfold quickly, I find aperture priority the best choice.
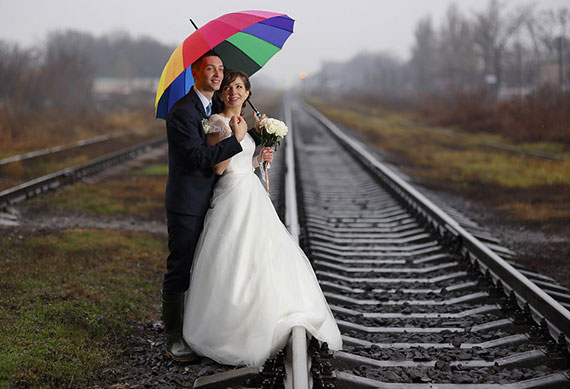
Photo by Vladimir Pustovit; ISO 400, f/2.0, 1/1250-second exposure.
My Journey Away from Manual Mode
Like most young photographers who started shooting film, I was taught to shoot in manual mode and use a separate light meter. I used black-and-white film and slide film. Slide film has a very low tolerance for exposure error, so measuring light with an incident meter was a must. If you don’t know, an incident light meter measures the light falling on a subject and disregards its tone, so the reading is always accurate. In an ideal world, this is the best choice; the trouble is, this isn’t an ideal world!
I have always loved street photography, and it’s something I’ve done for pleasure for many years, but more often than not, the lighting conditions are not ideal. In many ways, this was my training for becoming a wedding photographer. For years, I shot in manual—mainly because I used a rangefinder (a Voightlander Bessa R), and it only had a manual mode. This was fine when the light was consistent, but a total pain if it wasn’t. I would meter and set my camera up for sunlight only to miss shots in the shade or vice versa. On days with broken sunshine, the light would be a constant frustration, and I would have to constantly refer back to my meter. In the end, I spent more time checking my light meter than I did shooting pictures, and I knew something had to change.
When I switched to digital for my 35mm work, I started to play around with my technique to suit the new equipment I was using. I found that the in-camera metering was good enough. Most of the time, I could let it do its own thing, and the exposures would be dead on. I had enough experience to know when they wouldn’t be, and in those situations I would override the camera. I found that using aperture priority mode meant I spent more time looking for pictures and less time worrying about camera settings.
The Speed of Auto, The Control of Manual
When I started shooting weddings, I found that my aperture setting was one of the main weapons in helping me turn the chaos of a wedding into beautiful images. Aperture choice is one of the main determining factors towards the look of a photograph. You can use it to blur out the busy backgrounds that can ruin wedding shots. Weddings move fast—too fast for fiddling around with your camera if the light changes, so a degree of automation is a real necessity.
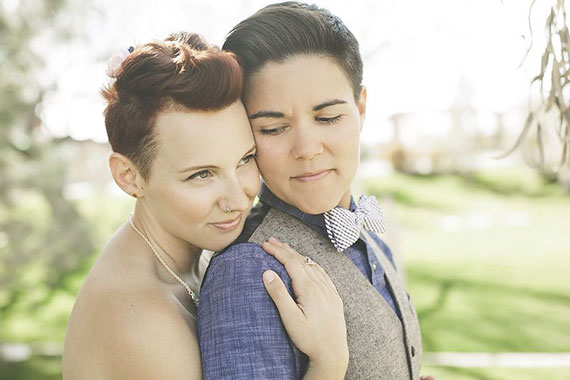
Photo by Kim Leutwyler; ISO 320, f/2.8, 1/1000-second exposure.
Reasons I Prefer Aperture Priority
Here are the reasons I prefer Aperture Priority over Manual mode in a wedding environment:
1. Most of the time it’s just not possible to use a separate meter.
If you’re positioned at the back of the church during the ceremony and the light changes, you can hardly walk up the aisle, take a quick incident reading off the bride’s face, and retire back to your station. If you are using the camera’s built-in meter, there is very little point in setting the camera manually when the camera would set itself to the same way automatically. If I feel that the camera has got it wrong, I use exposure compensation. That way, if the light levels drop, the exposure will still be correct.
2. Aperture priority gives me control over the look of an image.
Depth of field can have a decisive effect on the look of an image. An aperture of f/2.8 will look very different to f/11. Once the shutter is fast enough to freeze motion, you can’t tell the difference between 1/500 and 1/2000 of a second, so Shutter Priority mode does not offer the same aesthetic control, especially as your aperture will change in variable light and change the look of the images.
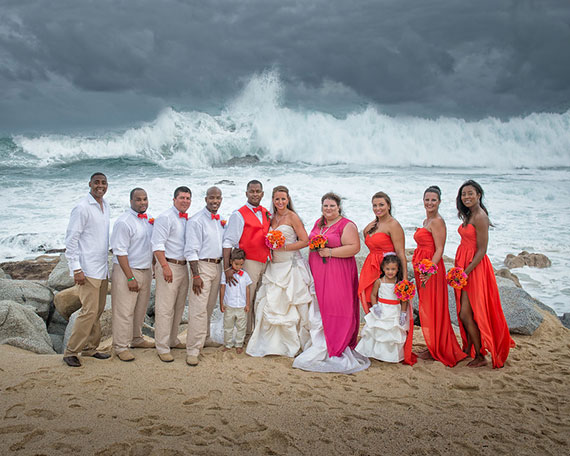
Photo by Jay Weenig; ISO 100, f/8.0, 1/160-second exposure.
3. Modern camera meters are good enough (most of the time).
Modern camera meters will get exposure right 95 percent of the time, so not using it can almost feel like an affectation. Weddings are hard work, and it makes sense to let technology help you where appropriate.
4. I can concentrate on image making, not technicalities.
The less I have to worry about technical concerns, the more I concentrate on creativity. Ultimately, creativity is what people are hiring me for, so I make sure I’m not getting too bogged down in the technical side of things. I’ve come up with a simple way of working that I can rely on, and I stick to that.
5. Events move quickly, and I need to capture them.
I’m not a fan of making the bride and groom repeat anything. I think you can tell when something is fake, so I treat every event at a wedding as a one-shot deal. That means I have to think fast, be flexible, and react to things as they happen. I don’t have time to keep fiddling with my camera, so aperture priority gives me the perfect balance of control and automation.
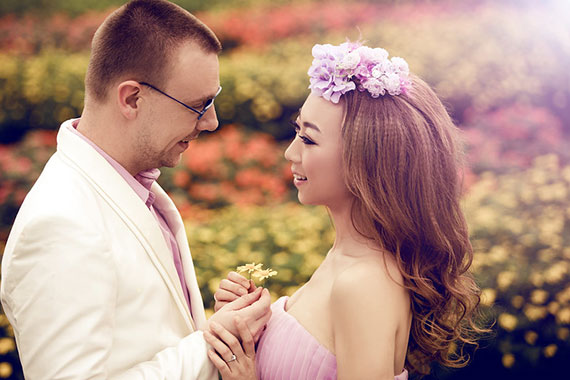
Photo by Azchael; ISO 125, f/3.2, 1/640-second exposure.
6. It’s better in low light.
I can often find myself at the ragged edge of low-light capability at weddings. If things are getting tricky, I use aperture priority to decide what needs to be in focus in the frame and then adjust ISO to get a usable shutter speed. This way I’m always at the best ISO I can get away with.

Photo by Armistead Booker; ISO 640, f/2.8, 1/80-second exposure.
Conclusion (And Some Caveats)
I’ve stopped using manual mode for fast-paced situations, but one of the reasons I can use aperture priority successfully is that I have enough experience to know when the camera is likely to be caught out. If you’re a beginner or intermediate photographer who wants to take his or her photography more seriously, I still recommend a prolonged length of time learning to use manual mode on your camera.
Too often today, workshops and online tutorials try to persuade you that photography is easy, and you don’t have to know the technical stuff. Well, unfortunately, there is no such thing as a free lunch, and understanding photography at its most basic is still a necessary grounding in the craft of image making. Aperture priority is a great tool, but it’s not a replacement for a good photographic brain. The real skill in photography is learning what to do in a myriad of circumstances, and choosing the best compromise to suit the situation.
Happy Shooting!
About the Author:
Toby Key is a wedding and portrait photographer based in West Sussex, UK.
Like This Article?
Don't Miss The Next One!
Join over 100,000 photographers of all experience levels who receive our free photography tips and articles to stay current:


Everything at an wedding in my country is happening very fast, so i don’t really have time to switch settings, aperture priority is my mostly used setting.
What happened to the 4th reason that you prefer aperture priority … or did you learn a different method of counting to the vast majority of us? lol.
But why not manual w/ auto ISO as the “best” mode? IMO, it’s much better than Aperture Priority – more consistent and flexible/creative, especially today with low-noise full-frame sensors and (now available on many DSLR’s) exposure compensation when using manual mode and auto ISO.
I’d rather have my aperture & shutter set with auto ISO going to 6400 than be in Aperture mode and somehow end up with 1/25 shutter speed with my 70-200 on during an unexpected lower light moment. I’ll rescue the first shot. The second will be so blurry it won’t even survive the first cut.
Great work. Photography style is different. I like that very much. Good job, Keep it up.
I did two photo shoots this weekend where I used full manual mode on a Sony A6000. I’ve done so before, but got poor results when I failed to check my exposure on a couple harshly backlit photos with water and sun behind the subject. My skies were blown out and unrecoverable, so they became B&W pictures to at least have some use for them. I’m still relatively new to photography and learning as I go, giving away photo shoots for free until I build the confidence and portfolio to believe I can do well in more dynamic settings. This article did well to acknowledge that my results in Aperture Priority should be acceptable at times when scenery, lighting and subject movements are more rapid than my ability to react to the changes and nail every setting the first time. I would say I got about 85% accuracy with exposure in full manual, but I do need to continue to hone those skills before just relying on AP to do the heavy lifting. I understand the histogram and my camera, but the breakdown is me taking the time to verify everything and my haste has bitten me more than once. Living and learning, but thank you for this article to confirm that fast paces aren’t necessarily meant for full manual all the time. I know how to set my camera, but time doesn’t always allow it before I feel I’m aggravating my subject fiddling with settings, resulting in sometimes unrecoverable details in post. Thanks for the shot of confidence with the article!
There is not a one size fits all mode and they all have a place in the overall scheme of things. I probably shoot 90% in aperture mode because I like being able to shoot instantly and controlling my depth of field is usually my biggest priority. I do shoot in shutter priority when action and controlling movement are my top priority. Also I use manual sometime when I am using flash and want to control the ambient light and the light from the flash separately. I do mainly use aperture priority because it lets me concentrate more on the image than fiddling with settings and after all isn’t the image the most important thing we are after. I can’t begin to tell you how many shots I would have missed over the years if I had to take time getting all the setting right before taking a shot!
Thank you… I had struggle with Manual on a few shots at Christmas and couldn’t get my settings properly. I After a lot of frustration I switched over to aperture priority and bang after some minor adjustments I got my shot. So I learnt Manual is not king but a good prince and that at times there are other settings to be used. After this I read and watched video from the pros and some will do Aperture 98% of the time. So I agree with you to much bunk on Manual Mode.
Really i fill that the photography style is different. I like that very much.Good job,Keep it up.
I agree. We should have an open-minded and be flexible in using our knowledges and skills when interacting with machine. Neither aperture priority nor speed priority completely takes over our control of the camera.
Thanks for expressing your opinion regarding “old school” thought and bring up convincing reasons.
Rotor
I too was taught to shoot in manual b/c the pros do…..well a pro I respected told me that he does use Av(Canon) and M. I use M when time does not matter, I am on a tripod and I am waiting on the sun to rise or set, however I am getting away from that too as I have EC and auto ISO to make it like shooting in M. I know manual and where to meter, but not as fast as with Av, or Sv or even Auto in a pinch. I also have more fun creating images using Av as I walk about and see interesting subject. Av can also be a very good indicator of your dynamic range and what is blown out and how you need to adjust when you pair it with your RGB histogram.
Thanks for the article….
THANK YOU! When I switched to digital in 2006 I was made to feel I was not a professional photographer unless I was shooting in manual. It has never fit my style which is fast and painless for my clients, and I love capturing the emotion of the moment.
Great article I agree with your caveats at the end. I used to only shoot in AP mode but got caught out when my camera decided that 1/60 was fast enough in many situations where it clearly wasn’t.
Today I shoot in manual, but with auto ISO. That way I can fix my aperture, and control my shutter speed depending on the conditions. Should there be a gap, my auto ISO will try to compensate and even if the shot is more grainy than I’d like, at least I’ll generally get the shot(s). My camera also allows me to cap my ISO at a certain level, but then my judgement of shutter speed becomes all the more crucial.
So, similar to that author’s technique, but rather than adjust ISO I adjust shutter speed. And because I love using my camera LCD screen, I can see what’s too dark and what isn’t as I make that adjustment.