Probably one of the most misunderstood terms in beginner photography is “stop.” Imagine hearing, “I need three stops of brightness. Stop up the ISO 200 to 400, stop down the speed from 1/60 to 1/30, and stop up from (f-stop) 5.6 to 4.” It’s statements like this, and the mathematical explanation, that cause most people to leave their camera on Automatic mode and never venture into manual modes. The reality is that the math and “how it works” doesn’t really matter.
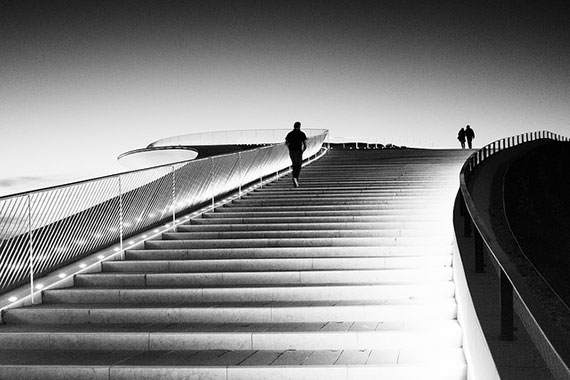
Photo by Fernando Coelho; ISO 6400, f/2.0, 1/100-second exposure.
A 9 year-old can understand how to use a microwave, but 1 in 5,000 people (if that) understand, truly, how a microwave works. Many professional photographers have no idea about the inverse square law and how it functions to calculate aperture size. However, every single one of them understands how stops are used. On the other hand, there are quite a few nerds who can rattle off the math, but cannot control a camera whatsoever. The purpose of this article is NOT to explain how stops work, but instead explain how they are used to become a better photographer.
One of the main reasons that the term stop is so confusing is that has multiple meanings (only two of which are important for this article). This is going to be a bold statement and I’m probably going to get hate mail for saying this, but the only important thing that really matters about the word stop (as far as taking better pictures goes) is that it indicates that something is doubled or cut in half. At our photo studio in Nashville and Louisville, we have all kinds of books and charts which talk about stops, but at the end of the day, a stop really is just that simple.
Memorize this: A stop means doubled or halved. 1 stop up, means doubled. 1 stop down means cut in half. 2 stops of light up means four times the amount of light (double then double again) and 3 stops of light down means 1/8th the light (cut in half, then half again, then half for a third time).
Photo by Bernard Spragg. NZ; ISO 400, f/11.0, 1/640-second exposure.
As an example, imagine you are out in the sun and you need a pair of sunglasses that block exactly half of the sun hitting your eyes. You could say, “Hey. I need a pair of sunglasses that block 1 stop of light.” After you put them on, the sun is still too bright, so then you say, “Actually, I need a pair that only allow a quarter of the light in.” In other words, two stops down of light. The first stop cuts the light in half, and the second stop cuts that half into another half, which results in a quarter of the original. 1/8 is 3 stops down, 1/16 is 4 stops down, and 1/128 is 7 stops down.
In photography, this is exactly how we speak when talking about adjusting light. If we need to double the amount of light let into the camera, we “stop up” the light by one stop. If we need to cut the light in half, we “stop down” the light by one stop. If we want to allow in 16 times the amount of light that is already coming in, we need 4 stops of light (the first doubles it to 2x, then doubles it again to 4x, then 8x, then 16x). Remember, each stop either doubles or cuts the previous in half.
The main reason photographers use this terminology is to have a common language to measure light adjustments that everyone can agree on. (Again, I’m simplifying here, and will get more hate mail, but I’m not a purist and this is the easiest way to understand this).
How to actually apply a “stop”
There are three main controls on a camera: ISO (sensitivity), Speed, and Aperture. EACH ONE has different sets of numbers, but the one thing they have in common is that increasing or decreasing each one of these controls has the effect of doubling or cutting the final light in half. Tattoo this statement on your forehead and internalize it; this one concept will completely revolutionize your ability to understand how to control the light in your picture (let’s face it, without light, all of your pictures would be pitch black, and people would make fun of you).
The ISO is how sensitive the film or sensor on your camera is. It’s commonly measured in 100, 200, 400, 800, etc… Forget the technical of why these numbers exist, and just remember that going from 200 to 400 means 1 stop of light UP, and going from, say 1600 to 200 means 3 stops of light down (cutting your number in half 3 times from 1600 to 800 to 400 to 200).
The shutter speed is how fast the aperture opens and closes. So, 1/30 of a second is twice as long as 1/60th of a second. Because the aperture is open twice as long, it lets in twice as much light. Therefore, 1/30 is one stop up from 1/60. 1/240 is 4 stops down from 1/15. (Again we go from 1/15 to 1/30, then to 1/60 to 1).

Photo captured by PictureSocial member Tomas Eriksson
The aperture is the opening in the camera which allows light in and it’s measured in what’s called f-stops and the numbers are displayed in a series like 1.4, 2, 2.8, 4, 5.6, 8, 11, 16, 22. Again, forget for a moment why these numbers are in this series and just remember that 11 is two stops up from 22 (here a smaller numbers means a larger opening and more light). 5.6 is 4 stops down from 1.4.
Bringing it all together
Understanding that all three controls are in increments of “stops” is the key of enlightenment. If you take a picture at ISO200, 1/60, and f8 and you need the picture 4 times brighter, you now understand that there are three options: 2 stops up from ISO200 to ISO800, 2 stops up from 1/60 to 1/15, or 2 stops up from f8 to f4. Each of these decisions will have a creative visual effect, but they all will have one thing in common: Allowing four times the light into the final picture.
About the Author
Callie Colleen Smith can provide more information about wedding photography, family pictures, engagement, or modeling headshots. Smith is an assistant photographer that works with Shane Messer and Raychle Searfoss at Shane and Raychle Photography in Nashville, TN and Louisville, KY.
Like This Article?
Don't Miss The Next One!
Join over 100,000 photographers of all experience levels who receive our free photography tips and articles to stay current:


I was writing an article for my blog, and this more or less covers everything, though I think there are 2 other points to add: Aperture can also affect the depth of field, and the shutter can affect how much movement blur you get, so sometimes you will need to adjust around these using a setting you would not normally think of using: if you need the sharpest photo of something moving, then you are stuck with a fast shutter speed, and if you cannot crank your aperture open far enough for the speed, then, you only have ISO to play with, and if you need a shallow field of view, you need the aperture wide open, so you will have to either have a faster shutter or lower iso so you don’t over expose – and finally on cameras with EV settings, you can give your settings a “nudge”. So, one holy trinity of settings, 2 attached caveats and one ace up your sleeve.
A second and third ace if possible: don’t do long range photos with a flash, they look eerie (my option, don’t flame me bro), and don’t outguess your stability unless you are an Olympic marksman – tripods are cheap, only solution for low light, and either get a remote as not to nudge the first 1/4 of a 1/2 second exposure, or be cheap like me and use a time delay !
Newer cameras have shutter speeds increments in decimals. How would that fit into this scheme of things. Similarly exposure compensation.
I very much liked Charles’s explanation of how stops work when multiplying or dividing, but it still remains that some people have great difficulty with the whole concept of the inverse numbers for aperture. Some amateurs are flummoxed and frustrated to the extreme. My wife says why not number them 1, 2, 3, up to 10 with 1 meaning almost closed shut and 10 meaning wide open. I also note that Shane does not use “f” when discussing stops. Stops are closely related to focal length mathematically (I once knew the formula, even), hence the traditional use of “f stop” which Shane seems very willing to drop as his means of simplifying the issue. Nevertheless, Shane’s article is one of the best I’ve seen on the topic. I wonder what my wife will say?
this is very swag
In this post they mentioned about the stop function in digital camera and what does it truly mean. They also post some tips for the beginners who really don’t about this stop function in their camera. They have tips where to use/apply this function and what are its advantages.
I’m speechless. You perfectly unraveled all the mysteries of numbers and stops!!! amazing article. Thank you so much.
When referring to aperture, stops are actually computed by multiplying by the square root of 2 which is equal to 1.4. Therefore, f/1.4 is one stop brighter than f/2 (1.4 x 1.4, and rounding it off).
E.g. the following apertures are stopping down by one stop at every step.
1.4, 2, 2.8, 4, 5.6, 8, 11, and so on. You get each successive f/number by multiplying by 1.4, and rounding off the result, for simplification.
As mentioned in the article, stopping down essentially means cutting down the light by half. To reduce the light by half, the area of the aperture opening should be cut down by half. Since area is proportional to the square of the diameter, reducing the area by half translates to reducing the diameter by a factor of square root of 2. That’s how the multiplying factor is root of 2. Also remember that f/number is defined as (focal length)/(diameter of aperture opening).
Guys, it really isn’t that complicated when you think about it:
1.4 x 2 (stops) = 2.8
2.8 x 2 (stops) = 5.6
Therefore: 1.4 = 4 stops brighter than 5.6 (1.4 x 4)
You can do the same thing with f4 x 2 (stops) = f8
If you want to jump only one stop, then you are jumping from the “odd” numbers (1.4, 2.8, 5.6, 11, etc) to the “even” ones (2, 4, 8, 16, etc…).
Charlie, I was referring to the article. You are right though. Calculating stops in aperture wasn’t discussed. I understand iso and shutter speed in terms of f stops, thanks to this article. But I cannot use the same method for aperture (doubling, halving). That’s when this gets confusing for me.
Dana – If that was meant for me, I said that f/5.6 was one stop below f/4 not f/1.4. I really don’t know how to compute stops. Let’s see if catfish had it correct, I could multiply 1/4 by 1/2 and get 1/5.6. Ooops, that doesn’t work. I just know that the TC14E II loses one stop from whatever lens it is attached to. I attach it to my 300 f/4, and the fastest aperture becomes f/5.6.
My whole point is that the calculation for how to calculate a one stop difference in aperture was not discussed.
Sorry, I got confused. Shouldn’t 5.6 be 2 stops down from 1.4?
5.6 x1/2 x1/2 = 1.4 meaning stop down twice or halved twice, so 2 stops instead of 4 stops?
Help please!!!! I still don’t quite understand.
I appreciate the explanation, but it leaves out the most difficult of the three items, aperture. While it’s easy to halve, and even halve again, or double & even double again when talking about ISO or shutter speed, it doesn’t calculate so easily in aperture.
1st of all it isn’t intuitive to the casual observer that a smaller aperture number lets in more light when in fact aperture is a measure of closing the hole that lets in the light. Well, at least, sorta.
What is really not clear is that you “lose” one stop by going from f/4.0 to f/5.6. If I need one more stop–and I’m at the ISO and shutter speed that I desire–and I’m at f/8, what do I go to? f/4.5, f/5.6, f/6.3, f/7.1, or what. Show us how the math works simply in this case.
Charlie — just think of the F-Stop numbers as fractions, it may make more sense that way. 1/2.8 verses 1/16
Callie, you can tell the haters to buzz off, they need 4 times the light themselves. As I venture into this, I have won 2 contests using a simple P&S. I have not committed to a full DLSR, but have upgraded to a camera with more manual capabilities. This article is the first indication I’ve received that tells me I can venture into those camera aspects and learn. Something not accomplished by any other information so far. Good Article!
I love your short very informative articles, but it would be even better, 4 stops up, if they could be saved as PDF documents that then can be saved on my iPad so that I can read them at my leisure on the deck without internet and with a cup of coffee or glass of wine. Reading them on the computer at my desk is like 8 stops down in my enjoyment. My memory has become slippery and may actually not have a stop at all but by having your articles handy I can reread them without any stops at all. Thanks
Connie – even though this website doesn’t allow you to create PDF document from their articles, you can always ‘copy’ and ‘paste’ the article into a Microsoft Word document. If you have Office 2007 or newer you may save the document as a PDF file. If you don’t have Word 2007 or newer save it as a document (.doc) and find a website online that will convert your word document to a PDF. there are plenty of them on line and they are free.
That’s a great idea. I have tried several options, but not the most obvious. Thanks.
Thanks for the great article. I’m going to get my old ttl out and try this. I was always lost before.
One of the things I find the most when trying to explain is when a person says stop up, and the time value decreases, people tend to think if you say up it is more, but they miss the part where you say stop up light, not up the speed. At least that is some of the “issues” that I have encountered, miss communication / understanding. But if you can cross that bridge then it is all easy to explain and for others to understand
Thanks for sharing this information. Quite useful and I love your straighfoward style of teaching. Congrats!
Nice explanation. I’m teaching basic camera to adults with new DSLRs and we have hit this time and time again. The trinity of ISO, aperture and shutter are tough to get across to new camera operators.
Loved the explanation. I dont know why people over-complicate things. I have a feeling that some of them dont like newbies and amateurs getting into their business. lol