One of the easiest ways to improve your photography is by taking photos of interesting subjects. Of course, you can take great creative photos of uninteresting subjects, but if you choose an interesting subject to photograph in the first place, it makes taking a great photo much easier.

Photo by aotaro; ISO 400, f/0, 1/60-second exposure.
1. Choose an interesting subject to photograph
So where do you find these interesting subjects? They can be found everywhere, from a stormy landscape, to a simple street scene, to a flower in your garden or local park.
Just take a walk around your local neighborhood with your camera, and you’re sure to find something interesting to photograph.
2. Pay attention to the light quality
Something that has a big effect on how your photograph looks is the quality of light that is hitting your subject. There are two aspects of lighting that you need to pay attention to – the color of the light and how harsh / diffused the light is.
Color temperature
As a general rule, we tend to prefer photos with a warm (golden) tone. The warmest light naturally occurs around sunrise and sunset, and this is why many landscape photographers prefer this time of day.
The color temperature of a photo can also be modified by adjusting the white balance setting on your camera. And if you are taking photos using flash, you can use a warming gel on the flash to warm up the light.
Of course, in some instances you may want to go the opposite way, and use light with a cold (blue) color temperature.
Diffuse vs. harsh light
Diffuse light is where the light creates soft shadows, which is preferred for most types of photography, but particularly portraits.
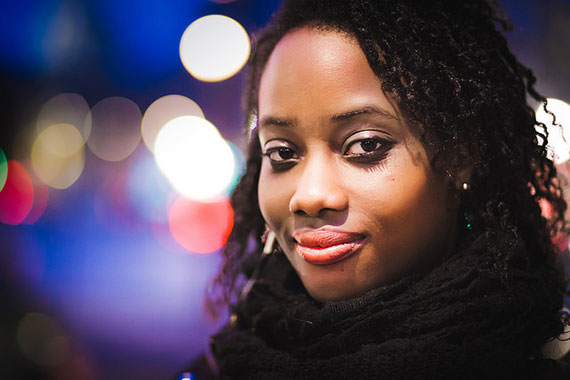
Photo by barbasboth; ISO 6400, f/1.8, 1/50-second exposure.
Diffused light can be created by reflecting light from a large surface (like a wall), or by using a large piece of semi-transparent material between the light and your subject. This works the same way as when there is a thin layer of cloud, which diffuses the sunlight and creates a nice soft light.
Harsh light creates strong shadows. Natural light is at its harshest around midday, while an non-diffused flash will also create a harsh light. When shooting with harsh light, try and use the strong shadows it creates to your advantage, incorporating them as an element of your photograph.
3. Compose your photograph carefully
When taking a photograph, it’s all too easy to just point and shoot. However, try and take a bit more time to think about the photo and the composition.
Rule of thirds
Composition is how the elements in the photograph are arranged, and a good guideline for composition is the ‘rule of thirds’. The rule of thirds works by splitting an image into thirds both horizontally and vertically, so you end up with 9 sections.
In many good landscape photographs, you will see the photographer places the horizon in the top third of the photo, while the landscape takes up the bottom two thirds of the photo.
As well as placing elements along the thirds lines, you can also try and put your main point of focus so that it falls on the intersection of two of the thirds lines.
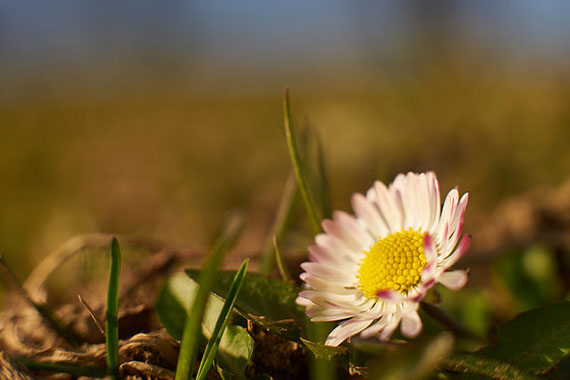
Photo by ninfaj; ISO 100, 1/200-second exposure.
The Golden triangle
The golden triangle is a good compositional guideline to use when your photograph contains strong diagonal elements. It involves splitting the photo into three triangles that contain the same angles (are the same shape).
One right-angled triangle runs diagonally from corner to corner, while the other two triangles are created by drawing a line that goes from one of the other corners to meet the diagonal line at a right angle. Try and place the diagonal elements in the frame so that they follow this pattern for a pleasing composition.
Leading lines and converging lines
Use leading lines or converging lines to draw the viewer’s eye into the image. Good examples of this you can use in landscape photography are roads, paths, fences, hedges etc, really anything that creates a line that leads into the photo.
Try and avoid including lines that lead out of the photo as this has the opposite effect, and leads the viewer’s eye out of the photo.
The Fibonacci spiral or golden spiral
The Fibonacci spiral is a spiral based on the Fibonacci sequence, while the Golden spiral is based on the Golden ratio. Both are very similar, and can be used as a compositional tool.
If you look at a curled up fern, this roughly follows the spiral pattern. By photographing a subject where the elements can be arranged in the golden spiral pattern, the curve of the spiral will help lead the viewer’s eye through the photograph.
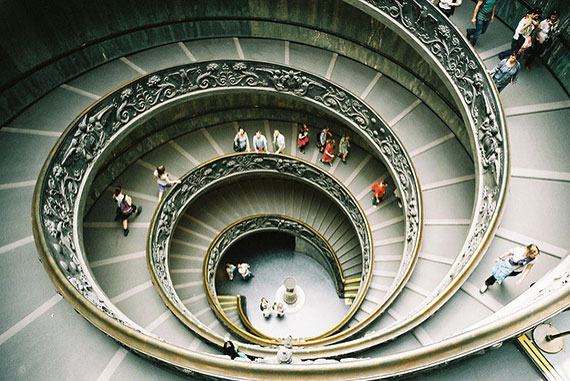
Photo by Tanveer Tarafdar; f/4.0.
4. Check the exposure
One of the main advantages of digital photography is the ability to check the photo on the camera’s rear LCD. When taking photos, you should check that the photo has been exposed properly, i.e. is not too dark or too bright. Although modern cameras have sophisticated auto exposure systems, they don’t always get it right.
As well as inspecting the image, most digital cameras also have a couple of tools that can help you judge the exposure of an image. The first one is Highlight Warning, colloquially known as ‘blinkies’. What this does is that any areas blown out white will flash when reviewing the photo on the camera’s LCD.
The second tool is the histogram. This is a graph that shows the range of tones in your photo. If there is a peak at the very left edge of the histogram, this means that some of your photo is solid black. And if there is a peak at the very right edge of the histogram, this means that some of your photo is solid white.
Either way, areas of the photo that are solid white or black contain no detail. Maybe this is what you want, but generally it is better to have detail available even if you don’t need it.
You can modify the exposure of the photo by adjusting the exposure compensation. Use negative exposure compensation to darken the photo, or positive exposure compensation to brighten. Take the photo again, check the exposure again, and repeat if any more exposure adjustment is necessary.
Generally the ideally exposed photo is one that is as bright as possible without any detail being blown out white. You can then adjust the photo on the computer to darken it if needed. It is an extra step, but maximises the image quality.
5. Reduce camera shake
Blurry photos can be a problem, especially if shooting handheld when it is relatively dark. The key to reducing blur caused by camera shake is either to make sure you are using a fast shutter speed or to make sure the camera has a solid support like a tripod.
To ensure a fast shutter speed, put your camera in the shutter priority shooting mode. As a general rule, the shutter speed should be 1 over the 35mm equivalent focal length, e.g.
- A full frame camera with a 50mm lens would need 1/50s shutter speed for a sharp handheld photo
- A 50mm lens on a camera with an APS-C sized sensor has a 35mm equivalent focal length of 75mm, and so would need 1/75s shutter speed for a sharp handheld photo
- A four thirds camera has a 2x crop factor, meaning a 50mm lens has the equivalent 35mm focal length of 100mm. So it would need at least 1/100s for a sharp handheld photo
The actual shutter speed you need will depend on your handholding ability. To try and give the camera more support when shooting handheld, hold the camera up against your eye, use both hands to grip the camera, and push your elbows in against your stomach / chest.
If using a fast shutter speed makes your photos too dark, try increasing your camera’s ISO setting, and / or using a wider aperture. This will allow more light to reach the camera’s sensor without having to reduce the shutter speed. If you are photographing a person or nearby object you can also use flash to provide enough light for a fast shutter speed.
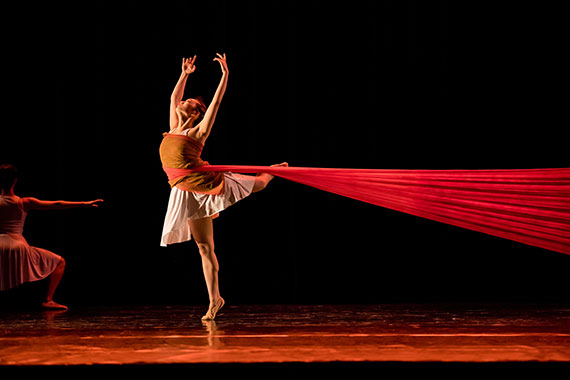
Photo by usfpasj; ISO 3200, f/2.8, 1/320-second exposure.
The alternative option to increasing the shutter speed is to use a tripod or some other form of support (e.g. placing the camera on a wall or table). Make sure the camera is secured tightly on the tripod and either use a cable release or self timer to trigger the camera’s shutter. This way the camera doesn’t receive any shake from the process of pressing and releasing the shutter button.
About the Author:
This article was written by Dave Kennard from DiscoverDigitalPhotography which offers advice, tips, and tutorials on digital photography. They cover all aspects of photography from Sports photography to Landscape photography to Portrait photography, and more.
Like This Article?
Don't Miss The Next One!
Join over 100,000 photographers of all experience levels who receive our free photography tips and articles to stay current:


Amazing content. I might want to share something here. Center your eyes. The same number of state, they are “the entryway of the spirit” and is most likely the piece of the body that gives more data about the life and disposition of the individual. Thank you for your great information.
I really appreciated your different tips and tricks on how to avoid camera shake when taking pictures. My cousin Jenna and her husband Trevor have decided to let me tag along on their trip to their family vacation house and they want me to help them take pictures while they have a good time there, and to show my appreciation for their invitation I want to make sure that I take only the best photos I can, even if I’m not a professional. Once I get some good shots, I’ll be sure to get picture frames that can suit the photos and give it to them as gifts. Thank you for the article!
You said, “One of the easiest ways to improve your photography is by taking photos of interesting subjects.” Ah, sorry, the word “DUH” comes to mind here. Did you really have to point that out to us? Sorry, but while the rest of the article was good, this opening sentence was like the sign on a door that said, “If this door doesn’t open it’s locked.” I think a stronger opening might have worked better, but perhaps the overly simplistic nature of the statement was what you were seeking. If so, it succeeded.
Great Article with some good tips. Thanks for sharing
Get tips.
This is not just photography tips.
As a professional photographer, I thought, it is the way to improve photography skills.
Very useful information and i think it will help me to capture a perfect picture without any mistakes.Thanks for sharing this
Nice information I would like to share something here. Focus your eyes. As many say, they are “the door of the soul” and is probably the part of the body that gives more information about the life and mood of the person.
I am starting to get really into photography and so I really appreciate all five of these tips, especially the one about the Golden triangle. I have never heard of splitting a photo into triangles before. However, how can I know how to properly use this method when taking a picture? In the rule of thirds, I know where my object is supposed to be, but in this type of frame I don’t.
Im new at photoraphy, so theese tips are really gona help me! :)
Do you have any article on composition?
I believe the photo “Nothing is impossible!” captured by Robert Nemet is a good example of the Golden Triangle.
sometimes it works breaking the rules :) exhibitionnhalls around the world are full of rule breakers :) but none the less, once you understand the above tips, you can move towards becoming better at the art form of taking cool pictures/photos/snaps
Best regards
PTO – the pixtakers
I didn’t feel your Golden Triangle was explained easily at all. Thinking of the four focal points and rule of thirds makes far more sense.
seems obvious.. but in heat of moment i know i sometimes miss some of those 5…
Good five pointer. Another one would be:-
1. Shoot
2. Get closer
3. Shoot
4. Get closer
5. Shoot.
Good light,
Jim