There are beautiful homes with superb design, architecture, and lighting. And there are homes that lack all three of these. The goal of a residential interior photographer is to make even the ugliest home look appealing. This guide will cover how to choose the right equipment, use proper lighting, prep a home for a shoot, and create an appealing composition.
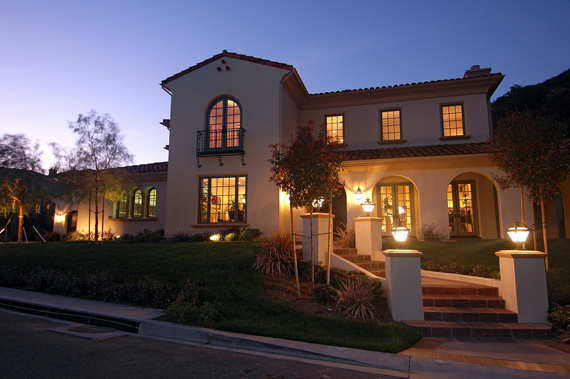
“Cantabria” captured by Sherwood CC
What Equipment Is Best?
For residential interior photography the home will dictate what equipment you need. Some homes designed by great architects are designed specifically with natural lighting in mind and won’t need much extra lighting. Other homes, however, will. Always plan for the worst.
The bare essentials you’ll need for interior photography include a tripod, electronic flash, and non-distorting lenses. Wide angle is fine as long as it isn’t too wide. If you can, get architecture specific lenses. Try using prime lenses over zoom lenses as this will minimize curvature.
Faster lenses are best, as interior photography will have much less available light to work with.
Lighting Basics
Great architects understand the importance of light and design houses around this. If you are fortunate enough to have a well designed lighting system, you might be able to get away with only using existing light.
The first step is to turn on all the lights in the house. This will add more depth and color variance to your photos. Be sure that the lights do not show up as reflections in pictures, windows, mirrors, or other reflective surfaces.
Often you’ll need to use external lighting such as flashes or strobes to balance the natural and artificial light. A simple tactic is to replace the incandescent bulbs with more powerful tungsten bulbs. These have a higher output and are more consistent in color temperature with outdoor lighting.
When using a portable flash, it is best not to point the light directly at your scene. Instead, aim it at a wall or ceiling. This will diffuse and spread the light throughout the entire room. Use caution with colored walls as the color may transfer to the light.

“Cantabria” captured by Sherwood CC
Bright and large windows often cause various problems in an interior shoot. They distract the viewer and can cause exposure problems. Planning your shoot when the sun isn’t at its strongest or entering directly into the window is an easy solution to this.
Room Preparation
For residential interior photography, the goal is to present an attractive, beautiful home. You’d be quite lucky to find a home with everything perfectly staged and orderly. Often you’re going to want to rearrange furniture and tidy up the area.
Every room has a key element that you will want to feature prominently in your photos. Moving around objects is a great way to lure viewers’ eyes to these elements. Simply placing bright objects (like a red vase) on these key elements (fireplaces, stairs, grand piano, etc.) will make them stand out from other objects in the room.
Composition
After you’ve completed all the pre-production phases of interior photography, now comes the actual photo taking! The following are a few tips for taking better residential interior photos.
Be Spacious
To make rooms appear more spacious, be sure to avoid shooting straight at walls. This will make the photo look flat and can also warp the perspective. Instead, shoot into the corners of rooms. This will create more depth and make the room appear larger. Photographing from a lower angle and with a wider angled lens is also a great way to increase the perceived size of the room.
Choose Attention Grabbing Areas
There is no way to photograph a room in one picture (besides photo stitching). When you photograph a room select the interesting parts. Choose objects of importance or parts of the room with more interesting architecture.

“The Livingroom” captured by János Csongor Kerekes
Keep the Lines Straight
Be sure that the vertical and horizontal lines in your photos are straight. Crooked lines are signs of poor technical skills and will detract from the image.
Know Your Goal
Are you photographing the house to feature the architectural design or the ambiance? Understand your goals for the photo shoot and compose accordingly.
About the Author:
Alphonso is a home inventory photographer located in Orange County, California. He loves design, art, and anything creative.
For further training on interior composition in architecture photography we recently featured this video:
For further training on photographing the exterior of a real estate location, here is a anotherhelpful video tutorial:
Best of luck in your real estate photography ventures.
Like This Article?
Don't Miss The Next One!
Join over 100,000 photographers of all experience levels who receive our free photography tips and articles to stay current:


Thanks for the great post ! I’m a aspiring real estate photographer and I often have to deal with rooms that are not always prepared perfectly. Your guide really helps me a lot.
Thank you for explaining that you’ll want to take your pictures in straight horizontal and vertical lines so as to not detract from the image. My friend is wondering if she should hire someone to take pictures of the house that she’s selling since she doesn’t have a whole lot of time before it will be going on the market. I think that it could be a good idea seeing as there is a lot of technical things involved in making sure that the photos are presenting the image that you want such as perfect lines.
Well, written content. I have read this full article and found it very informative as you have covered all the aspects of real estate photography. Moreover, you have explained every point in depth. So, users can easily find the thing which they are here for. If you are looking for real estate photography services in Hawaii do visit our website.
Thank You.
Really nice clicks all are. The Composition for Interiors is a good tutorial for beginner or must be too much helpful who want to decorate their home interior by themselves.
Great tips for Real Estate Photography, well explained and well shared in the right place.! thanks again for helping out starters like me!
Great tips summarized in an easy-to-read format! This is going to be a good reference to share with my clients ahead of time.
Thanks for this helpful article. It’s very detailed, will surely share it to others!
Thank you for sharing all these real estate photography tips. As a real estate photographer I found your article really helpful.
Great tips summarized in easy to read format! This is going to be a good reference to share to my clients ahead of time.
I love how you talked about lighting basics such as turning on all the lights in the house to give the photo a variance. My husband and I are looking for a real estate photographer to help us get good pictures of our home to help us sell it. We will keep these tips in mind as we search for a professional that can help us best.
Great tips for Real Estate Photography, well explained and well shared in the right place.! thanks again for helping out starters like me!
Thanks, very clear and well explained. Some interesting points.
I highly agree that bright, spacious, clean photos bring people in!
Real estate photography doesn’t require a ton of extra gear like some genres of photography, but there are a few essentials that one is going to want to invest in. And thank you for mentioned them.
These tips https://rentberry.com/blog/real-estate-photography-tips could be useful as well. There are some recommendations concerning the retouching of photos.
I loved your tip of shooting into the corners. Its sometimes difficult with the composition or size of the room to make it look spacious, and I think this a great way to accomplish that as well as add a new perspective other than the straight forward route. Thank you for sharing your tips on real estate photography!
As a real estate photographer for only 2 years, I can say that neitherof the “Cantabria” images would be accepted by my clientele. The exterior image is way too dark to see the home properly and the “Martini-Glass” effect of the walls in the kitchen shot are hallmarks of an amateur photographer, not a professional. I learned from the beginning that straight, vertical walls were paramount and that every picture has to “sell”. those Cantabria images do neither for me.
I still get notifications from this thread when new comments are posted and I wish people wouldn’t be so negative. It is a fact of life that anyone who puts up content on the net will be the target all the know-better’s – but do they do better?
One resource I like to suggest is a Youtube video by Mike Brown: https://www.youtube.com/watch?v=EZz48IIw8fE
Photography is a visual thing and Mike shows how it’s done. He films a shoot he does at a holiday park. Mike actually shows how to keep the lines straight, he also explains about light (inside, outside, different times of day) shows how to de-clutter the scene, explains what lenses he uses and why, use of a tripod etc
This video is about 25 minutes long and shows a fair bit more than this article which you read in a few minutes.
“Faster lenses are best, as interior photography will have much less available light to work with.”
A fast lens is irrelevant in interior photography. A fast lens by definition suggests something around f/1.4 to f/2.8 – apertures you don’t want to be shooting at with property photography. Secondly a fast lens suggests fast shutter speeds – again something which is irrelevant when using a tripod with static subjects.
This article is very poor and it annoys me when people post articles to get page hits regardless if they’re mis-teaching photographers.
Let me add — I’m assuming there’s lots of good info with this course; and I’m guessing these folks know good real estate photography. I’m just saying that if you’re representing yourself as experts who can teach others, then you need to make sure you select photos that are examples of that professional skill level. These photos — at least the first two — do not come across as professional real estate photography. If they swap them out with awesome, pro pictures, they’ll probably sign up more people, and make more money.
Wow — even after switching out the photos in response to the earlier comments, the new photo examples the author uses in this article are still awful, at least the first two by Sherwood CC. What is truly ironic is that in the article Sanchez states:
“Keep the Lines Straight — Be sure that the vertical and horizontal lines in your photos are straight. Crooked lines are signs of poor technical skills and will detract from the image.”
Yet, the first two photos here exhibit significant parallax distortion — they should have been corrected (straightened) either with a tilt-shift lens or in post-production. In fact, the composition and image quality of the first photo are also pretty sad.
Sorry, but some of those images are dreadful. The converging verticals in the kitchen photo are laughable.
The verticals in the kitchen photo are not straight which makes the image look pretty amateur. :(
Since when did tungsten lights balance with daylight?
Have to say — very poor photo examples for a tutorial on good interior photography. The perspective on the kitchen interior is kind of strange — looking down the counter with the fruit bowl right in front. It gives the room a crowded feel. The bathroom interior photo is, frankly, really bad. The overall exposure is terrible, with the lights blown out and much of the pic in too much dark shadow. Also, the perspective distortion should have been eliminated, either with a tilt-shift lense or through editing. The third photo, has way too much processing and the colors are oversaturated. And it looks like a really small space with too much clutter — not very good composition.
It makes one wonder if the writer really knows what they’re talking about.
The classic approach for that would be to adjust exposure without flash for the outside view. Then switch camera to full manual for these settings. Adjust flash/flashes to adjust interior properly… Or HDR.
How do you ensure that when you take internal shots, you can still see whats outside the window and not get just a blank white space where there should be detail such as trees landscape scenery etc. Thanks
Re the question about non-distorting lenses: Head over to Ken Rockwell’s site and punch “no distortion” into the search field. That will give you some pointers.
I have a Tokina 17-35 f4 for Nikon that has very little noticeable distortion. You get that lens for Canon as well. At certain settings (wide open) you may notice distortion, but that is easy to fix in software… some cameras do this automatically.
Several of the comments are far too negative. This is a short article for beginners. At least comment in a constructive way, don’t just shoot the article down.
There are a few good videos on real estate photography by Dom Bower on Youtube.
No info on focal length or depth of field! Wide angle – always? sometimes? For what situations? Depth of field – looks like images that are sharp end to end without selective focus points are best/most common? Tips, info, ideas, reasons. This didn’t really answer many of my questions, but thanks for the start. I agree that the example pics could definitely be better, more informative, and that more examples with a greater variety could be given . Also, how about real estate exteriors? Best lighting? Same questions for the exterior as listed in the rest of this comment. Thanks!
A short article like this cannot possibly cover all possible combinations of lenses and other equipment for all possible scenarios. If you have specific questions, I’m happy to help.
Ohh the pictures. What’s with the shadows under the bathroom sink and the oversaturated, overcluttered bedroom pic? Fruit bowl could be moved and some window reflections but otherwise not a bad kitchen shot.
The ad for the Academy of Art University spelled photography wrong. Kinda loses some credibility don’t you think?
Great Video! any more tutorials? what flash do you use?
There are a few good videos from Dom Bower about real estate photography on Youtube. Dom seems to do a lot of this kind of photography.
There is a good video by Matt Granger / That Nikon Guy on Youtube about balancing inside (flash) and outside (sun) light… not for real estate, but for portrait photography, but the same principles apply.
Real estate does not run away. Any cheap $50 manual Yongnuo flash will do nicely.
Really a nice clicks all are. The Composition for Interiors are a good tutorial for beginner or must be too much helpful who want to decorate their home interior by itself.
Could you tell me some non-distorting lenses? I haven’t heard of them and found anything… :( Thanks!
Look at the Tokina 17-35 F4
Very nice tutorial for Beginner.
Those are bad example images that are shown in this article!! The first few images have such hard shadows, looks least pleasing to the eye. If the property is decently designed by the architect there is no need to resort to tungsten lights bla bla, the ambient lighting with proper tone mapping should be ideal. And pls post better sample images, of late they are deteriorating badly!