So you have decided to have a go at photography? Good for you! Photography is a wonderful way to spend time, whether it is making money or a hobby. The problem a lot of poor souls have when they start is the bombardment of information about different cameras, memory cards, lighting equipment, the list goes on!
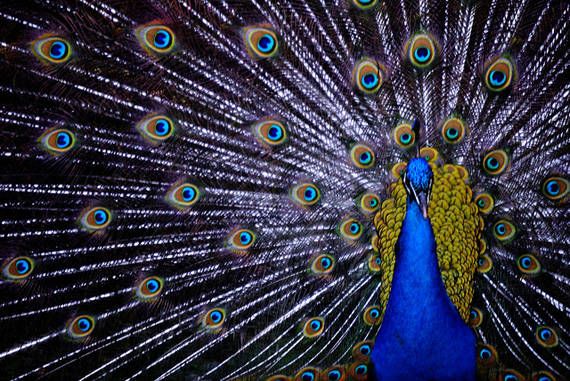
Photo by Wilson Severino; ISO 200, f/5.6, 1/60-second exposure.
In truth, there is no right or wrong brand. There is a bit of good and bad, but at the end of the day I know many different photographers who swear by different brands, and they are all taking amazing images and making quite a bit of money. I also have my preferred brand of choice when it comes to cameras but this will be up to you to decide once you gain a bit of experience and feel what direction you want to go in.
Maybe a good place to start is deciding how serious you are about your newfound love. Try borrowing a camera from a friend first and give it a test drive or go to a camera hire shop. If after that you see a long future rolling in the hills with your new camera, then it’s time to get your own!
Choosing a Camera
Take a look at DSLR cameras that can range from a couple hundred bucks to thousands of dollars. DSLR stand for Digital Single Lens Reflex, and it is your best option moving forward, as you can change lenses to suit your style of shooting. For example, if you are into wildlife photography, you may want a nice long lens so you can stalk the animals from far. If you are shooting portraiture, you may want a nice prime lens to get that crisp sharpness. Diving into lenses is a whole new debate and would need a longer article, so lets get back to it, shall we?
You have now bought your camera and you’re staring at it like it’s going to tell you what to do next aren’t you? To keep it simple, let’s break it down into four simple areas that are the basics of taking great photos: aperture, shutter speed, ISO and composition. If you have the hang of these four, you are well on your way to getting it right.
Aperture
The aperture is the opening in the lens that lets light through onto your camera sensor or film. It is made up of a series of blades and is measured in F-Stops. The smaller the F-Stop number, the wider the opening that is letting in light. Now this may seem confusing and the wrong way round but you will get used to it. The F number can be as low as F1.4 and go up to f22 on most lenses.
Task: Take your camera, and if you have one with manual controls set it to Aperture Priority mode. It should be a setting with AV (aperture value) or just read your manual. Take a series of pictures, changing the aperture from its lowest setting to its highest to see what happens.

Photo by Jeremy A.A. Knight; ISO 100, f/3.5, 1/20-second exposure.
Did you notice something specific happening to your images? If you did not, take a picture of something a few feet away with the lowest aperture and again with the highest aperture. Still nothing? Well, take a look at the background. You will see when you shoot with a wider aperture such as f/4, your background will be blurred, but when you shoot the same photo at f/22 most of the image, including the background, is in focus. Oh, so thats how they do that!
Shutter Speed
The camera shutter is, well, basically a shutter that opens and closes letting the light pass through the lens and only hit the sensor for the amount of time you want it to. While you were shooting in aperture priority, you may well have noticed that the shutter speed changes proportionately to how you change the aperture. This is because when you change your aperture, you are changing the amount of light travelling through the lens and onto the camera sensor. If you have a wide open aperture, there will be a lot more light travelling through, so you will use a shorter shutter speed. The smaller the aperture opening like f/22, the longer you can leave the shutter open to let in that light.
Task: Set your camera to Shutter Priority (check your manual) and take a few photos at different settings. Notice how it changes the aperture to allow more or less light. Now find yourself a moving subject. Someone running or your dog playing. Take photos at different shutter values and see how it affects your image. The slower the shutter speed, the more blur you will have in your image. The faster your shutter, the less time for light to hit the sensor, the less blur you will have.
Now you may think, why not just always have a fast shutter, right? Wrong. It depends on the type of image you want to shoot. If you want to shoot at night you will need a long shutter speed to let in the little bit of light long enough to get a good exposure. Or maybe you want to take one of those silky water looking photos? Again you will need a longer shutter speed to allow the water to blur enough to create that effect. Ah!

Photo by Andrés Nieto Porras; ISO 50, f/6.3, 30-second exposure.
ISO
ISO is the third part of the three major elements you should learn, besides composition, in order to get good photos. ISO is the electrical charge that affects the sensor, creating the effect like in old film when you had different sensitivity ratings. The higher the ISO (old film ASA) the more sensitive and the lighter the image. The drawback to using the ISO to lighten up an image is that your image gets noisier with the higher the ISO. I personally try keep my ISO at 100 unless I just do not have enough light.
Task: Take a few photos of the same subject, changing your ISO each time, and see what happens. If you expose manually at, say, 100 ISO and then bump the ISO up to 3200, your picture will probably be blown out and too light or extremely noisy. Play around with it and see how it all changes.
When you’ve learned the three techniques above, you are well on your way to taking great photos. This gives you the freedom to concentrate on being creative and leaving the technical details as second nature.
Composition
Alright, you can now take well-exposed images, but they seem to lack that something special. That photo of your dog in the center of the screen just doesn’t look like the one from the magazine you paged through in the shop! It’s time to look into composition and the rule of thirds.

Photo by Allen Skyy; ISO 200, f/2.8, 1/2500-second exposure.
The rule of thirds was created thousands of years ago by the Greeks, I think it was, and was a technical way of creating the perfect image. Look up the rule of thirds and you will see what you have been missing but the basic idea is to split your image into thirds horizontally and vertically and use the joining points to place your subject of interest, such as a person’s eye or the horizon. The rule of thirds is not a must and can be broken for creative purposes, but it is a good general rule to learn before you break it.
There are various other tips you can follow when it comes to composition, such as foreground interest. If you are shooting landscape images, it greatly helps an image if you have something in the foreground to lead your eye into the image. Do a search for ocean sunrise images in your favourite search engine and see what comes up. What you will notice with a lot of the ones you will find yourself drawn to is foreground interest such as rocks or a piece of driftwood that leads your eye into the image.
I am not going to go into lighting, memory cards, lenses, brands… the list goes on, and each deserves its own article. If this article is enjoyed and well received, I will write articles for each process as well as different types of photography. For now, take out your camera, stop reading, and go shoot! That is the best way to gain experience and find what style of photography suits you. Try as much as you can and don’t be afraid to ask people. The Internet is a big place, and there are wonderful people out there willing to help.
Seriously, you should be shooting right now!
About the Author:
Clinton Cunha (SupremeIcon) is a photographer based in South Africa. He also runs an icon design company.
Like This Article?
Don't Miss The Next One!
Join over 100,000 photographers of all experience levels who receive our free photography tips and articles to stay current:


All the suggestions you make can be done on most cameras that have manual settings. My favourite camera is a bridge camera which looks and handles like a DSLR, but I don’t have to change lenses or clean the sensor, both huge advantages for me as I like to take photos of most anything and I don’t have to carry around a bag of costly lenses to do so.