Here are several tips to help you capture the best images in dark indoor settings.
1. Camera Stability. You will be taking long exposures, and any camera motion could impact the quality of the image. Try to utilize a monopod or stabilize the camera on the back of a seat. Do not hold the camera in front of you without support.
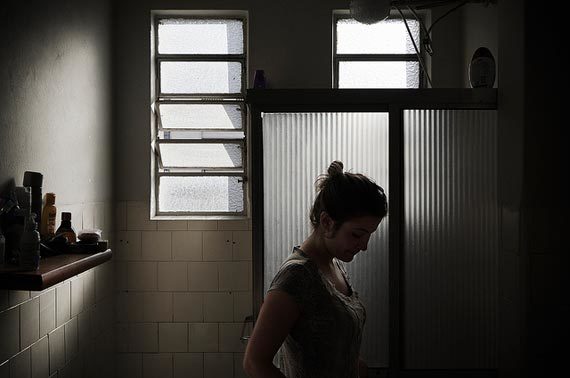
Photo by Gustavo Gomes; ISO 200, f/5.6, 1/500-second exposure.
Some cameras and lenses have stabilization features which help but will not be able to compensate for large movements in the camera. If you have an SLR, you may want to tuck your elbow into your belly, relax, hold your breath and gently press the shutter button.
2. Equipment. A DSLR with a fast (f/2.8 or better) lens and the ability to capture images cleanly at high sensitivity is best. If you’re using a point and shoot, you may have some challenges in getting clean images in a dark room.
3. Flash Off. Most indoor settings that allow photography specifically state “no flash photography.” In many cases, you’ll just ruin the existing lighting, distract the other viewers, and get yourself ejected from the event. Also, from seating distance and angle, many on-camera flashes will be largely ineffective.
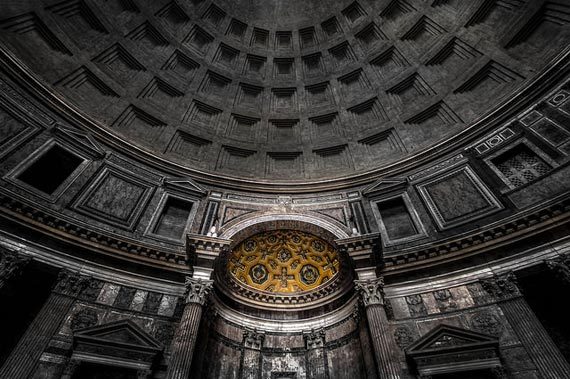
Photo by Moon Man Mike; ISO 400, f/6.7, 1/6-second exposure.
4. Exposure parameters. You will generally need to set your camera for high ISO or sensitivity (800 to 1600, some cameras will go to 3200 or more), low shutter speed (depends on your subject), and wide open F-stop (f/2.8 to 4.0). For those of you with point and shoot cameras, there may be a “night mode” or other preset which will attempt to deal with these conditions.
5. Shutter Speed. Integral to the exposure parameters above, you’ll need to set a preferred shutter speed for the activity being photographed. Indoor sports events are often well lit, but you’ll still want to stop motion at 1/120 of a second or faster speed. Indoor dance performances may be much darker, but also require at least 1/60 to 1/100 to stop motion.
Speeches and plays may have less motion, so you may be able to drop below 1/60 of a second. For images of still items such as museums, you can afford to drop to a low speed to get a better exposure at higher f-stop or lower sensitivity. Just remember that low shutter speed amplifies the need for camera stability.
6. Underexposing. Sometimes, to get the right shutter speed, you may not have enough sensitivity and aperture to get a good exposure. Instead of lowering the shutter and getting a guaranteed blurry image, keep the shutter where you need and underexpose the image. In your image editor, you can push the exposure a couple of stops and get a good image, even though it looked too dark on the camera preview.

Photo by Chris Bird; ISO 400, f/4.5, 1/20-second exposure.
7. White Balance. Getting this right in the camera will save you time. Many SLRs have a white balance custom function, where you photograph a white or gray image and tell the camera to use that for your white reference. If you can’t do that, try the canned settings on the camera and review the playback of samples to see the best playback of color tones to the actual room colors. Or, you can shoot RAW and fix it at import.
8. Focus. Often cameras will have trouble focusing in dark settings. You may want to switch to manual focus, compose a test shot at the same distance to your subject, playback and zoom in the image to verify crisp focus on your subject. Then you’ll avoid the “hunting” and missed focus of your images when the action starts.
9. Post Processing. I already mentioned pushing dark images and adjusting white balance. Another good tool for dark image editing is noise reduction. When you shoot at high ISO, you often get digital noise on the image. Running a noise reduction will remove some of that noise, but at the expense of image detail or sharpness. You’ll have to weigh the amount and benefits of noise reduction in your case.
Please make sure that you don’t take photos where you are not allowed, but given permission and these techniques, you can take some great indoor images in dark settings!
About the Author:
John Huegel is a photographer in the Erie, Pennsylvania area who specializes in Seniors, Dance Studio, Families and other groups. He operates a blog for professional photographers at http://newphotopro.blogspot.com. He is active in many charitable and volunteer activities in the Erie area.
Like This Article?
Don't Miss The Next One!
Join over 100,000 photographers of all experience levels who receive our free photography tips and articles to stay current:


One idea for focus in dark areas is to carry a small flashlight and have someone shine it on the subject. Once you have focus (I use back-button focus), this simplifies the rest of the process. The flashlight also comes in handy for reading information off the top panel of my camera, which is not backlit!
“#6 Underexposing” should come with a warning, the noise levels shoot through the roof when you try to brighten up the shadows.
Learn to spot meter and adjust +/- from that reading of the area you’re most concerned with being well exposed. A scandinavian type caucasian face – +1.5 from meter, a darker latino or african, -1. This is how you get spot-lit performances right as well. The more evenly lit things are, go with your regular metering mode (center weighted or matrix equivalent). If you have largely dark scenes, you expose for what’s lit, not the dominant shadows – they need to stay underexposed to end up dark in your result.
Interesting article, and some lovely photos. I’ve generally found that shutter speeds of of 1/400s or 1/500s are more suited to dance performances, and you need to get the aperture as open as possible to get those speeds, and be prepared to crank up the ISO. You might be able to get away with 1/200s or 1/250s depending on how much movement there is. How fast you can get the shutter speed depends on how much light there is on the performance – for a proper venue such as a theatre, the chances are you’re going to get enough light. For a school, or a stage set up at an exhibition, you might well struggle. However, it’s often the case at less formal venues that you CAN get away with using flash. It’s a good idea to talk with whoever’s organising the event to establish the rules. At a school play I photographed, the only time I needed flash was when the headmaster or other teachers were talking before and after the show in front of the stage. Ironically, I had someone approach me about flash during the performance on the second night because someone else had been using flash. I’d mostly been shooting at f/2.8, 1/250s at ISO between 800 and 1600 with no flash, so I was happy to explain to them that I didn’t need to use flash during the show.
When it is really dark (theatres?) you may a small flashlight (torch) comes in very handy at times.
Excellent Read, Filming in DSLR and determining the ISO is something I’ve been working on at the moment. This is an awesome article and I am using the advice to coincide with my filming.
these serve as a very good reminder, i always forget to set my ISO accordingly and keep on cursing my lens and ambient light till i realise i set my ISO at 80 from previous day .. i should start getting into the habit of using the reset settings at the beginning of each shoot
Thank you for this site! I learned a lot from it! Keep up the good work !
Thanks for the tips and the beautiful sample photographs.
Your care, detail and examples are heartwarmingly practical. Thank you
I am doing doing the photography for a ruby wedding which there is going to be a party. The room is very dark and MAY have tungsten lighting ( amber ), I am using a flashgun on my olympus camera. If I want to get the best white balance what is the best method of getting this. 1) using the flash white balance 2) setting up the white balance with a white card ( but when do you point the camera at the card in a room that has light or at the event when the room is dark). ? I will appreciate any advice you could give.
It is good to see a sensible article on los-light photography. Now – in 2018 the high iso performance is even better than when this article was written. My ‘two-pennyworth’ is to suggest bracketing – NOT so much for HDR although it gives this possibility as a last resort. Looking at the RAW images there is often one that gives good exposure to both light and dark areas.
Thanks for sharing great article, also learn a lot from these tips. it really informative and helpful.
Many thanks for this site! I have learned many details and tips about photography Keep going the excellent work