It’s not hard to learn how to capture the moon’s craters and detail with your digital camera. In fact, once you get a handle on why you must use these wonderful photographic methods, taking pictures of the moon will be pretty easy.
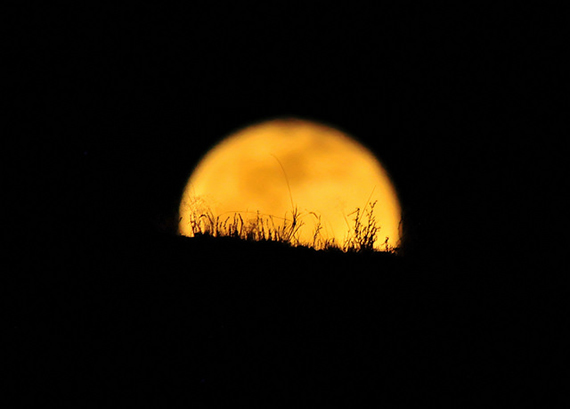
photo by USFWS Mountain-Prairie
A Cloudless Night
The first thing to try for, naturally, is a clear night—a night without clouds. Clouds can smear and smudge an otherwise sharp photo of the moon’s craters. A lovely, clear night provides the ideal circumstances to take photos of the moon. If there are clouds that butt in, then use that. Try a photo of a soft cloud streaking gently in front of the surface of the moon. This really does lay the foundation for superb images. So let’s have a look at precisely what you will want for your moon shots.
How Close?
Lets examine what focal length works best. If you want to take pictures of the moon close up, use a four inch telescope. You can screw your camera on a mount and then the telescope effectively results in being your lens. It utilizes the lens and you can get close images quite straightforwardly. Of course your camera will need to have the ability to interchange its lenses.

photo by Emilio Küffer
If you don’t own a telescope then you can use a telephoto lens. A telephoto lens is a lens that is very long. You may have seen them before. It is used for wildlife photography and portraiture, like wedding photography. A good range of focal length might be something like 200mm to 400mm. These telephoto lenses are very expensive but get the loveliest shots.
Moonlight
Numerous people capture the moon the equivalent way as they would a dark night time city scene. If you do this , you may experience a big ball of bright light against a black night sky, without detail. That may be okay if you’re photographing the moon over a pond, for example, but if you like to take photos of the craters, then this is not the way to shoot it.

photo by Jorn van Maanen
The moon is very, very bright, especially when it’s full. I suggest choosing settings that are used for brighter, daylight conditions. I know this sounds funny, so bear with me.
When I shoot the moon I put my settings at anything from 1/180 of a second to 1/60 of a second. If you’re not sure which shutter speed is better to use then try few shots on a different selection of shutter speeds to get the best one.
Setting Up
You will want a tripod when you take photos of the moon. Since the moon is so far away, any movement of the camera and you may chance missing the gorgeous craters. Position your camera on a tripod, and if you have one, use a shutter remote cable to be in command of the shutter speed. We use these because we do not want to accidentally move the camera by pressing the shutter button down. And that’s right, even movement as light as a finger can put your entire photo out of focus.
Keep the Camera Still
It’s essential to keep the camera fixed and immobile so you get everything in focus. I use manual focus so I can get the craters as sharp as I can. I occasionally find that auto focus can either have difficulties getting the correct focus or sometimes can’t focus in the least. It can be time consuming and frustrating. Try moving the focus ring until you come across a position whereby the moon’s craters look razor sharp.
Lighting Sensitivity
ISO is a quality of your digital camera that controls how responsive the camera is to lighting. If you’re photographing the moon as the major theme against a black sky, then you will not want a very high ISO.
If you’re shooting the moon as an addition to your shot, then this becomes a different matter altogether. The closer you get to the moon, the less ISO you require.
What about the camera’s aperture?
Since the moon is so far away I would suggest shooting with a middle aperture (something around f/8 or f/11). In fact it is so far away that you don’t really need to worry about depth of field.

photo by Hernán Piñera
Image Quality
Shoot at the very maximum quality you can. I always select RAW for all my photos and shooting the moon is no exception. If you want excellent quality pictures then opt for the highest quality setting you can go. Even if you’re not able to shoot in RAW, pick the largest JPEG size possible.
Sharpening and Tweaking
Once you’ve taken your moon photograph, you may have to sharpen it a bit. Not for the reason that your photo will come out blurry, but remember, it’s over 300,000 kilometers away. A little increase in the sharpening will help enhance some of detail in the craters. Try improving the darks and lights a little too by using your contrast tool in Photoshop or your favorite editing program. That naturally helps to give the surface more of a three dimensional look and detail, rather than having a large flat white surface. Increasing contrast, clarity, and sharpness makes the craters look deeper and more interesting.
Moon photography is so much fun. Just apply some of these principles and methods that I use and you will pleasantly surprised at the lovely photos you get.
About the Author:
Amy Renfrey writes for DigitalPhotographySuccess. She’s photographed many things from famous musicians (Drummers for Prince and Anastasia) to weddings and portraits of babies. Amy also teaches photography online to her students.
Looney 11 Rule:
The “looney 11 rule” states that for astronomical photos of the Moon’s surface, set aperture to f/11 and shutter speed to the (reciprocal of the) ISO film speed (or ISO setting).”
- With ISO 100, one sets the aperture to f/11 and the shutter speed to 1/100 or 1/125 second.
- With ISO 200, aperture at f/11, set shutter speed to 1/200 or 1/250.
- With ISO 400, aperture at f/11, set shutter speed to 1/400 or 1/500.
Like This Article?
Don't Miss The Next One!
Join over 100,000 photographers of all experience levels who receive our free photography tips and articles to stay current:


Very interesting reading. Thank you.
When I shoot the moon I try to photograph it shortly after it rises. It’s at it’s largest also when it sets.
Yo tengo una Sony Cybershot DSC HX300 y el lente es del rango 24-1200mm y tengo un muy buen acercamiento a la Luna
good tips
Also be sure to turn off the len’s vibration reduction when using a tripod. If you don’t the VR will be constantly trying to adjust and cause lens vibration.
I find that removing any UV filter will prevent the appearance of “ghost moons” somewhere else in your photo.
Since the moon is *so* far away I don’t believe you need to worry about depth of field. At f/4 the hyperfocal distance is ~2km.