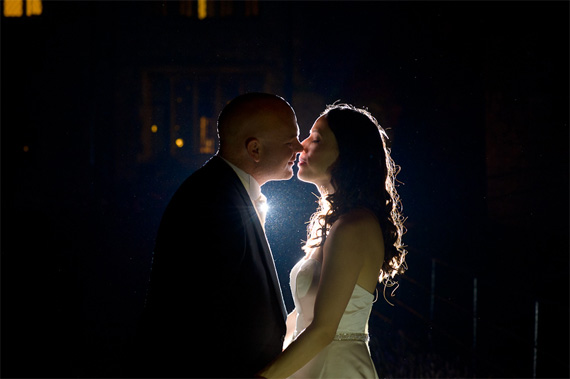
There is nothing nicer than using a high quality prime lens and shooting wide open, it can be quite liberating especially when coupled with a full frame camera. It gives you the ability to almost see in the dark. Small changes in light can be used to create dramatic images and the shallow depth of focus lets you draw the eye and hide unflattering distractions. It is a great tool at a wedding but if all of your pictures are shot like this it can be boring too. So what is the answer?

Photo captured by Alan Langley
You may reluctantly have to take that flash out of your bag and actually use it. Think of it not as a bright light source to be used in the event of a lighting emergency but as a creative lighting tool that can be used to supplement the light in most situations. On or off camera you have at your mercy fantastic device that is just waiting to help you. The only problem is you are going to need to learn how to use it.
Simply connecting it to the hot shoe and relying on it’s auto capabilities is really not going to cut it. Now you have decided to use it the options are limitless and that little flash opens up a whole new world. Even with it on the camera, possibly the most uncreative place for it you will be amazed at what it can do once you consider it to be your friend. Even when using your trendy f1.2 wide open, a little pop of carefully directed flash can transform your image even if it is used just to provide a little catchlight.
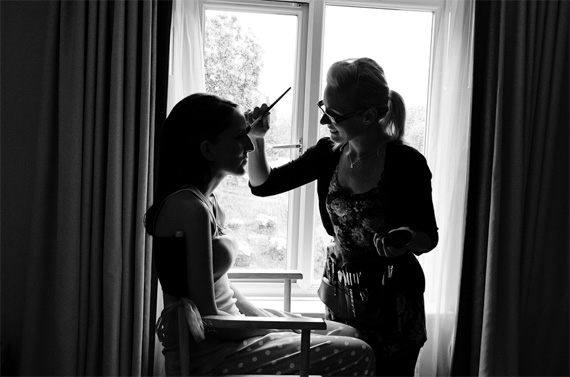
The next stage is to take the flash off camera and use some kind of remote triggering to fire it. There are many choices ranging in price but whatever you select the trick is understanding the limitations of your equipment. There are simple wireless triggers which liberally just fire the flash or some of the higher end flashes have remote triggering built in.

Photo captured by Alan Langley
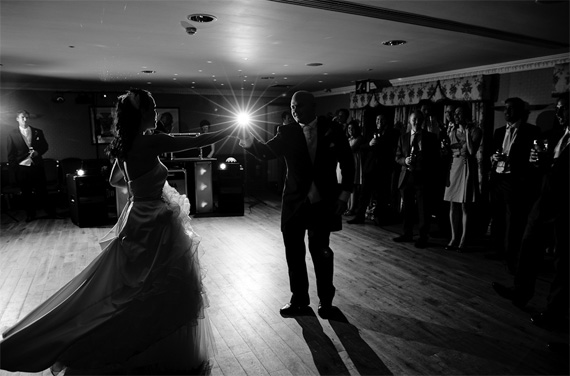
My standard wedding light rig is my camera equipped with an on camera flash but in addition I have a wireless trigger and two remote flashes set up on stands. I then always have plenty of options, I can shoot natural light, I can use TTL or I can mix it all up. The key advantage is the amount of control I have, not just in lighting a dark room but in complimenting existing lighting. I try and use my lights when doing the formals – even if it is a nice day that little bit of extra fill can give the pictures another dimension. There are occasions of course when I avoid flash and one of these is during the wedding ceremony itself. In this situation the pop of a flash can seriously detract from the moment.
Of course using flash brings it’s own problems. All of this extra equipment can detract from your creativity, it is something else to worry about and something else to go wrong. Another issue is light balance – the colour of your flash is unlikely to match any existing light so be careful. You obviously can use gels to balance the colours but in a fast moving wedding situation this is not always possible.

Photo captured by Alan Langley
Once you are comfortable with the mechanics and basic principles then there is nothing to stop you experimenting with light modifiers. Umbrellas, reflectors and snoots all enable you to to direct the light and further unleash your creativity.
About the Author:
Alan Langley (doverdesign.co.uk) is a professional wedding photographer at Kent Wedding Photographers.
Like This Article?
Don't Miss The Next One!
Join over 100,000 photographers of all experience levels who receive our free photography tips and articles to stay current:


I always thought wedding photos have to be as colorful (energetic?) as possible — but this series of photos gave me new perspective! Didn’t wonder black-and-white photos could look so cool…
Thanks for sharing your fantastic pictures!
I do love the low light shots and silhouette purpose imagery is often drawing more curiosity into mood and creates an appealing storyline. I have to be honest that the 2nd image isn’t very flattering, I would had taken the image semi-front on silhouetting the make up artist and using light tones on the seated as it comes over a little too heavy. On saying that however the 1st and last are lovely the first image I love the intimacy captured and in the last especially like the way the moment has been attained, instead of just focusing on the bride and groom the joy shared with the DJ and guests gives this image more life.
Hello,
I am very much interested in photography. I read all your blog posts and learn many things about the photography.
I am a beginner and planning to buy a camera (FUJIFILM S3300) for myself soon. Is this camera okay? Please help.
Your response would be greatly appreciated.
Thanks
Nagendran
I wish the writer would post his settings so that the reader would have more information on how to capture the effects that are being described. Lighting alone, while obviously a key component, is only one part of the exposure triangle, and the tips being described would be so much more useful if settings were provided so that we can see how all three aspects worked together to create the images that are demonstrated in this article.
This comment is not limited to this article alone. I hope the editors will take note and encourage all their contributors to post their settings along with their tips and tricks.
Karen,
Settings could help, but remember that they will differ tremendously depending on the location, the lighting in the room, time of day etc. If you got given 1/250s, f/8, iso200 and tried to mimic it, chances are it wouldn’t look anywhere near the same.
All in all just trying to copy them would be pretty pointless, you have to work the other elements out for the situation in which you want to apply them.