Learning how to begin taking photos at night is dependent on some very key photography practices. Taking photos in low light conditions, especially of the city, is a fantastic approach to get better in your shooting of long exposures. You must primarily learn how low light photography techniques work. Taking good photos at night requires a long shutter speed, a way to keep that camera rock steady, and effective use of aperture. In this article I will not only tell you how to do it, but also give you some methods in which to start taking photos at night and have them turn out beautifully.
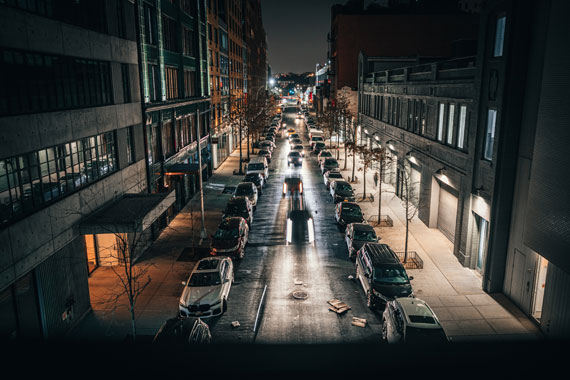
Photo captured by Pontus Wellgraf; ISO 160, f/4.0, 0.8 seconds.
Why is it so significant for the camera to remain still and steady? When you take photos at night you normally want to include a very slow shutter speed with your shots. You must keep the camera dead still if you want a slow shutter speed and sharp images simultaneously. This is why strong support is necessary such as a tripod or beanbag to set your camera still on objects if you don’t have a tripod. When you take photos at night the first thing to aim for is sharpness. Being able to keep that camera secure is equally as important as the shutter speed and aperture.
You should consider buying a shutter release cable–an excellent piece of equipment that will improve your night photography. This cable is an elongated lead that attaches to your digital camera. At the other end is a small button that triggers the shutter to open and then close each time you press it. You need one of these so you don’t knock or touch the camera when working with a slow shutter speed. The smallest amount of movement can completely blur your photo. Without one of these handy little cords, you can create blur in your photo from the simple act of pressing the shutter button.
Taking night photos is possible to do without a cable. After I purchased my Canon 5D I was without the right shutter cable for my camera. Because I had just upgraded to a better camera, I was eager to begin taking photos at night time. This included the city skyline and astrophotography. I decided I would use the self-timer feature. I set it to two seconds. In the length of time it took to make the count down to zero, the vibration from pressing the shutter open would cease. When the camera’s timer went off and the shutter opened, it gave the camera time to be still again.
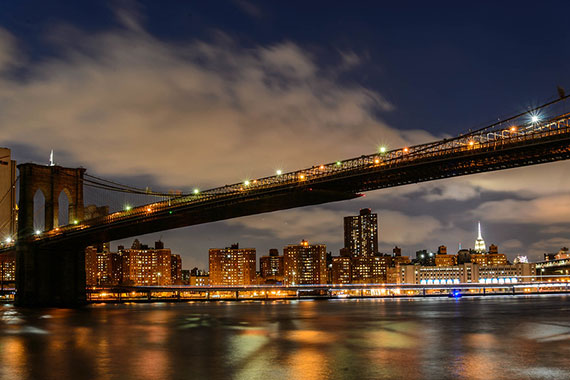
Photo by Spiros Vathis; ISO 100, f/10.0, 30-second exposure.
Exposure bracketing can be enormously helpful. In my time as a photographer, every now and then, a photograph that I thought was overexposed was actually just right. This is the key reason why it is imperative to try different things. Put your shutter and f-stop on a variety of speeds and just observe what happens.
With practice and the right know-how you will be taking photos at night with ease.
About the Author:
Amy Renfrey writes for DigitalPhotographySuccess. She is a professional photographer and photography teacher. She shows you how to take the most breathtaking, brilliant and incredibly stunning photos every single time you press the shutter button, even if you know nothing about photography and have never used a digital camera before.
Like This Article?
Don't Miss The Next One!
Join over 100,000 photographers of all experience levels who receive our free photography tips and articles to stay current:


This blog has a lot of useful information. All of the suggestions are quite beneficial.
With a long exposure ( 30 sec, 1 min, etc), shutter vibration does not matter. The duration is too short compared to the over-all exposure to be recorded.
Hey don’t forget to reduce the camera shake even more with the 5d and other Canon Models you can lock up the mirror before the shutter releases! This means when you press the button the mirror goes up, your timer counts down then the shutter releases and the mirror drops back! Talk about no vibrations! Who needs mirrorless!
Have a look under:
Menu>Custom Func>C.Fn3:Autofocus/Drive>Mirror Lock Up and set to enable
Set your timer to 2 seconds and give it a go! Nb. If your timer isn’t set press the shutter release twice, on the first one the mirror will go up and on the second the shutter will release and the mirror will drop this is handy if your using a remote shutter release! Have fun Tom!
Thanks for the article. I have 1 comment & 1 question:
I read somewhere (perhaps this site!?) that when using a tripod, esp at night & using self-timer you should turn off image stabilisation. Haven’t had a chance to try it out yet, any thoughts?
Now the question: Often when taking night shots certain light sources will produce a dark horizontal line to appear (eg this happens a lot when taking shots of the moon.) What causes this & how can I correct it?
Should point out I’m using a bridge camera at the moment.