In the world of bird photography, the hummingbird is certainly one of the most challenging to photograph. This little bundle of flying energy and its ability to zoom and dart makes this bird difficult to capture. This article provides you some tips to help you better photograph this flying marvel.
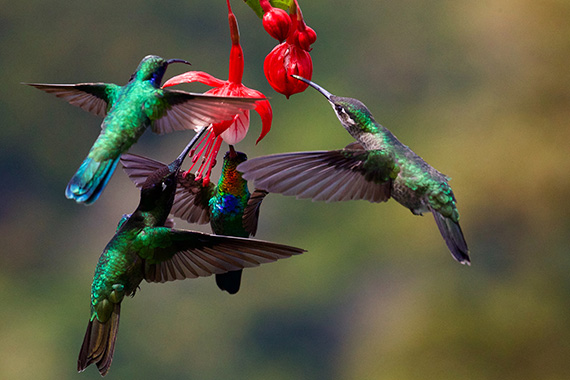
Photo by James Wainscoat
Set out the Hummingbird Welcome Mat
Most places in North America have hummingbirds either seasonally or year round. Your local Audubon Society can tell you when to set the feeders out. You can also find out if the hummingbirds in your area migrate, so you can remove the feeders in time for the hummingbirds to migrate and avoid freezing in the cold. Every serious hummingbird photographer needs a hummingbird feeder. The things you want to look for with feeders are that they are easy to clean and that they are filled with a solution of sugar water.
Most birders suggest using 4 parts water to 1 part sugar; you can try using a 3:1 mixture, as well. Keep the feeders filled so that the hummingbirds don’t head to a more reliable nectar station. Don’t forget to remove the feeders regularly for cleaning, and then put them right back up. Remember to never use food coloring because it is not needed to attract them and can cause a dangerous growth on the hummingbirds’ beaks.
Feeders, Perches, and Flowers
The biggest challenge with taking hummingbird pictures is that they rarely hold still. Hummingbirds are constantly zooming and darting, so it makes it difficult to photograph them. Many photographers try following the hummingbirds (with camera in hand) in the hopes of getting a shot. However don’t follow the hummingbirds but instead be patient and stay in one location.
You want to think about the kind of bird pictures you want and then set things up to help increase your chances of getting the shot. After that, it’s a matter of getting comfy and having your camera ready. Many photographers use a stabilizer device, like a tripod or monopod, so the camera is always ready for the next shot. Some photographers use blinds so they can move without worrying about scaring off a hummingbird.
If you want pictures of the hummingbirds hovering, you’ll need to remove the perches from your hummingbird feeder. Although this may seem a little mean, if you plug up all of the holes on the feeder but one, it will make it easier to get a good hummingbird picture. You will still have hummingbirds zipping around trying to chase off the other birds from the feeder regardless of what you do.
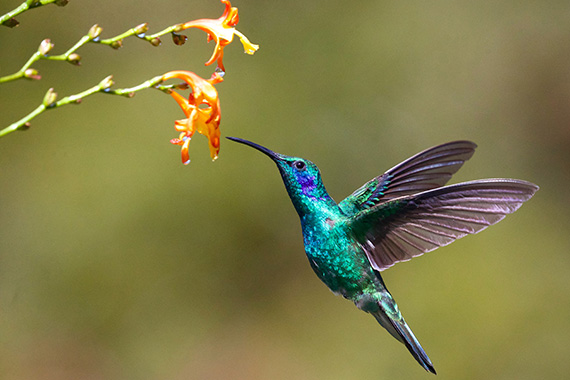
Photo by Zdeněk Macháček
Now if you want to take a picture of a hummingbird perching, watch where the dominant male goes after he gets a drink at the feeder. Usually, hummingbirds will perch where they have a good view of the feeder. And if the perch isn’t a good location for you to get photos, do some rearranging. Try moving the feeder near a perch so you can get a better picture.
You can also move it farther from the natural perches and add a new perch that is in a photo friendly location. The hummingbird won’t mind as long as he or she can keep an eye out for intruders. Eventually the hummingbirds will get used to you and your camera, but movement will likely frighten them off, so make sure you’re in a quiet area with very little activity.
If you have a particular flower that would make a lovely picture with the hummingbird but they are never there long enough for you to press the shutter release, try this photographer’s trick: Using an eye dropper, gently fill the flower with some sugar water. This only works for a short time though, because after a couple hours the blossom will wilt and then it will die.
As with feeders and perches, you can also hang a basket of flowers to help attract them for photographing. Regardless of what type of “feeder” your hummingbird uses, you will still have less than 8 seconds to take your picture. Still, it pays to be patient and not press the shutter until after the hummer’s had a sip of nectar. If your flash frightens them off, it’s likely they won’t return to the feeder.
Check Your Background
The best background for hummingbird photography is something dark green that doesn’t have any distractions, like brown twigs or branches. If you want a mobile background, try a dark green potted plant or a painted poster board. The main thing is to have a dark background that makes the hummingbird’s colors pop.
Hummingbird photos in Google Images will give a good idea of what type of backgrounds work and don’t work. Note how brilliantly colored hummingbirds fade into some backgrounds, like the bright green, sun lit trees and shrubs. A shaded area behind the feeder or perch also works well as a good background.
With a photo editor like Photoshop Elements, you can use the software’s filters to blur the background, creating depth of field that puts the hummingbird in the spotlight so to speak. Adobe has tutorials on this on their website.
Lights, Camera, Action
After you have things set up, it’s just a matter of finding a nice, comfy place to sit nearby with your tripod and camera. In order to freeze their beating wings, you will need a high speed flash but you can still get some great pictures with a good compact camera by using these tips.

Photo by Philip Brown
Even though hummingbirds can be very tricky to photograph, by using these tips and having some patience you will soon be enjoying your beautiful collection of hummingbird pictures framed on the wall.
About the Author:
Autumn Lockwood is a writer for YourPictureFrames.com and loves shopping for picture frames. If you’re looking for gallery picture frames, visit our website or call us at 1-800-780-0-699.
Like This Article?
Don't Miss The Next One!
Join over 100,000 photographers of all experience levels who receive our free photography tips and articles to stay current:


Leave a Reply