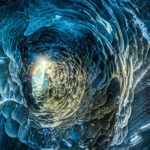
If you think you need an expensive ten-stop ND filter to make a (really) long exposure photo, think again. With just a few exposures shot at several seconds apart you will have all the raw materials you need to produce a stunning long exposure photo. The only requirement is you shoot them on a tripod. Here’s how:
Now, this technique doesn’t involve using the multiple exposure mode some cameras have. Instead, it uses stacking in Photoshop to produce the same effect; and no, you still don’t need an ND filter.
The process uses basically the same technique behind using the multiple exposure mode on a camera. You’re averaging several images and producing a single image that blurs any moving elements.
Automated Method
For the automated technique, begin by sorting out all the relevant images in a folder. Next go to File > Scripts > Load Files into Stack. Click Browse from the new dialogue box, and select the images from the relevant folder starting with the last one.
Once the images are selected, click OK and the image list will populate in the dialogue box. If you hand-held while shooting these images (not advisable) you can check Attempt to Automatically Align Source Images. Otherwise leave that alone. Check Create Smart Object after Loading layers. Hit OK.
Photoshop will load all the layers and then compress them as a single Smart Object. Next click on Layers > Smart Objects > Stack Mode > Mean to average all the layers in the smart object and produce the simulated long exposure. Depending on the number of images and the interval at which they were shot, you could have a simulated image of a very long exposure—all without the need for a neutral density filter.

Simulated long exposure using the Automated Smart Object method
Manual Method
If you have an older version of Photoshop, use this technique.
To start off, load all the files into stack just as in the first method.
Tip: If you’ve shot a lot of images you might want to make a smaller selection for reasons to be disclosed later.
In the final step of importing the images don’t check Create Smart Object after Loading layers. This time Photoshop will simply stack all the images as layers.
To average the layers, the opacity of each needs to be tweaked manually.

Simulated long exposure by manually changing the opacity of each layer
The formula for opacity is to take 100 (the value of opacity strength) and divide it by the layer number. For example, if there are eight layers, the last layer (bottom-most) will have a new opacity of 100 / 1 = 100 percent (unchanged). The second one will have 100 / 2 = 50 percent, and so on.
As soon as you change the opacity of the last layer the image will undergo a magical (and dramatic) transformation.
Like This Article?
Don't Miss The Next One!
Join over 100,000 photographers of all experience levels who receive our free photography tips and articles to stay current:


Leave a Reply