One of the most appealing attributes to working as an independent artist is the freedom to be your own boss and set your own terms. In fact, many people desire a certain amount of autonomy in their careers. But finding an effective, comfortable, and affordable workspace can be one of the biggest deterrents in taking the steps necessary to starting a home business or working as an independent contractor.
What most artists don’t realize is that creating the right space doesn’t have to be an expensive investment. Here, Joe Edelman offers some insight on how he transformed the basement of his home into a fully functional, versatile studio:
Of course, every home has its own unique set of measurements and attributes to work around. Edelman’s model is precisely calculated to accommodate the amount of space he has to work with, so keep in mind that following his example exactly may not be efficient or viable for every photographer. With that being said, here are just a few suggestions designed to help conceptualize and construct a studio that fits your needs:
- Carefully map out the usable space at your disposal. Make a note of any plumbing, pumps, or electrical circuits that the might impede on your ; it may be possible to hide these nuisances away or somehow incorporate them into the environment.
- Determine your needs to decide how the space should be divided. Specifically, Edelman specializes in portraiture; therefore, in addition to the studio, he allotted quite a bit of his space to a makeup area and a small changing room. However, a reception room or small office for digital editing might suit another photographer’s needs more so.
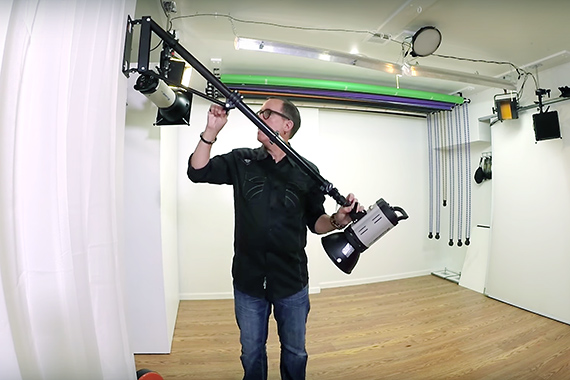
- Mount lighting equipment, backdrops, and diffusers to maximize floor space. Jointed arms and closet tracts can increase the overall mobility of your equipment, eliminating the need for clumsy light stands and minimizing the time spent setting up and cleaning up.

- Keep in mind that knock off brands can often accomplish the same tasks as more expensive competitors. Edelman explains how he cut corners by opting for a rig that uses plastic chains to lower and raise backdrops rather than using more traditional (and more costly) metal chains. Scouting out reviews and feedback from other photographers online and in person can provide some insight in making a decision as to whether to invest in a knock off or the real deal for a specific tool.
- Be a bargain hunter. Edelman saved a fortune by employing discontinued cabinets for storage. In addition, he managed to snag a hairdresser’s chair for his makeup area through a business that happened to be closing its doors. The tools you require will differ, but nevertheless liquidation sales and secondhand stores can offer the supplies you seek for a fraction of the cost.

- Keep around appliances and tools that can multitask. For instance, Edelman installed a large LCD television that was capable of playing music, projecting video, or displaying tethered images during a shoot. Using just a few pieces of plywood, he constructed a large box capable of doubling as a bed for boudoir shoots or a platform for shorter models. The more tasks a single tool can juggle, the more time and space you can save in the long run.
When constructing a home studio of your own, it’s important to remember that the most valuable tools you can have in your arsenal are creative thinking and a willingness to problem solve. These tips can make an enormous difference when it comes planning out the home studio of your dreams.
Like This Article?
Don't Miss The Next One!
Join over 100,000 photographers of all experience levels who receive our free photography tips and articles to stay current:


Leave a Reply