Getting the right photo exposure can be a bit tricky at times. Expose for the highlights and lose the dark areas, expose for the dark areas and blow out the highlights… it’s a never ending battle. Today’s photo tip answers a question about how to get the best photo exposure for different skin tones.
I was recently asked: “When taking pictures of black people, do you have to open up the f-stop more?” It’s a great question! In this case, they were referring to a studio lighting setup, but the issue remains in any photo lighting situation, not necessarily just with skin tones.

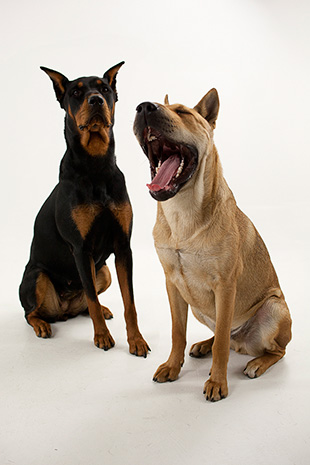
“Stephaniex2” captured by Tracy DePaola. (Click image to see more from Tracy DePaola.)
What if you are shooting a black dog and a white one?
Or, more commonly, a bride with a white wedding dress next to a groom in a black tux?
If we expose for the white area, we will get nice detail and properly show all the lace and beadwork in a wedding dress. Or the fur in a white dog, or all the subtle skin tones in a white person.
On the flip side, by exposing for the white areas, we will inadvertently underexpose the black areas. We will lose all the detail, and the black area will become nothing more than a big black blob.
We have problems going the other way, too!
If we expose for the black area, we show all the nice detail in the black areas of the photo, but the white parts are totally overexposed and blown out. We lose all detail and the white part is ruined.
“Even Dogs Get Tired Of Modeling” captured by Paul Hentschl. (Click image to see more from Paul Hentschl.)
Stop reading for a second and think, “What would you do? What is the best course of action?”
Most of you probably went with – “Expose for a middle of the road area. It’s not perfect, but at least you won’t totally lose either side.”
Good call. In fact, a middle of the road exposure is the concept that all reflectance light meters are based on. BTW – a reflectance meter is what is in your camera.
No matter what your light source is, when light hits a subject, it reflects off. The color, and even the types of materials present, have a fairly large impact as to HOW MUCH light is reflected.
White areas reflect more than black areas; velvet absorbs more light than satin.
After reflecting off the subject, the light goes into your camera. The meter absorbs all this light, and sets the exposure for a setting that is in the middle. The middle setting is calculated to be 18% gray, which is a whole book of its own. Just know that a middle setting is what your camera’s reflectance meter will give you. Not perfect on either end of the spectrum, but workable.
The other type of light meter is called an “incident” light meter. This is the type of meter that is outside the camera and is hand held. That is the one you see photographers hold up to a model’s face and fire off the lights. We most often see it used in a studio setting, but it works with any light source. We just tend to be too lazy to get it out for normal day to day stuff and rely on the meter in our camera.
An incident meter doesn’t measure the light reflected off a subject. It measures the amount of light hitting a subject. This may seem like basically the same thing, but it is radically different.
Reflected light is affected by color and the various reflectance properties in the frame. Incidence metering is measuring the light BEFORE it hits the subject and is not affected by color, etc. Measuring the actual light hitting a subject means we are properly exposing for the light as well as the colors in the photo. It will record colors and so on, exactly as we see them–under those lighting conditions!
The whites will record as white, the blacks will record as black, and everything else in between.

“AF Models” captured by Linda DePaola. (Click image to see more from Linda DePaola.)
It is a far better way to meter your shots and that’s why you see the best photographers buying and using incident meters even when they have a perfectly good reflectance meter in the camera.
To answer the initial question… With a reflectance meter, yes, you have to open up to get the right exposure for black skin tones. (And close down for white.) With an incident meter, it doesn’t matter what colors are present.
If you want to truly master your camera–and get the photos you see in your most creative visions–you have to take your camera off automatic mode and start taking control. The first issues you will have are with photo exposure. Learn the various metering methods (in this photo tip) and you are one step closer to winning photo contests!
About the Author:
Dan Eitreim writes for ontargetphototraining.com. He has been a professional photographer in Southern California for over 20 years. His philosophy is that learning photography is easy if you know a few tried and true strategies.
Like This Article?
Don't Miss The Next One!
Join over 100,000 photographers of all experience levels who receive our free photography tips and articles to stay current:


What about bracketing?
I don’t know if I’ve misunderstood the text in your article but I respectfully disagree.
If you take an exposure reading off the skin of a black man, the light bouncing off him is less than that bouncing off the skin of a white man.
The exposure meter assumes that any reading it gets is supposed to equate to 18% gray – but in the case of black skin, it’s getting less light, so the camera keeps the shutter open for *longer* to try and produce this mythical 18% gray. Black skin is *supposed* to bounce less light, but the camera has had enough light to force it to be gray.
Whatever light reading you get from black skin, you have to **close down** the shutter not open it up as it states in the article. Dependent on how black the skin is, determines how many stops to close the aperture. Very black skin might require up to 3 stops less, light chocolate color might only need one stop. Even if a person with extremely fair skin is also in the same picture, they both will come out perfectly exposed provided the film (or digital sensor) has sufficient latitude to accommodate these two skin types. Nearly always this is the case, ie, everything will be fine.
Lighting that makes things difficult is extremes of contrast. That is to say extreme bright lighting or extremely dull (flat) lighting.
Neither case should present a problem, with an adequately positioned strobe ( flashgun ).
People get into trouble when they don’t think about either the brightness or position of the light source.
Great tips! I have struggled with this in the past.
Good article. But I don’t see how using a special metering device changes the fact that it is hard (impossible sometimes) to have details in both dark and bright areas? Maybe it gets me to the best exposure faster, but it will still be a compromise somehow… right?
The image of the AF models is great. I presume that an incident meter was used.
I have never used/seen one. WHERE do you put the incident meter to get these great skin tones? What information does the incident meter give you? Thanks.
My camera believes the world reflects back 18% of the light and suggests an automatic exposure accordingly. However, white reflects back more than 18% and black absorbs some light, reflecting back less than 18% of the light hitting it. If my camera thinks that both are reflecting back 18% of the light, won’t it will automatically underexpose the white and overexpose the black? Thus converting both the white and black objects to grey tones. And, for example, while automatically underexposing the whites, it will turn the grey shadows dark and blacks to black without detail. I suggest taking some white and black (and mid-grey) cardboard outside in sunlight and experiment on how to get a good white and good black. In my experiment, I needed to “overexpose” the white and “underexpose” the black (from the camera’s auto meter setting) in order to get good whites and blacks. Wouldn’t dark complexion fall in about Zone 4, pale complexion in Zone 6 and a white dress in about Zone 7?
It is such a nightmare when I need to photograph wedding where the bride is a black lady wearing the usual white dress. The tips you shared here are really priceless.