Frequency separation is like a god among the retouching techniques. It allows you to separate the texture from everything else in an image, resulting in easy edits and a fabulous photo finish. Aaron Nace demonstrates how to use frequency separation in Photoshop:
What is Frequency Separation?
The technique is used widely in editorial photography. The textures of skin—fine lines, wrinkles, pores—are placed on one layer, while the colors, tones, shadows and highlights are placed on another. This makes it easy to smooth out skin without creating that super airbrushed look.
“You don’t want to get rid of your skin texture because that’s what makes the images interesting and makes them look a lot more realistic.”
How To Create Frequency Separation
- Create two copies of your background layer (Command + J).
- Make the Layer Copy 2 invisible. This will become your texture layer.
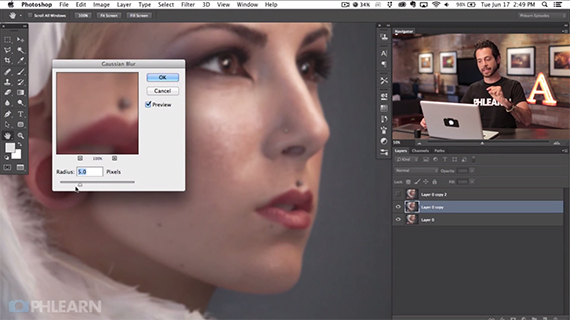
- Layer Copy 1 is your base layer. Now add a blur: Filter > Blur > Gaussian Blur
- Add just enough blur to get rid of whatever texture you want to keep. The blur should be just to the point where you can’t see the texture. For skin textures, try around 5 pixels.
- Make Layer Copy 2 visible. A filter is needed that will take the information from this layer while subtracting the information from your base Layer copy. The difference results in a layer of only textures.
- Go to: Image > Apply Image
- Change Layer to Layer Copy 1 (base layer). Change Blending to Subtract. (The numerical values of scale and offset are set at 2 and 128. It’s the same every time; just leave them as is.)
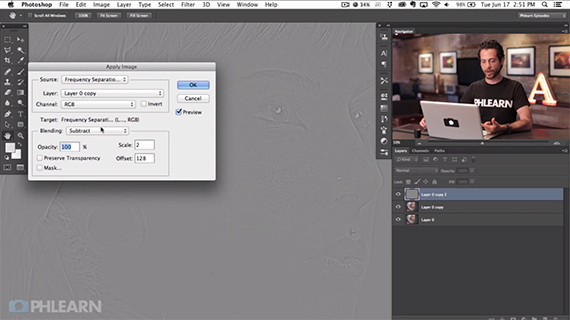
- It should end up looking like a high pass filter.
- Add the texture back to Layer Copy 2 by changing the blending mode in the layers panel to Linear Light.
How to Use Frequency Separation for Retouching
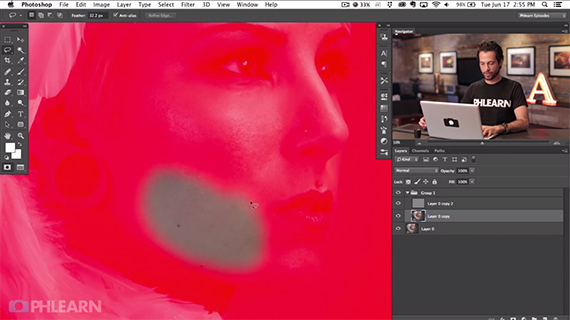
- Choose the base layer. Use the Lasso tool and make a selection on the image of what you want to blend. Use a soft feathered edge on Lasso for better blending results.
- Hit Q to bring up Quick Mask. This gives a preview of what your selection.
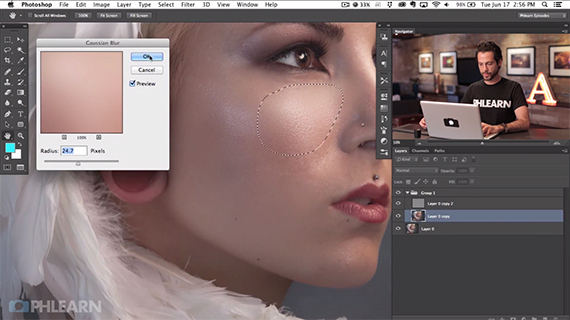
- Now, add a blur: Filter > Blur > Gaussian Blur
- Bring up the slider until the area is smoothed to the desired amount.
- Select like areas, and larger areas for better results. Don’t worry too much if you get some hair in a selection—this technique means hair registers as a texture.
- Depending on the area selected, you will probably want to change the blur amount each and every time.
- Change the opacity of the base layer if you overdid the blur and want more of the original image to show through.
Voila! Although you have flawlessly smoothed out the skin, the texture remains.
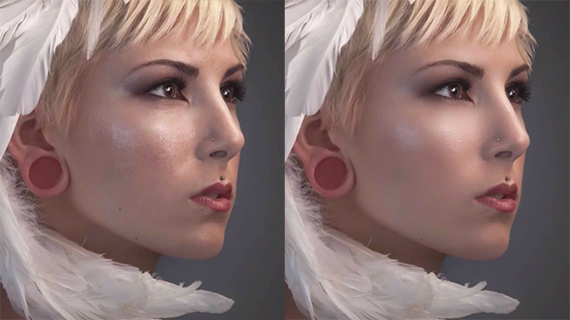
Before / After
The results are clean and professional.
Like This Article?
Don't Miss The Next One!
Join over 100,000 photographers of all experience levels who receive our free photography tips and articles to stay current:


Hi, can you advise me please? I tried this, and when I did the lasso clicked OK – and no texture remained in it just blur. Even if I put the Gaussian blur to 1,5 value. Please advise.
There are automated Plug In’s (Not script) like Wow! Tonal Equalizer.
They claim to do the same (Even more than just one frequency separation).
Do you have any experience with it?
The results looks good to me.
This is just one of the many ways to edit for skin retouching. As stated, feel free to lessen the level of blur in order to gain the desired amount of smoothness. You may also choose to change the opacity so more of the original image shows through. This type of frequency separation does leave all of the skin texture, and only smooths out the underlying tones, skin redness – it is up to the editor whether to smooth out the little bumps, pores etc. afterwords.
OK, this may not be the most positive response, but I gotta keep it real.
Honestly, the results shown here look very plastic to me. Good retouching should strive to look natural, which I though was the point of frequency separation retouching for skin. Texture and imperfections, is what makes humans well, human. Though this video’s results have a bit of texture, it looks generate. In fact, the whole photo looks CGI. Like all retouching techniques, this one requires judgement as to how much may be too much. I teach PS to hundreds a year, and the best FreqSep examples look texturally human, not CGI.
In other freq-sep tuts I have seen where they setup the blur layer slightly differently AND they used that layer to also adjust tones; such as reduce a white hot spot
Your method seems to do less; tho the smoothing results look nice.
How do we adjust tones and balance the color and remove hot spots yet still keep the texture?
How do we apply some texture to a blown-out hot spot that lost everything with RGB = 255,255,255?
So, why is the method called “frequency separation?”