Bokeh, or the quality of the out of focus area in a photograph, is an easy way to add interest to your images. By making a bokeh filter for your lens, you can have more control of your photograph by giving the out of focus lights in the image almost any shape you wish. The filter is easy to make and chances are you probably have most of the supplies you’ll need around the house. Take a look at the following instructional video for a detailed look at how you can make your own:
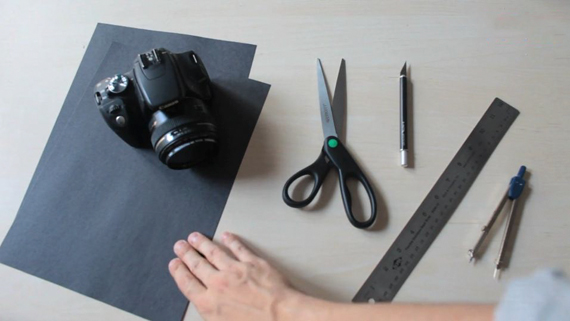
Here are the supplies you’ll need:
- camera
- lens
- black construction paper
- scissors
- craft knife
- ruler
- protractor
Measure the width of the glass on your lens and use the protractor to draw circles of the same size onto the paper.
Cut out the circle, leaving a small tab for easy removal of the filter like in the image below.
Use the pencil to draw your desired shape onto the center of the circle. Using the craft knife, carefully cut out the shape from the paper.
Stick the filter onto the front of the lens and you’re ready to go!
Below is an example of a heart shaped bokeh:
It’s recommended that you set your aperture to its widest setting, since the bokeh filter will block a lot of the light. You’ll also want to use a longer shutter speed than you normally would, which means you should also use a tripod to eliminate camera shake. Other than that, the possibilities with these fun and inexpensive filters are endless. Be sure to share your links to your bokeh images in the comments below!
Like This Article?
Don't Miss The Next One!
Join over 100,000 photographers of all experience levels who receive our free photography tips and articles to stay current:


I’ve cut the circles and created my shapes and this effect is not working. I’m not sure where I’m going wrong. I am using a Nikon D5200 with a 55mm lens (52mm diameter). My aperture is opened as far as it can go which is approx 3.
What ISO works best? Will keeping the lens zoomed out or in work best or does it matter? I’ve seen the photos where there is no obstruction to the subject yet I find everything blocked by the filter except where the cutout is placed.
Any advice?
I’ve made quite a few of these, I use scrapbooking punches of various shapes. My most fun one was a dragonfly shape that I used when doing an Avatar themed photograph, I managed to have the lights in the background look like woodsprites.
Great article! Unfortunately I have no black paper in the house so can’t do this straight away. I take it this won’t work too well in the light?
It will work at night, but the exposure time is increased even more.