Welcome to the world of HDR photography. HDR will not suit all images but is very effective in bringing out the highlights and shadows in an image. To process an HDR image using this tutorial you will need Photoshop (or similar) editing software, and Photomatix (or similar) HDR software.
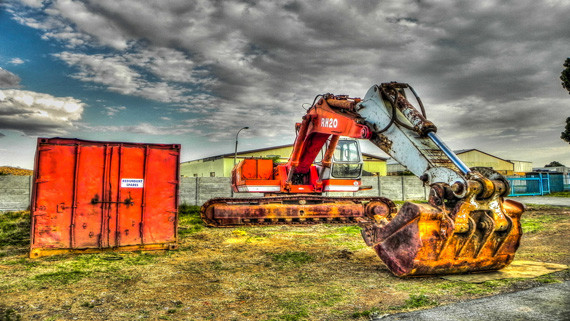
Photo by Paul Saad.
1. Take multiple images of the same scene
To achieve an HDR look you will need at least 3 images:
- Underexposed
- Normal exposure
- Overexposed
Ideally to start with you should have an image of -2 exposure, one exposed correctly, and one of +2 exposure.
2.Merge the images in Photomatix
Open Photomatix and choose Generate HDR Image.
Choose your three jpeg or RAW files and press OK.
A new window will appear with options to align the images, reduce noise and attempt to match any moving elements – choose accordingly for your image. Press OK.
A merged version of the image will appear which looks highly unrealistic – this is because standard monitors cannot display all of the detail correctly and so we must further Tone Map the image.
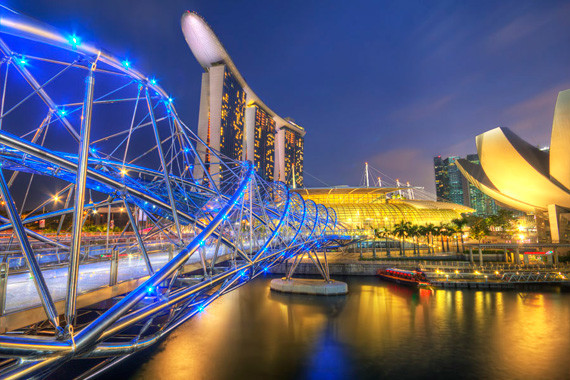
Photo by Jimmy McIntyre.
3. Tonemapping
Having pressed the Tonemapping button next to the merged image, a new, more realistic image will appear with lots of options. This is where you can alter the image to your preferred look.
Photomatix will automatically revert to the Default setting, though it also has some Presets and the option to save your settings for future use (once you get the hang of it!).
These are the settings available:
- Strength: This is key to the final look of the image, a high setting will increase the “cartoon” look
- Colour Saturation: Boost the vibrancy of colours throughout the image
- Luminosity: A higher setting will boost the shadows and brighten the overall image
- Microcontrast: Increase the contrast on the details in the image
- Smoothing: This is key to the final look of the image, adjust this to change how dynamic the range of highlights and shadows appears. Avoid setting this on it’s highest setting where the image can look extremely unrealistic. Adjust to your taste
- White, black and gamma points: Adjust these according to the histogram to ensure it meets both sides equally in the graph
- Temperature: Increase or decrease the overall temperature of the image
- Saturation highlights/shadows: Increase or decrease the saturation of the highlights/shadows according to the saturation point you set for the image earlier
- Micro smoothing: Reduces noise but be careful not to lose all of the detail!
- Highlights/Shadow smoothness: Increase this to bring some of the natural highlights/shadows back to the image, particularly useful when keeping a natural look to the sky in an image
- Shadows clipping: Adjust how much of the shadows is clipped, move carefully to reduce noise in the shadows
When you are happy with the look of the image press Process, and save the image which appears
4. Masking ghosts and retaining a natural look
Finally, open Photoshop or similar software and open your tonemapped HDR image.
Add one or more of the original exposure images as new layers in the file and use Layer Masks to allow original areas to show through. For example if the blue sky on your original image was perfect, use a layer mask and brush to mask out that area on the HDR, allowing the perfect blue sky in the original shot to come through.
This is also particularly useful for HDR images with movement, for example trees blowing in the breeze between your original images, or people moving.
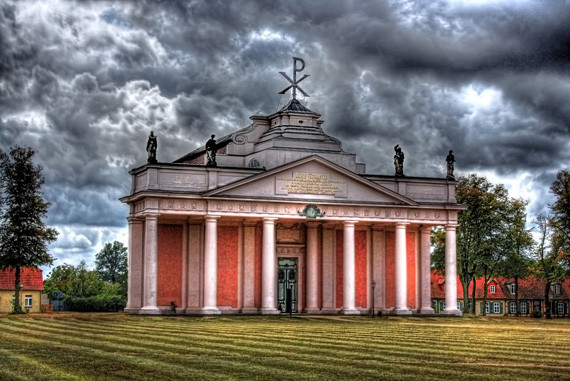
Photo by Daniel Mennerich.
For examples of HDR images search online, this is a massively expanding area of photography and there is some beautiful work to be seen.
About the Author
Lucy Hill (lucyhillphotography dot com) is an amateur photographer based in Hampshire, UK. Specialising in landscape and HDR photography.
Try the Leading HDR Photography Software:
Photomatix is the software of choice for most professional HDR photographers. Create high dynamic range photos with the look you want, from realistic to creative, using one-click presets and a large range of settings. Includes alignment of hand-held shots, powerful ghost removal tools, batch processing and more: Try Photomatix HDR on Your Photos
Like This Article?
Don't Miss The Next One!
Join over 100,000 photographers of all experience levels who receive our free photography tips and articles to stay current:


Please please PLEASE don’t make your images look crappily cartoonish. Proper tone mapping balances the highs & lows. A poorly-processed image will look like this:
http://farm2.static.flickr.com/1185/1409419657_123b4a6a8d_o.jpg
Proper tone mapping can produce images like this:
http://www.aeternus.com/photoblog/wp-content/uploads/2010/02/smos_hdr.jpg
There are quite a few software, and you can download the demo for photomatix and see if you like it, but if you have light room 4 that also or photo shop. I I use hdr efx pro its a plug in for light room or photoshop
As one-year DSLR beginner I am now beginning to feel reasonably confident with my SLR camera. Manual is not a problem any more, although I KNOW I have tons to learn yet.
So my next step is post-processing, including HDR. Could anybody please tell me which software I should purchase, as a complete beginner.