Okay, so you’ve just shelled out your hard-earned coin for a sophisticated (codename for “expensive”) digital camera. Even if you’ve done the sensible thing and purchased a quality camera bag or backpack to keep it in one piece when not in use, you’ve only taken the first of two important steps toward keeping your camera in good working order.
photo by The Preiser Project
You see, through the natural course of using your camera, it will get coated in microscopic bits of dust and grime, no matter how careful you are with it; the shiny lenses and camera bodies attract dust like you wouldn’t believe. So, you’re going to need to spend some time detailing your camera to keep it nice and clean and in good working order.
And it’s not just microscopic dust and dirt you that may cause you to have to take time to clean your camera. For instance, you may be out taking photos when it starts bucketing down with rain. Now, rain can be a good thing, making dull, dry-day photos into something more interesting, with the dark rain clouds adding a touch of moodiness and the rain water reflecting light in all sorts of interesting ways. Later on, though, what you may find is your camera has small streaks on it, where the rain water evaporated. This will need to be cleaned off, especially if water got onto the lens.
Or, maybe you’re taking photos around a barbecue or on bonfire night; the smoke from the fire can get on your camera and any residue left behind will need to be cleaned off.
Dust, sand, dirt, water, and smoke are all elements that photographers are likely to encounter that are harmful to cameras and camera gear. Keeping your camera(s) and lens(es) clean can:
- Help to preserve the functionality of buttons, dials and touch screen LCDs
- Save you both time and money (as you avoid unnecessary repairs)
Keeping your lenses clean will help keep specks of dirt or grime from showing up in your photos, which at best might mean extra minutes spent trying to erase them in post production (using software such as Adobe Lightroom or Photoshop) or, at worst, could render a prize photo unusable.
Bridge Camera Considerations
I’ve owned both a bridge camera (Panasonic FZ1000) and a proper DSLR (Panasonic GH4). Bridge cameras are much easier to live with, from a cleaning and maintenance perspective, as they don’t have interchangeable lenses, so all you need to worry about is keeping the lens clear of dirt and debris, so it goes on taking crisp, clean images, and keeping the rest of the camera clean of dust and debris, so that it doesn’t manage to find its way into any points that are opened or can be opened to the elements (e.g., battery and memory card slots, microphone sockets, or even down the ultra slim gap between the buttons or dials and the camera body itself).
Also, dust on the camera body can easily find its way onto the lens. So, if you only bother to clean the lens and ignore the camera body, you may return from a long or important photo shoot to find one or two annoying specks of dust or debris that had been dislodged from the camera body or lens barrel, only to find their way onto the lens. Do you really want to take that chance? I’ve experienced this and it’s not something you allow to repeat too often.
DSLR Camera Considerations
If you’ve bought a DSLR camera, you will also need to:
- Factor in keeping clean the rear of your lenses, including the metal contact pins (which allow the lens and camera to communicate the necessary data, making things like your camera’s autofocus work as intended)
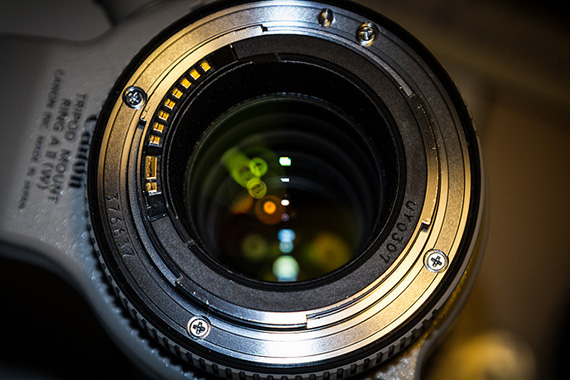
photo by William Brawley
- Potentially clean the ultra sensitive sensor, as well. You certainly don’t need to be cleaning the sensor every time you’ve changed lenses—only if you discover that there are specks of dust or debris on the sensor, which you will likely find if your photos still have spots on when you’ve made doubly certain the glass of the lens, at both ends, is clean and dust free. I’ll talk more about sensor cleaning, later on in this article.
Right then, this is the cleaning and maintenance process I followed with my two cameras, which has now become something of an ingrained habit, over the years…
Cleaning and Maintenance of Bridge Cameras
1. Preparation. I like to get organized, first, by taking out all of the cleaning tools I’ll need and putting them on the surface where I’ll be detailing my camera (whether that’s at the kitchen table or wherever’s most convenient at the time). Tools include:
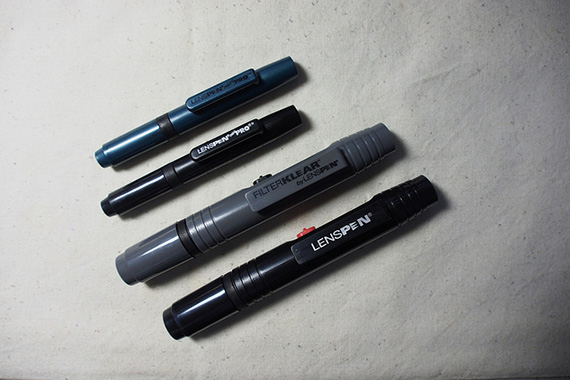
photo by othree
- Lens Pen. It contains a soft bristled brush that I use on the camera body and lens barrel, as well as a statically charged tip, which I use primarily on the glass of the lens, but I’ve also used it on the LCD screen and viewfinder, from time to time.
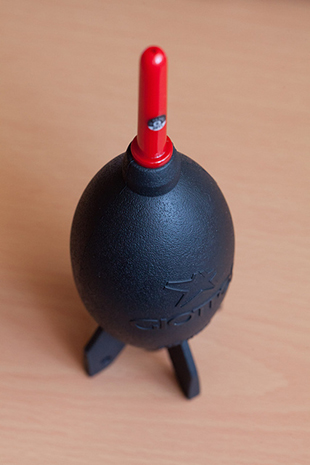
photo by Keith Williamson
- Air Blower. I blow off any dust and debris that can be easily dislodged with this tool. I do this before I use the brush from the lens pen, so as not to risk harder bits of debris potentially scratching delicate surfaces. Maybe it’s overcautious, but that’s just my way of doing it.
- Microfiber Cloth. I wrap a clean area of the cloth so that it’s taut around a forefinger and then I use a circular motion for cleaning, especially on the glass of the lens itself. So, at this stage, I will have used, first the air blower, then the brush of the lens pen, and now the microfiber cloth for the rest of the job. While the statically charged tip housed underneath the cap of the lens pen, can be used for cleaning the glass of the lens, I typically like to reserve that for when I need to clean my camera away from home, as it’s less fiddly than using a microfiber cloth. When at home, I will opt for the microfiber cloth for this part of the job. Choose whichever method you prefer, if you have the choice of cleaning with both a microfiber cloth and a lens pen.
- Lens Cleaning Fluid. This is used with the microfiber cloth. I tend to only use this fluid if the camera and/or lens becomes particularly grubby. First, I wrap the microfiber cloth around my cleaning finger and then I spray a small amount onto the cloth—not directly onto the lens or camera body, as it can be easy to spray too much, and then you’re effectively pouring liquid into the gaps of your camera—between buttons and dials, for instance—which could be just as harmful as getting any of the other unwanted elements in there. Spraying onto the cloth helps absorb any excess fluid, first, and then you’re good to clean the body, lens barrel, or lens.
2. Cleaning the Camera. I clean my cameras in the following order and now it’s just become a habit. First, I clean the Lens Barrel, so that no surface debris or dust falls off and onto the glass of the lens when I turn the camera over to access different parts for cleaning. Next, I clean the glass of the lens and, finally, I clean the LCD & Viewfinder.
Cleaning and Maintenance of DSLR Cameras
I follow the same procedure for cleaning my Panasonic FZ1000 Bridge Camera, only now, because my Panasonic GH4 is a “proper DSLR”, with interchangeable lenses, I have to be vigilant about not getting dust on the sensor or on the rear of the lens when switching lenses and, if that happens, I need to take steps to clean either the lens, camera sensor, or both.
1. Cleaning The Lens . There is a button on the body of the camera, which you push and then you turn the lens (typically in a counter-clockwise direction), to remove the lens from the body of the camera. Now, before I do anything else, I pop on the bottom lens cap (which will come with any new lens that you buy from any good manufacturer) and set the lens to one side. If you have a cap that will go over the exposed sensor on the camera body, now is the time to put it on (so that no household dust can find its way onto the sensor—there’s no sense in having to clean the ultra sensitive sensor if you don’t have to). Once done, now I can clean the lens, itself.
I tend to clean the body of the lens, first, using first an air blower to remove the loosest of the dirt or debris. Then, I’ll use the brush on the lens pen to get rid of the more stubborn bits of debris. If needed, I’ll use the microfiber cloth, with a spray or two of cleaning fluid, to finish cleaning the body of the lens. Next, I’ll take off the lens cap and clean around the edges of the lens, before using a circular motion with the cloth to clean the glass of the lens. After putting the lens cap back on, I’ll check the bottom of the lens (the end with the metal contact pins). If it needs it, I’ll clean this in the same way that I detail the front of the lens. However, I often find that there aren’t any marks, nor any grime or debris on this end (because I’ve been careful when changing lenses and have managed not to get any dirt on this end of the lens—I tend to go out of the house with the lens I intend to use, so changing lenses in the field isn’t something I have faced, as yet. That is when you’re more likely to find specks of dirt or debris on the bottom of the lens, and so will need to clean it).
And that’s it, the lens is cleaned and it can either go back on the camera or away into my camera bag, which is where I keep my lenses.
2. Cleaning the Sensor. I’m going to refer to the user guide for my Panasonic GH4, to explain how sensor cleaning is done with the this particular camera. If you have a different camera, because of the sensitivity of the image sensor, it’s recommended you consult the manufacturer’s user manual before attempting to clean the sensor.
The following is from page 411 of my copy of Panasonic’s “Operating Instructions” PDF user manual, for the GH4:
Dust Reduction Function
“This unit has a dust reduction function that will blow off the debris and dust that have affixed to the front of the imaging device. This function will function automatically when the camera is turned on, but if you see dust, perform the [Sensor Cleaning] (P68) in the [Setup] menu.”
Removing Dirt On The Image Sensor
“The image sensor is very precise and delicate, so be sure to observe the following when you do have to clean it yourself.”
“Blow off the dust on the surface of the image sensor with a commercially available blower brush. Be careful not to blow too strongly.
“Do not put the blower brush further inside than the lens mount.
“Do not let the blower brush touch the image sensor as the image sensor may get scratched.
“Do not use any objects except a blower brush to clean the image sensor.
“If you cannot remove the dirt of dust with the blower, consult the dealer or Panasonic.”
I would imagine the same advice applies for pretty much all digital camera sensors, but I still recommend you read the operating manual for your particular brand of camera, before proceeding with cleaning your camera’s sensor.
When to Clean Your Camera
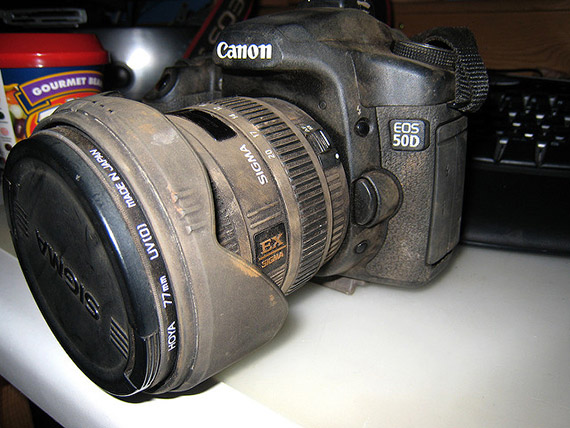
photo by Mark Tighe
Finally, I’ll just let you in on when I clean my camera…
When I got my first “big” camera (Panasonic FZ1000), I was resigning myself to cleaning and detailing the camera and my gear after every time I used it. However, that soon changed to only when it looked like it needed a cleaning. If the camera had obvious specks of dirt or debris on it, then I’d clean it. But, if it all looked acceptably clean, and if there were no marks on the glass of the lens, I’d just put it straight back in the camera bag (changing to freshly charged spare batteries, before doing so, so that I wouldn’t find myself running out of power the next time I needed to use the camera).
That said, perhaps once a week, I’m likely to sit down and clean the camera, as general grime does accumulate on the camera through normal use, and it blends in with the black finish of the camera lens and body. If you don’t believe me, just go a week or so, using your camera daily, but without cleaning the surface. Then, at the end of the week, take a light/white colored microfiber cloth and wipe it into the crevices at the front of the lens barrel, surrounding the glass of the lens, and then take a look at the cloth. It will be grimy. Guaranteed.
About the Author:
Graham Wadden created and maintains the Creative Commons photography website, WaddenCCPhotography, specializing in creating stock photography primarily for home educators and those in education.
Like This Article?
Don't Miss The Next One!
Join over 100,000 photographers of all experience levels who receive our free photography tips and articles to stay current:


Very informative and helpful article about camera cleaning. thank you for sharing with us.
this is very helpful. thank you so much for sharing.
I currently own a Nikon D60. I am looking to move up and need help. I wish to deal with a camera store that can guide me in my selection.