It is human nature when taking a photo of someone’s face to look them in the eye. Most built-in flashes are only about one inch or so above the viewfinder. So if you are looking your subject in the eye and they are looking you in the eye, it stands to reason that the flash is only about one inch above the subject’s eye level (even if it is further away).

Photo by Torben Heidenreich; ISO 100, f/11.0, 1/125-second exposure.
When it comes to electronic flash, one of the most common problems people run into is “red eye”. At one time or another, we’ve all either done it or seen it. You know what I’m talking about; that cute little toddler picture with the innocent looking grin and those demon looking red eyes that remind you of something out of a horror movie.
What causes red eye is simple enough; the light from your flash is reflecting off the back of your subject’s eye. This is usually because your flash is at the same level as the subject’s eye. This most often happens with any type of camera that has a built-in flash.
With a built-in flash you have several options to avoid the dreaded “red eye”:
A) Avoid being at the same exact level as the subject. Shoot your photo from slightly above the subject or from slightly below the subject.
B) Avoid being in a direct line with the subject. Similar to above, but here you the photographer move slightly to the left or to the right to take your photo. Do NOT have the subject look directly into the lens. Tell them to look just past one of your shoulders, instead.

Photo by Matthias Weinberger; ISO 100, f/8.0, 1/60-second exposure.
C) Diffuse the flash itself. Use a tissue or a thin handkerchief over the flash so that it does not overwhelm the photo.
The main reason professional photographers use a separate flash for their photos–either handle mount or on the camera’s hot shoe–is because it gives them more options when making a photo. With a bigger flash you can still do all the options listed above, PLUS:
D) Most bigger flash units have a tilt or swing function that allows you to bounce the flash off either a wall or a ceiling. (This also diffuses the light in your photo).
E) Many of the bigger flash units that can swing all the way around are aimed into an umbrella or reflector of some type to reflect the light and make it less harsh.
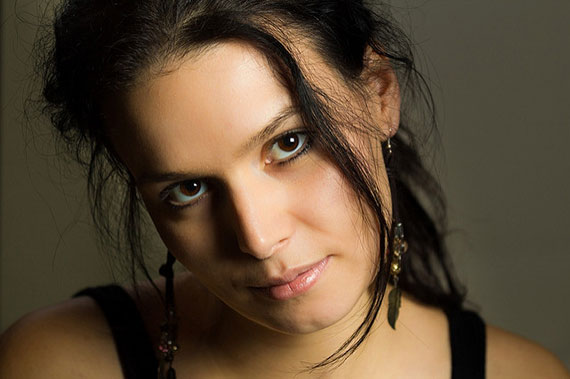
Photo by sama093; ISO 100, f/4.0, 1/100-second exposure.
F) Most bigger flash units have a power ratio setting that lets you shoot at 1/2, 1/4, 1/8, 1/16 power or even less. A slight burst often will fill in what you need without being so overwhelming that it reflects back.
G) Many of the separate flash units can connect through PC jacks on the camera. Why is that an advantage? The light source can be 10 feet away at a totally different angle and often fitted with an umbrella as well.
H) Some flash units can be fitted with actual filters, either to effect light density or color.
When it comes to bouncing light, reflecting light, or using power ratios, the key is always to practice before you get into the situation that you have to use it. Bouncing the light off a 9 foot ceiling is totally different than bouncing it off a 15 foot ceiling. This is where having a separate flash meter comes in very handy.
Do yourself a favor and find out what works best for you. Keep it simple. Don’t try to bounce your light, use a flash filter, AND shoot at 1/2 power. Electronic flash is a powerful ally and does not have to overpower the shot. Think of it as a tool. Like any tool, it’s how you use it that determines if it is helpful or not in taking better photos.
About the Author:
Award winning writer / photographer Tedric Garrison has 30 years experience in photography (better-photo-tips.blogspot.com). As a Graphic Art Major, he has a unique perspective. His photo eBook “Your Creative Edge” proves creativity can be taught. Today, he shares his wealth of knowledge with the world through his website.
Like This Article?
Don't Miss The Next One!
Join over 100,000 photographers of all experience levels who receive our free photography tips and articles to stay current:


I’d also like to learn about it. Messing with my camera I accidentally got a shot just like this that turned out great. But I have no idea how I did it and for the life of me can’t recreate it! Great post! very helpful tips!
If you have a pop-up flash you also can put a napkin over your flash to soften it harsh light.