My bridge camera is finally sharing space in my travel bag this winter. I’m off on tropical holiday, and I’ve decided to leave my DSLRs back home (for obvious reasons—bulk!).

When I first tried the bridge camera and compared it to my DSLR, I felt that the camera was a piece of crap. But this time, I know it’s going to be different.
What is a bridge camera?
Bridge cameras have the functionality of a DSLR but aren’t really built for perfection. They hover somewhere between point and shoot digital cameras and professional SLR cameras. For newbies, bridge cameras are awesome tools to learn photography. If you’re new to the photography world or find DSLRs overwhelming, a good bridge camera can help get your confidence up.
Why bridge cameras?
- Bridge cameras are cheap.
- They have a DSLR-like form factor and functions that help new users get acclimatized to photography basics: shutter speed, aperture, white balance, and ISO.
- The lens is attached to the body with a really good wide angle and telephoto range.
- Bridge cameras offer scenes, effects, and presets for different kinds of photography: portrait, night, landscape and food. The added advantage here is that the camera also does the post processing for you. Pictures out of the box will look vivid and vibrant. Ready for Instagram and social shares.
My Love and Hate with Bridge Cameras
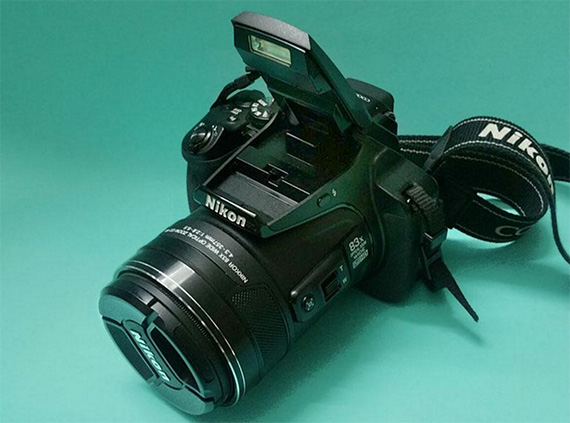
I own a Nikon P900, which has an amazing zoom range of 2000mm (so they say). When I pixel-peeped my photographs and compared them to a DSLR, yikes! I wanted to get rid of it, instantly.
I still found the P900 an amazing camera to shoot animals at the zoo. I could really abuse the zoom and its awesome 2000mm lens. Pressing the camera against the fences gave me great capture for animal portraits. While outdoors, there’s enough light to get some great clicks at high shutter speeds and in burst modes, too.
Bridge Cameras & Depth of Field
Shallow depth of field is all about aperture. The lower the apertuer (e.g. f/1.4), the more the bokeh. It’s very tough to get bokeh and depth separating subjects from your background, especially with close-ups. This is because the typical bridge camera lens is not very fast—f/2.8 to f/8—and the sensors on these cameras can be as tiny as 1/2 inch (smaller than some smartphone cameras). This could make an f/2.8 lens an equivalent of an f/6 or more on a DSLR. That’s why the whole scene seems to look sharp and in focus on a bridge camera.
On the other hand, DSLRs have large sensors and let in more light. They give you more shallow depth of field and that beautiful bokeh.
Want shallow depth of field on a bridge camera?
You’ll have to lower your aperture, step back and tele-in. Your pictures might start to get too dark or noisy as you zoom in. Since the tele end of these lenses are morbidly slow at f 8. Sometimes, you may just have to pop up the camera’s flash too.
Family Gatherings & Black and Whites
At family events, I usually shoot to expose for black and white shots—especially when I’m shooting indoors or after dark. At these events, I found that the camera performance was not a lot better than my smartphone. The only advantage being that I could shoot documentary style from a distance. The downside was underexposed photos with a lot of noise. The on camera flash created harsh highlights and shadows on my subjects’ faces. The pop up flash isn’t really powerful enough nor does it have the dexterity to bounce off a wall. When the shutter speed is dialed down, the photographs get brighter but capture a lot of shake and double exposures. The only thing left to do was to pull back the details in black and white and add more grain in post.
Why can’t bridge cameras handle low light?
Most bridge cameras have an evil combination of slow lenses, half inch sensors, and a tiny on-camera-flash. This combination is a recipe for disaster. There is never sufficient light to work with such a camera. After the sun goes down, these cameras don’t really work at all. The only good pictures that are exposed well enough or are usable are the ones I take outdoors during the day when it’s overcast or sunny.
Sadly, the Nikon P900 doesn’t come with a hot shoe adapter, so there’s no provision to mount an external speedlight or trigger.
That made me wonder: Would the camera do better if I brought in more light?
I did a bit of tinkering and came up with a couple of clever DIY diffuseness along with external speed lights. Here are some of the combinations I tried:
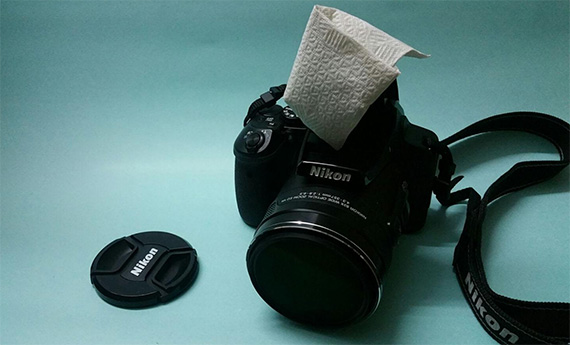
Diffused on-camera-flash for close portraits. A tissue paper placed on the pop up flash helped me get up close and capture some evenly exposed portraiture photographs. Finding tissue at a family event won’t be a biggie.
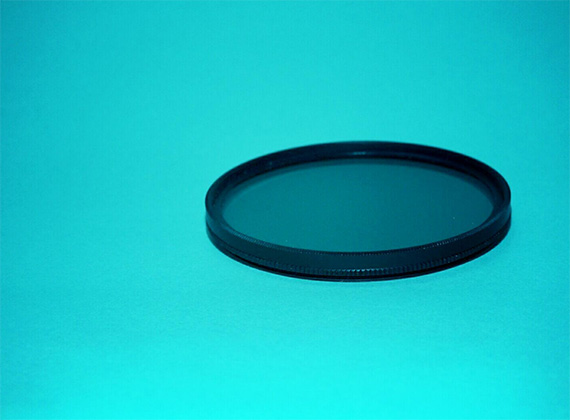
UV filter. The camera’s small sensor creates awkward flares and streaks when bulbs and tube lights are in the background. The UV filter can be adjusted to minimize these flares.
Bounce card for on camera flash closeups. You could make a simple bounce card out of a business card and a little bit of tinfoil. The light from the flash hits the foil and bounces off the business card to provide a softer, more usable light on your subject. I was able to get a nice soft light with no overwhelming highlights for portraits.
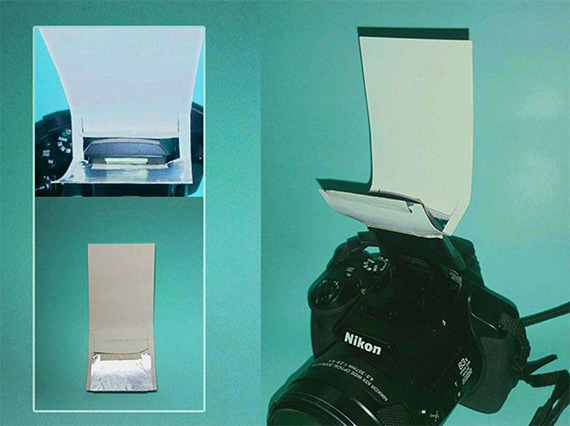
Bounce an external speed light off the wall. Diffuse the on-camera-flash with a semi opaque tape. You could use scotch tape or masking tape. (I hear floppy disk material works well, too). This blocks out most of the harsh light from the on-camera-flash. Set the speedlights on slave mode. Now bounce the speedlights off the ceiling, background, or any white surface to get a large diffused soft light. The external flash can be dialed down if it’s too bright for your liking.
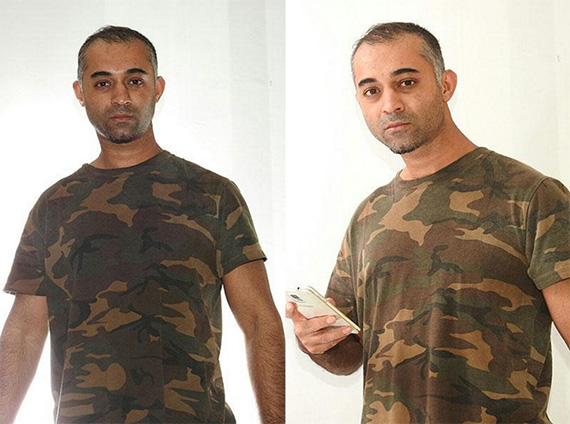
(Left) Image taken with pop up flash and speedlight bounced on background wall. (Right) Image with one ceiling bounced external speedlight and another speedlight bounced on the background wall. All triggered by pop-up flash
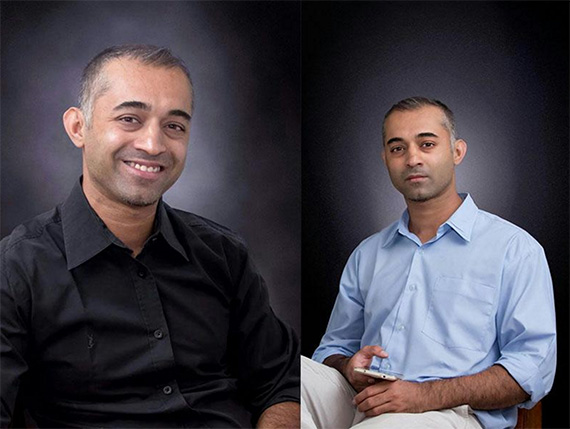
My self portraiture photography, shot on the Nikon P900
The speedlights may also be mounted on light stands with diffusion umbrellas or a soft box. You could use the cheapest speedlights, that are available for about $25 for this setup. Check if the flash triggers sync with your on camera flash before you purchase them, though.
What bridge cameras would you recommend?
Based on your budget, you could cherry pick from different versions of the Sony RX10, Panasonic FZ1000, FZ300, or Nikon P900.
Don’t be afraid to spread the light. With a little more muscle from external speedlights, bridge cameras can carry you a long way. My faith is restored! The indoor self portraits turned out quite well. I’m going to be attempting a lot of portraits outdoors with bounce cards and speedlights. I’ll be pushing the Nikon P900 for the next couple of months to see how well it adapts to travel photography.
If you have any more tips for bridge cameras, share them in the comments below. If you would like to track my travel updates with the Nikon P900, let’s connect on https://www.instagram.com/filmwithmark/.
About the Author:
Good Samaritan, convivial marketing companion, and storyteller. He’s also a corporate video and documentary filmmaker at http://wif.co.in
Like This Article?
Don't Miss The Next One!
Join over 100,000 photographers of all experience levels who receive our free photography tips and articles to stay current:


I bought a new bridge camera from PC world, its a Canon SX540 HS with 50x optical zoom, it does great shots at high ISO, but the f stop range isn’t very wide only f3.5 – f8. I wish it was wider range but it takes some great shots none the less. The built in flash comes with 3 brightness’s sometimes need to use it to get enough colour in the picture. I think your view on the bridge camera is pretty correct in my view as well, I love your post Mark, I’m learning all the time.
I am normally used to using low ISO’s on my camera’s before this camera but it works great in most lighting conditions.
I also have a fz1000 there almost in a different class it is probably one of the few bridge cameras that can compeat with dslrs altho p900 bridge camera has a really long zoom its not. Like the fz1000 with 1inch back aluminated cmos and leica 400mm at f4 to get thos specs you would be looking at a dslr the price of a used car
I keep thinking I should move “up” from my Panasonic Lumix FZ1000 but when it comes down to it I can’t see why as I am an amateur, I post only on the web and almost none of my photography doesn’t involve a tripod. For US $380 I have a decent camera, lots of control, ease of carrying and after some considerable use I find it easy to use despite all the buttons and controls. to go DSLR I’d need at least $2,000 and a larger bag to carry everything. That’s really the story of a happy man with a non photography job a family who doesn’t care for photos beyond their phones and lots of time to walk around and take modest pictures. Everything else is consumer inducement to spend money unnecessarily.
I’d like to learn more about shooting indoor basketball with a bridge camera!
Bridge cameras were alien to me and now I know that, Scaffold cameras have the usefulness of a DSLR however aren’t generally worked for flawlessness. They float somewhere close to simple to use
computerized cameras and expert SLR cameras. For novices, connect cameras are magnificent devices to learn photography. In case you’re new to the photography world or discover DSLRs overpowering, a great extension camera can help get your certainty up.
It might helpp if you are apealing to beginners to use less jargon or at least explain it.
Dear Laura, I took your feedback and wrote something more suited for beginners. This article, however, was to get professional results. https://www.picturecorrect.com/tips/manual-settings-for-beginner-photographers/ I think this article should explain all the jargon and such. Thanks.
Take a look at the Leica V-Lux1. I saw that it has come way down in price since I bought it. Ive gotten some fine images with it.
Thanks for the article and tips.
I own a Nikon P610 mainly for bird photography which is the lower zoom version(60x)of the P900. Definitely need a sunny day for best results as ISO needs to stay around 100 to keep noise down. Hand held at full zoom is no problem even with shutter speeds down to 100th sec due to great lens stabilisation. I use mainly aperture priority to keep the lens wide open at max zoom and occasionally switch to bird watching mode or sports mode. The Nikons only shoot jpegs but it’s worth doing a bit of tweaking in Lightroom or similar for best results. I have got great results with my bridge when the conditions are favourable. I now own a micro four thirds camera but the Nikon will still be my back up if weight and bulk are an issue
really nice to see some specifc details for bridge cameras – they are a great tool that can do so much. Well worth a read.