Digital photography has given almost anyone with a camera the potential to become a creative photographer. These days even compact cameras offer features that once were only found on ‘serious’ SLR cameras.
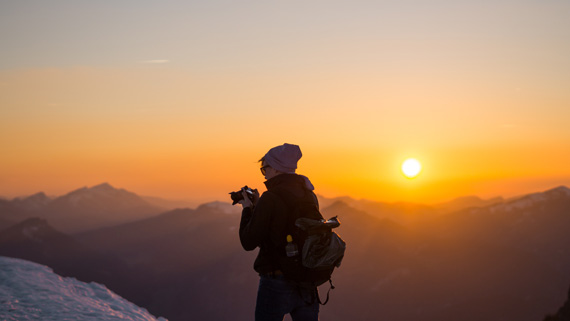
Photo by Robert Richarz.
The trouble is, most people who have grown up with point-and-shoot cameras have very little idea what these features are all about. After buying a good digital camera with the best intentions, they soon give up and switch to automatic.
Are the settings on your camera really so hard to understand? Of course not, but it can seem that way at the start, especially if they are not explained to you in simple terms you can understand.
The two settings you need to understand here are Aperture and Shutter Speed. Aperture is the size of the hole that lets the light in for your photo. The larger the hole, the brighter the exposure. The shutter speed is the length of time given to each exposure. Slower shutter speeds allow more light, resulting in a brighter exposure. By finding the right balance of these two settings, you and/or your camera control whether your photo is overexposed, underexposed, or just right.
With your camera set to Manual mode, you control both settings. If this seems daunting, you can start with the semi-automatic functions, Aperture Priority and Shutter Priority.
How do the semi-automatic functions work? They allow you to choose one setting (either aperture or shutter speed), while the camera chooses the other. That way you can be a little bit creative, but with the safety net of knowing your camera will make sure your exposure is correct. It is a good halfway point between automatic and manual.
Aperture Priority
Let’s start with Aperture Priority. This function allows you to set the aperture on your camera; the camera chooses the shutter speed for you.
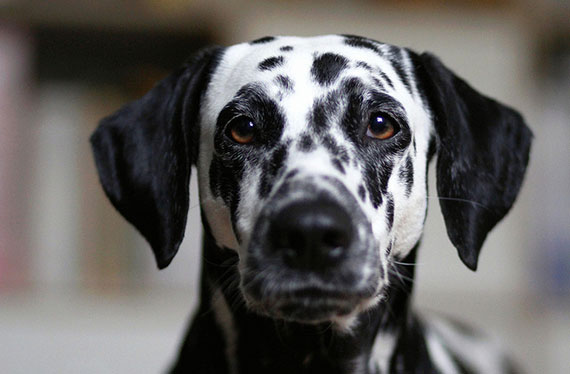
Photo by Maja Dumat; ISO 1600, f/1.8, 1/260-second exposure.
The aperture controls depth of field (the area in front and behind the main subject that will be in focus). When you set a wide aperture, you reduce the depth of field; when you choose a smaller aperture, you will have a greater depth of field.
Obviously when you change the aperture, you change the level of light in your exposure. The camera will compensate by adjusting the shutter speed. So when you operate your camera in Aperture Priority mode, you have control over the depth of field, but your camera still makes sure your exposure is correct.
The catch here is, you still need to keep track of what your shutter speed is doing. If it falls to a very slow speed, you need to use a tripod to eliminate camera vibrations.
Shutter Priority
How about Shutter Priority? Here you set the shutter speed, and the camera balances the exposure by setting the aperture. This is a great system if you are working with moving subjects. Sometimes you may want to freeze a moving subject with a fast shutter speed, or create a motion effect with a slower shutter speed. Meanwhile the camera compensates for the changes in shutter speed by adjusting the aperture.
Shutter priority may be a better option for some beginners. It is much easier to stay aware of when to use your tripod. Also, when your camera manages the aperture, it controls the depth of field, which is not usually as critical as the shutter speed. You may not always get exactly what you want, but you won’t get any catastrophic failures.
These two semi-automatic functions appear to offer you the best of both worlds. You get to be a bit creative, and try out your photography skills, while your camera’s high-tech hardware makes sure you don’t overexpose or underexpose the photo. So far, it sounds perfect.
So why should you learn to operate your camera in Manual mode? The answer is simple.
Aperture Priority and Shutter Priority both work on the assumption that your camera’s reading of the exposure is always correct. Unfortunately, that is not always true. In fact, sometimes you have to be smarter than your camera.
Manual Mode
Imagine you are photographing a flower in the sun, but the background is in the shade. This simple situation can be all it takes to confuse your camera. It may expose for the background, brightening the exposure and totally overexposing the flower.
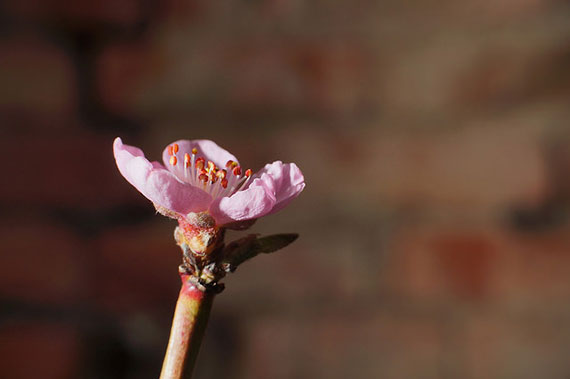
Photo by Bernhard Friess; ISO 100, f/0.0, 1/60-second exposure.
In this situation, semi-automatic settings will not solve the problem. You could reduce the brightness of the exposure by (for example) reducing the size of the aperture. The camera would simply adjust the shutter speed to compensate, maintaining what it believes to be the correct exposure.
What you need to do is switch the camera to Manual. Then you can adjust both settings and create an image that is slightly darker, bringing your flowers into perfect exposure.
This is not just a hypothetical exercise. Situations arise all the time that require you to out-think your camera. If you understand how to operate your manual settings, you can take control, and you won’t be left blaming your camera for ‘the one that got away.’
About the Author:
Andrew Goodall writes for http://www.naturesimage.com.au and is a nature photographer based in Australia. He manages a gallery in Montville full of landscape photography from throughout Australia.
Like This Article?
Don't Miss The Next One!
Join over 100,000 photographers of all experience levels who receive our free photography tips and articles to stay current:


Thanks for tips. Very useful for beginner.
I’m inclined to agree with Graystar. We spend an awful lot of money on our picture-taking computers (cameras) so why would we want to do all the work ourselves?
The camera will get very close if not spot on exposure which can be corrected in post or by a simple adjustment on a second shot.
@Graystar, there are hardly any instances where Manual Mode is the wrong mode. What utter nonsense.
Your explanation of aperture and shutter use clicked for me. As a beginner I have struggled to get my mind around this concept and your article has given me a simple way to remember when to use them. Thanks.
I wish the article had mentioned the TAV mode available on Pentax DSLRs; whether or not a comparable feature is offered by other manufacturers I don’t know.
When set to TAV the photographer may adjust either or both aperture and shutter while the camera varies the ISO, within limits set by the user, to ensure a proper exposure. As can be seen the user is able to exercise great control over the picture. And of course conventional Shutter and Aperture priority modes are also available, as is Manual.
Charlie – go to the top of the page and click on the “Share This Article” button on the right hand side and you will see a link to Twitter
Tony
Where’s the link to share this on Twitter?
Nice article! ;)
I find it sad how many articles there are telling people that they have to shoot in manual mode to get the right exposure, when the fact of the matter is that you have just as much control over your camera in auto modes as you do in manual mode. Proper auto technique provides superior control over the camera. And in changing-light conditions, auto techniques are the only way to get consistent exposures shot after shot.
On a modern camera, manual mode is for times when the meter doesn’t work, such as long exposures (night and astrophotography) and for certain types of flash photography. Otherwise, if the meter works then manual mode is the wrong mode.
Well said! I totally agree. Furthermore, most cameras now have an exposure compensation dial which makes using the aperture and shutter modes even easier. This is not mentioned in the article at all.
Thanks a lot.
Very useful for beginner..
Is the photos that you used in your article realistic or something abstract? i love them :) And i understand that shutter has a big role taking wonderful photos thank you for share
Thank you very much this i was looking for a long time. Helped me a lot. And i think your pictures are stunning
I REALLY love the autumn one by Nathan, it’s really really amazing :|