Fall is here, and it’s that time when you might be thinking about checking off all the things you wanted to do this year but haven’t quite gotten around to yet—like capturing stunning wildlife shots. At least you still have some time left this year! Bring that camera out of the closet, dust it off, and pay attention to Steve Perry‘s tips on how to nail great wildlife shots:
1. Catch the Early Morning and Late Afternoon Light
Most nature and outdoor photographers understand and appreciate the importance of getting out early and coming in late. If you want soft, warm glowing light on your subjects, you’ve got to take advantage of the time when the sun is low in the sky.
Shoot in early morning and late afternoon light.
Worried what to do in between the golden hours? That’s a great time for scouting locations, watching and learning the animals’ behavior—and if you are to believe Perry, take a nap!
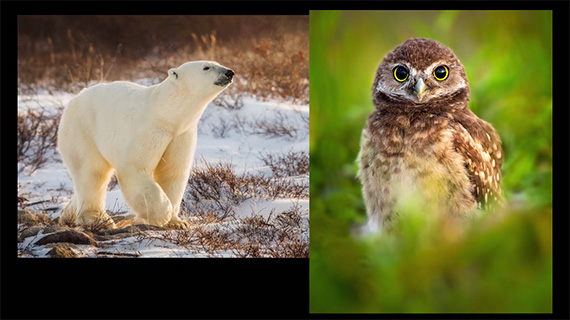
2. Drop to Eye Level
This tip is applicable not only for wildlife photography but also for photographing children. Unfortunately, far too many photographers tend to skip this part. As a general rule of composition, getting down to the level of the animal you are photographing so that it appears that the animal is looking straight down the barrel of the lens leads to better images.

Shoot from the animal’s eye level for more engaging photos.
The further away the animal is, the less it is going to appear that you’re shooting from a height. So, a slight change in the camera angle is all that you need in such a situation.
3. Watch Your Background
Better backgrounds, almost always mean better photos. Aim to separate the animals from the background. Better backgrounds means leaving out man-made construction. You don’t want to include anything busy or distracting highlights that take away from the subject.

Watch your background.
4. Never Follow an Animal
Never follow an animal or stay parallel with it. You’ll only get a bunch of shots from behind, which frustrating. You’ll also most likely scare the animal and push it deeper into the forest.

Stay ahead of the animal you’re trying to photograph.
Instead, the right approach is to stay ahead of the animal, anticipate where it’s going, and let it come to you. Of course take precautions and stay out of the path of big game.
5. To Get Closer, Look Distracted
If you do want to get close to an animal, the best option is to appear to be ignoring it. Pretend you’re more interested in the bush, the twigs, and the grass around you. Always take a zig-zag path and never, ever, lock eyes with the animal you’re trying to photograph.

To get close to an animal take a zig-zag route.
Always keep the animal in your peripheral vision. As soon as you’re in position, slowly set up and start making images.
6. Outsmart the Wind
A windy autumn day is a wildlife photographer’s worst nightmare. You’ll probably be trying a dozen tricks to stabilize your gear to get a sharp photo.
Turn on image stabilization and take the lens hood off.

If it’s windy, take the lens hood off.
The lens hood sticks out like a sail and catches a lot of wind. But make sure that you aren’t pointing at or close to the sun to prevent unwanted flare.
7. Shoot on Continuous Mode
Even when you think your subject is static there is probably still a bit of movement. Slight movement probably isn’t going to make much of an impact when you’re firing at higher shutter speeds. But when the shutter speed drops, even the slightest bit of movement can cause blur in your images. The best solution is to fire off as many shots as you can. This increases your chances of getting at least one sharp image.
8. Make Your Buffer Last Longer
This is every photographer’s nightmare—you’re firing away happily at 6, 7, or 10 frames per second, and suddenly your camera can’t keep up.
Use a faster memory card. A faster memory card ensures that the card can keep up as you fire the frames, recording them and freeing the camera buffer. Switching from 14-bit color to 12-bit color also helps.

Switch from 14-bit raw to 12-bit raw.
There’s hardly any discernible difference but the image size reduces dramatically.
9. Use AF Points for Composition
Focus and recompose is a widely used technique. It works sometimes, but if you want a better option move the AF point around instead of your camera. Compose first and then select an AF point that is closest to the subject’s eye.

Switch the AF point around to compose.
You may have to slightly change the composition to ensure that the AF point lines up with the subject’s eye. For fast moving subjects, anticipate where the subject will be and then select an AF point accordingly.
10. Use the Center AF Point for Anything That’s Tough to Focus On
This is an exception to the AF point focusing rule above. In tough to focus situations selecting the center focus point helps. Usually the center focus point in all cameras is more powerful. Use the focus and recompose technique in such situations.
These ten wildlife photography tips should get you well on your way to better photos this fall. What tips would you add to this list?
Like This Article?
Don't Miss The Next One!
Join over 100,000 photographers of all experience levels who receive our free photography tips and articles to stay current:


This exactly what i looking for ..
Thank you so much for the useful article .