If you’re new to Photoshop, you’ve probably been a little overwhelmed by the million and one things you can do to your images and the multiple ways to get any one effect. You’ve probably also discovered that not everything you do—even if it’s something “everyone” is doing—will make your images come out looking great. To address this, commercial photographer Nathaniel Dodson created a tutorial covering some of things novice Photoshop users may not be aware of:
Dodson’s tutorial covers a lot of ground and very quickly, but it generally comes down to these main points: effects to mostly avoid, effects to tone down, non-destructive editing, and never, ever leave ill-defined edges.
Use Some Effects Sparingly, If At All
One of the most common errors amateur photographers make with Photoshop is using effects to boost not-the-greatest photos. In doing so, they tend to use techniques that pros avoid completely. Dodson considers the Bevel and Emboss filter and selective color to be among these. This doesn’t mean, of course, that you should never play around with these effects–we’re not all pros and there’s a time and a place for everything. Selective color, for example, was very popular at one point, and some very cool images came out of it. In addition, people had a lot of fun with it. Should you enter a high-stakes photo contests with it? Probably not. But that doesn’t mean you should forgo it completely.

Using Selective Color
In the end, though, it’s probably best to avoid “all or nothing” thinking. Just about any effect can look good in Photoshop when used wisely with an image that lends itself to the effect, so don’t let rules ruin your creative flare. Just use the effects wisely, with thought as to why the rules exist and why you might want to break them.
Don’t Go Overboard
Another issue that tends to crop up with newer Photoshop users (and some more experienced ones!) is going a little haywire with enhancements, like over-whitening the teeth and bumping up the clarity, unsharp mask, high pass filter, dehaze slider, or HDR effects to the point where the effect stands out way too much. Dodsons advice is to bring the effect past where it should be and then tone it back just enough to find the sweet spot. (Good advice for about any effect, actually.)

Only Do Non-Destructive Editing
One of the first things you probably learned is how to work with layers, but some novice users haven’t gotten very far in the world of smart objects or even using adjustment layers. In fact, if you’re still applying filter effects directly to your layer, you’re really not using Photoshop to its full potential. (Not only that, but you risk making a mistake that can really destroy your image.) Being able to make adjustments that are not permanent is one of the keystones of Photoshop’s magic. Working on multiple layers, using adjustment layers, and converting to smart objects allows you to always have the original image available no matter what adjustments you make.
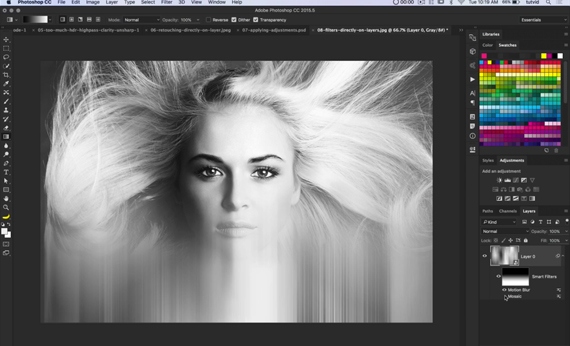
Convert your image to a smart object. That way, any filters you adjust become smart filters and you can come back and adjust them later.
Never Leave a Cut-Out With Bad Edges—EVER!
On this one I fully agree with Dodson. There are many ways to make sure your edges look natural and fluid. The older versions of Photoshop have a Refine Edge feature that works remarkably well, and you can get to it in CC by clicking on a selection tool, going to the select menu, and Shift clicking select and mask. The old refine edge will pop up. But on top of refine edge, it’s also important to decontaminate your edges and remove any matting.

Don’t leave your edges looking like this!
If you’re finding this tutorial a little basic, well, it was indeed intended for novice users. Yet even more experienced users can benefit from some of the techniques Dodson was using while showing us what not to do. He’s a bit quick, so you have to pay careful attention, but his knowledge of Photoshop is pretty expansive, and just watching what he does in between what he’s teaching can shed some light on the depths of Photoshop.
Like This Article?
Don't Miss The Next One!
Join over 100,000 photographers of all experience levels who receive our free photography tips and articles to stay current:


Nothing worse than a photoshop FAIL !