I am an amateur photographer. I photograph in my spare time because it is my passion. Here are 10 tips that I think will improve your photography. As with anything, there are rules in photography, but sometimes when you break them, you get unique and interesting photos. Keep this in mind as you read through these tips!
1. Eyes are important. When taking photos of anything with eyes, you must focus on them. When we look at photos, we are immediately drawn to eyes, so they should be in focus.

Photo by Chris Zerbes; ISO 100, f/1.8, 1/320-second exposure.
2. Keep the sun behind you. Don’t take photos of anything when you are looking into the sun unless you want a silhouette or are using a flash or reflector. You will not get good photos since your camera believes that you are taking photos of something very bright and will try to darken it.
3. Cameras are not smarter than you! If you often get grainy photos, it is because you have low light, and the camera uses a high ISO setting to correct this (a camera needs less light to get a clear photo with higher ISO). Use the flash or set the camera to ISO 200, which is a good general setting. Lighting is viewed very differently by humans and cameras. Our eyes adjust properly for bright and poor light, while cameras do not. Digital cameras are great for testing lighting out. Before taking shots of people, try different areas and directions for light and see how this affects the photos.
4. Use the golden hours. Most photographers know (but beginners might not) that the most beautiful light for taking photos is near dawn and dusk. It is hardest to take photos in the middle of the day because of the harsh shadows. You will get very dark and very light areas in the same photo.

Photo by Heather Phillips; ISO 200, f/4.5, 1/160-second exposure.
5. Try a tripod. Tripods make it easier to compose a photo, and if there is low light, you will get blurry photos without a tripod and without a flash. The shaking of your hands is enough to make your images blurry. You really need a quick release on your tripod, because if it is not easy to get your camera on and off the tripod, you won’t use it!
6. Remember the thirds rule. Try not to center your subject; place it off to one side.
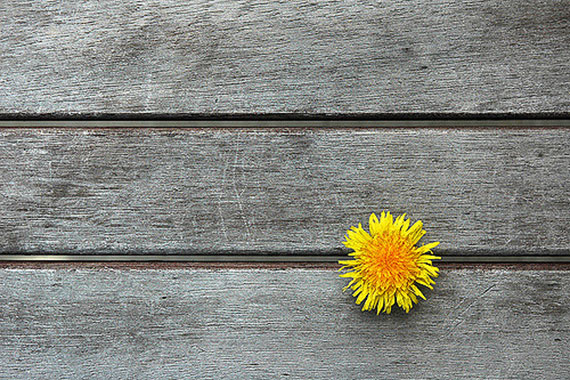
Photo by John Watson; ISO 200, f/8.0, 1/200-second exposure.
7. Pose people naturally. My favorite images are candid shots when people don’t know you are taking their photo. Sometimes you do want more formal photos. I have found that it is good to start off with people posing themselves as they are comfortable. Then, if you give them little suggestions about position, they look more natural. When people are diagonal to you (not straight on), it makes a better composition.
8. Fill the frame. Get close to your subject. You don’t want lots of distracting elements around your subject, so make it fill the photograph.\

Photo by Takeshi Kawai
9. Sometimes color distracts. If you are taking photos of patterns or shapes, sometimes the surroundings are distracting, especially if they are bright colors. Changing these photos to black and white can make your focus more clear. Someone once told me to always take photos in color, because you can change them to monochrome if it suits you. However, if you take it in B&W, there is no easy way to change it to color.
10. Take your “good” photos, then break the rules. Take the shots you want to print out to remember an occasion, then try things that aren’t supposed to work. Some of the best photos break the rules. Sometimes you will be pleasantly surprised at your results.
About the Author:
This article was written by Trisha Hachey (tristasphotos). The best thing to make you a better photographer is practice, practice, practice.
Like This Article?
Don't Miss The Next One!
Join over 100,000 photographers of all experience levels who receive our free photography tips and articles to stay current:


Leave a Reply